So far in CS 106A, you've been programming in Python on your browser. Moving forwards, however, you will be writing your code on your computer using an application called PyCharm. PyCharm is what is known as an IDE, or Integrated Development Environment, which means that it allows us to edit our code, browse our files, run our programs and debug them, all in the same place. It's one of the most popular Python IDEs in the world, and used extremely commonly in industry. This handout is intended to take you through installing PyCharm on your own computer.
Setting up
The Terminal
The Terminal, also sometimes called the Command Line or the Command Prompt on Windows, is a text-based interface for operating your computer. We'll be using it a bit throughout the quarter in order to run our programs, so make sure you know how to open the Terminal on your computer. This website explains how to find the Terminal application on your computer, as well as some further details on what you can do with it. You don't need to worry too much about those details just yet, although you're free to peruse them if you'd like. As we go through the quarter, we'll explore the capabilities of the terminal in much greater depth.
Installing Python
In order to be able to run Python programs on your computer, you need
to install a Python Interpreter. An interpreter is a program
that is capable of reading a .py file that you have
written, and translating the Python code in that file to instructions
that your computer can easily execute. Begin by downloading Python:
- Mac Installer
- Windows 64-bit installer (If you're using a relatively new Windows computer, download this file)
- Windows 32-bit installer (If you're using an older Windows computer, download this file)
Note: Macs come with a version of Python installed, but this is an older version of Python (specifically, Python 2). CS 106A requires the use of Python 3, so make sure to follow these instructions even if you think you already have Python installed. If you require the use of Python 2 for other work, you can still install Python 3, which exists alongside Python 2 rather than replacing it.
- Open the downloaded Python installer file and follow the default instructions.
- Open up your terminal application.
-
Type
python3and press enter. You should see something that looks like this:
Python 3.7.3 (default, Mar 27 2019, 09:23:15)
[Clang 10.0.1 (clang-1001.0.46.3)] on darwin
Type "help", "copyright", "credits" or "license" for more information.
>>>
- Open the downloaded file. Before installing, there should be an option that says "Add Python 3.7 in PATH". Make sure to check this box. Then, continue installing normally.
- Open up the command prompt.
-
Type
pyand press enter. You should see something that looks like this:
Python 3.7.3 (v3.7.3:9a3ffc0492, Mar 27 2019, 09:23:15)
Type "help", "copyright", "credits" or "license" for more information.
>>>
Installing and Testing PyCharm
Installation
To get started, download and install the community version of PyCharm:
-
Mac Download
(Open the downloaded
.dmgfile and drag PyCharm into your Applications folder) -
Windows Download
(Open the downloaded
.exefile and install PyCharm, using all the default options. )
Testing PyCharm
Now that you have PyCharm downloaded and installed, open it up and follow the setup wizard, which allows you to choose some default settings. Feel free to install any additional plugins it suggests, although none will be necessary for this class.
PyCharm models a program as a 'project', which consists of one or more Python files, as well as any additional resources like images or text files. To get you familiar with working with projects in PyCharm, we've provided a sample project, which you can download here. To test out this project, and to gain familiarity with the PyCharm environment, download the sample project and open it in PyCharm (using the 'open' option on the first screen). Now, follow the steps below to run the project in PyCharm:
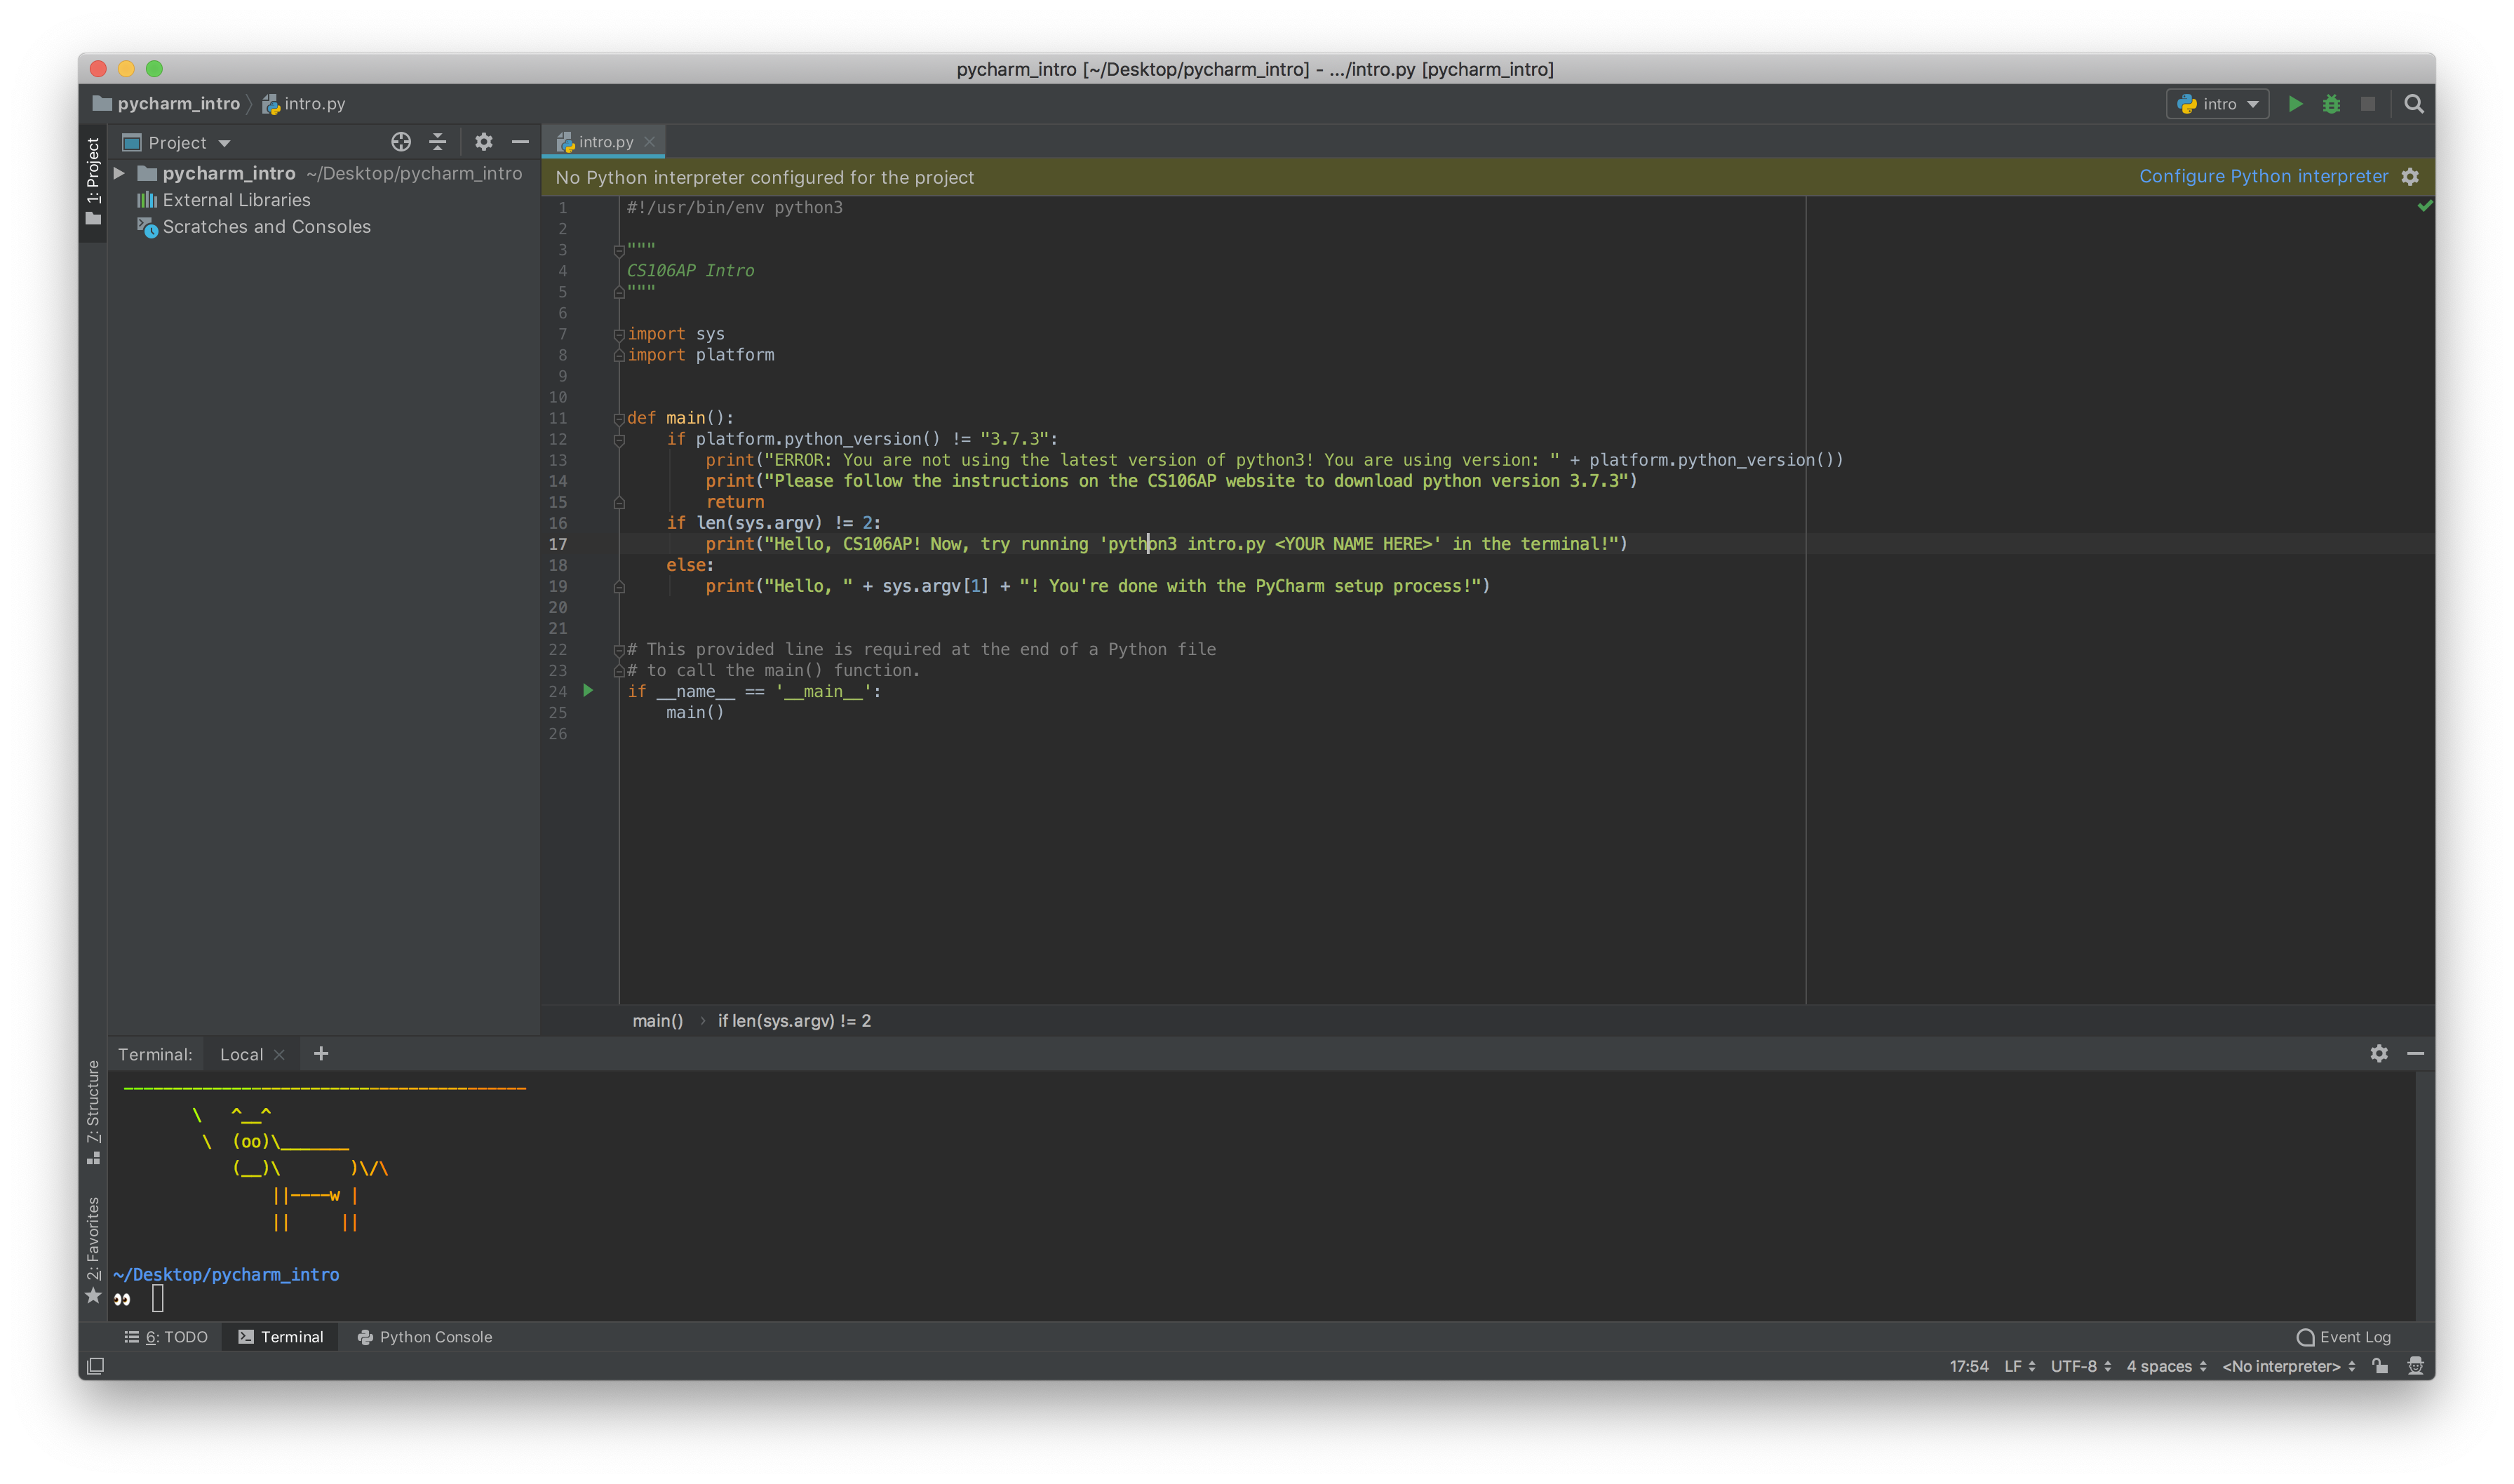
- First, you need to configure the interpreter for the project, which essentially means that you want to specify the version of Python you'll be using to run your code. To do so, click 'configure Python Interpreter' at the top of your window:
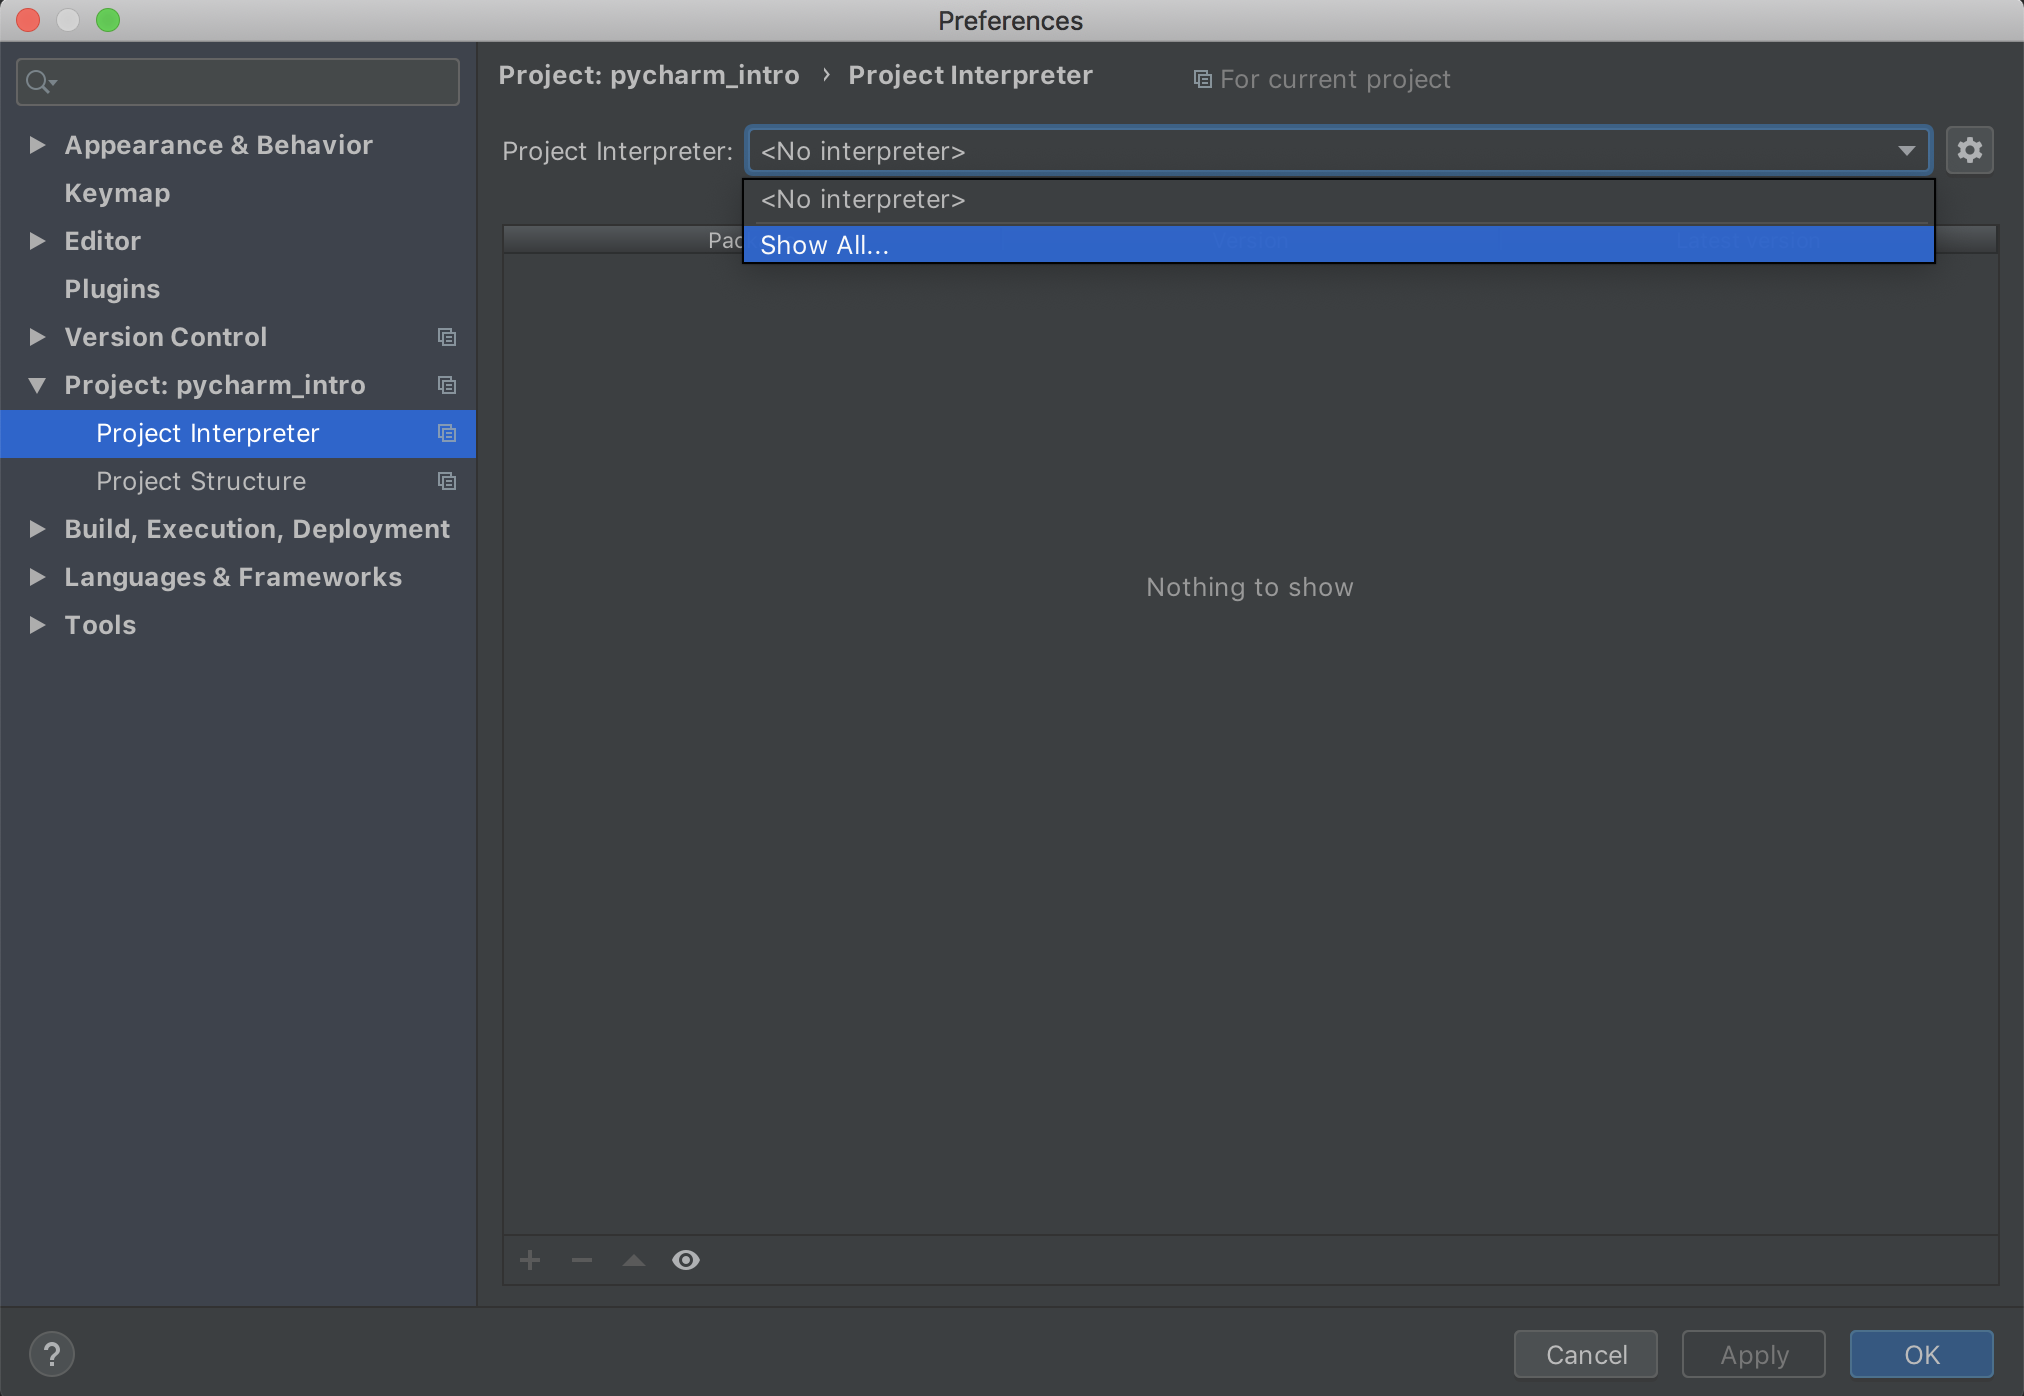
- Then, select the dropdown at the top of the window and click 'show all'.
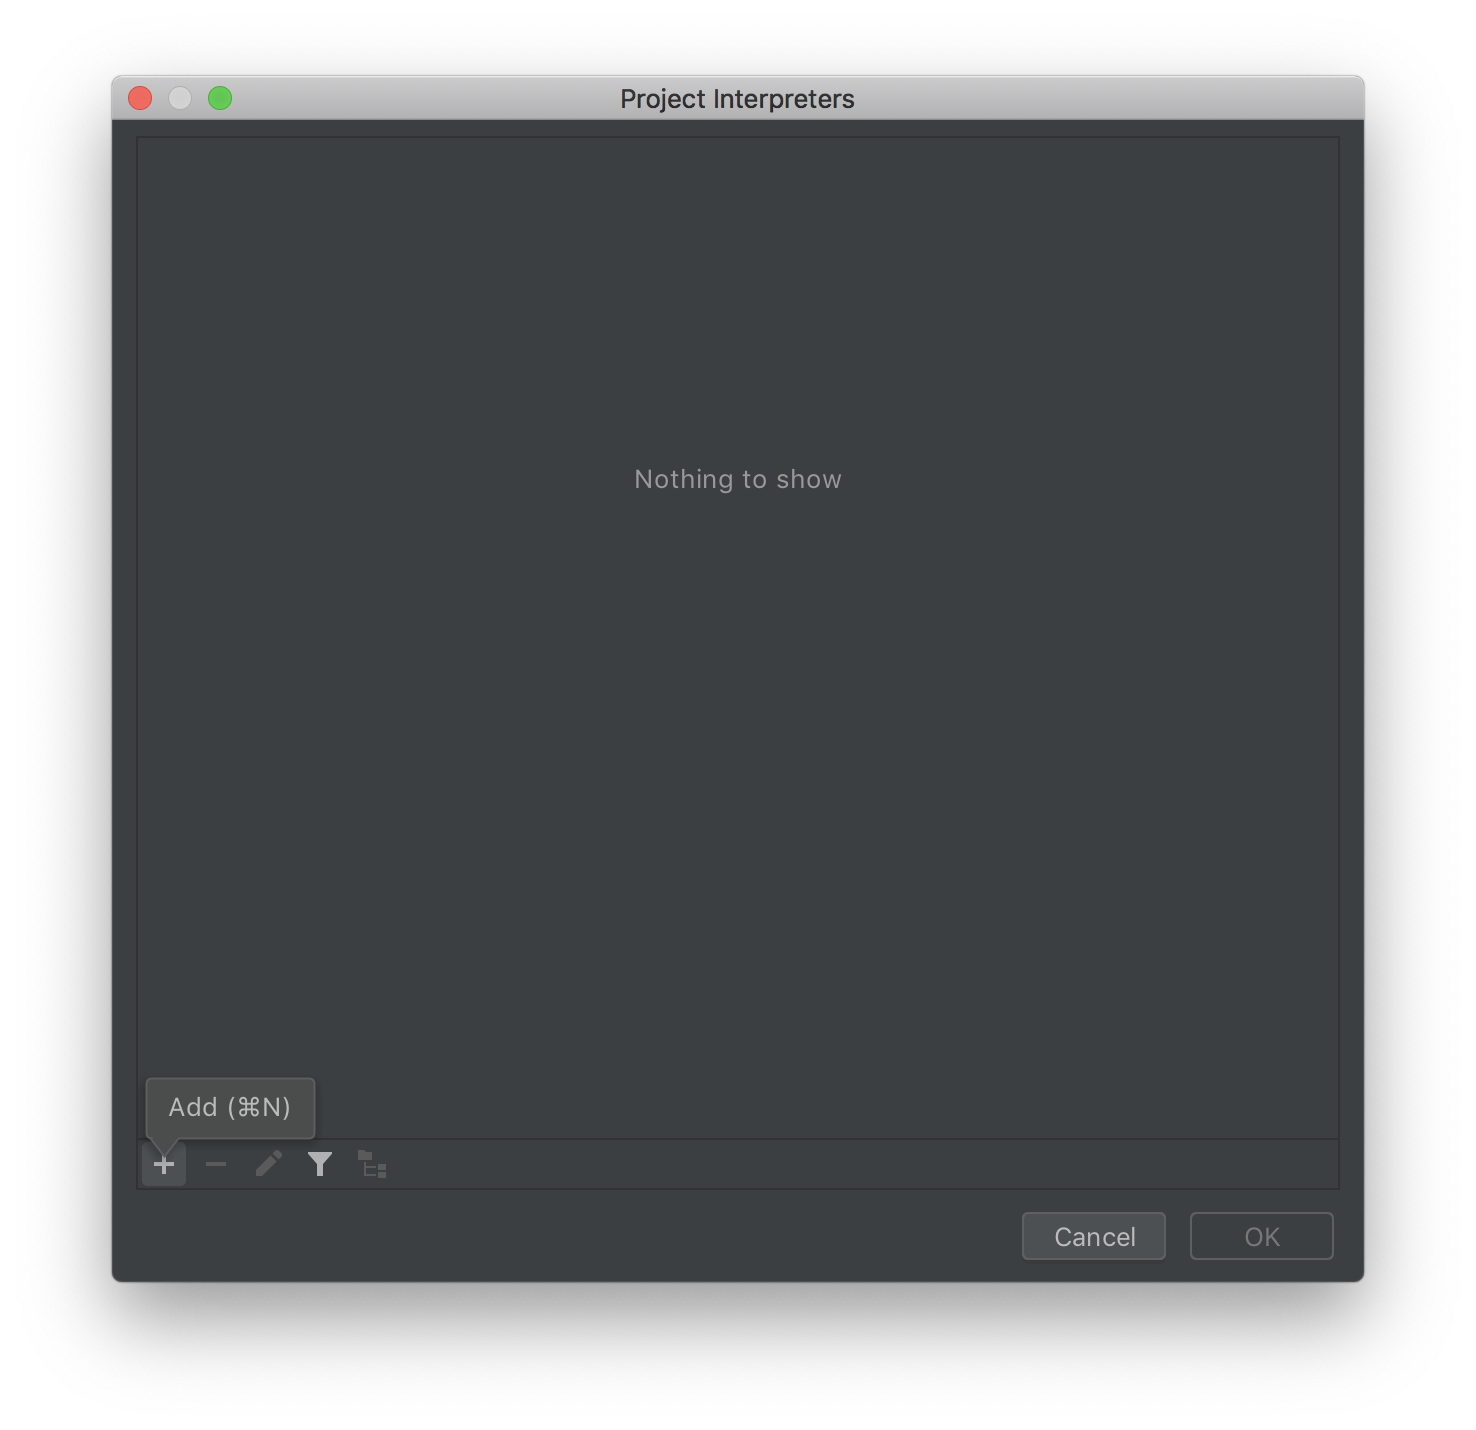
- Then click the + button at the bottom left corner.
- Now, Python 3.7 should automatically be selected on the next window. Click 'OK', and save your progress. PyCharm might take a while to recognize your interpreter, but you should eventually be good to go.
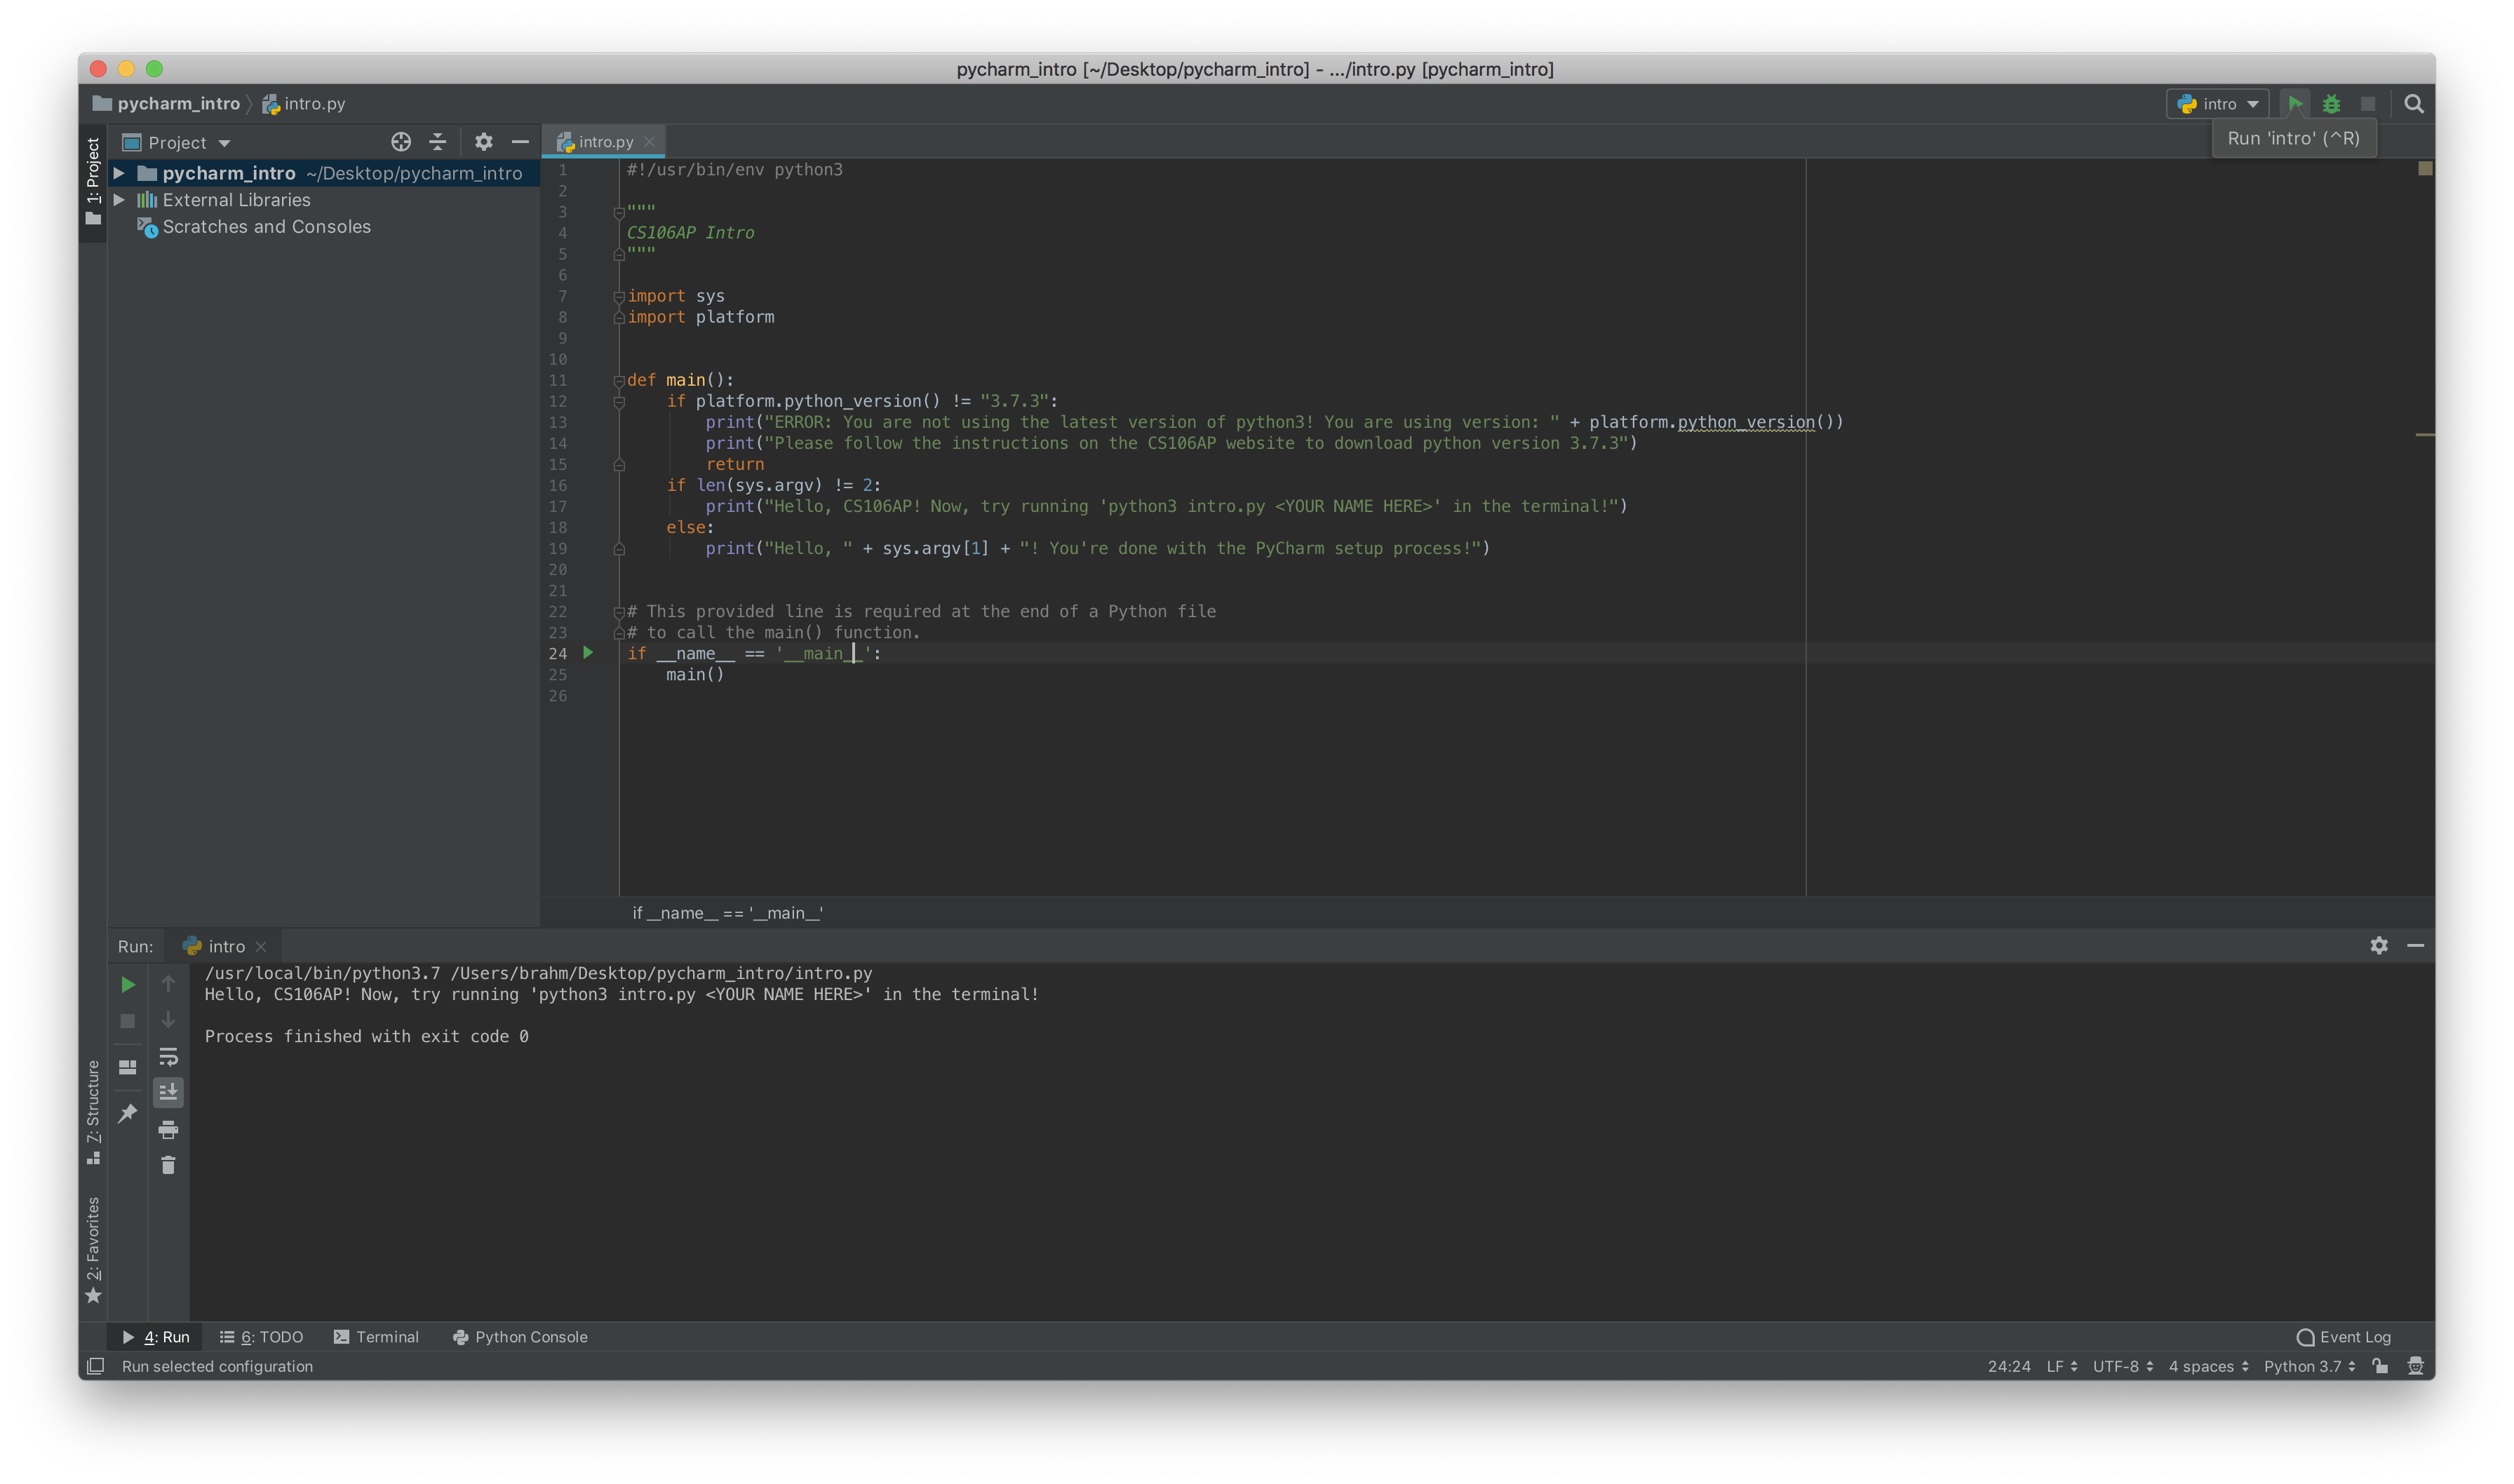
- Once PyCharm has finished recognizing your interpreter (indicated by the progress bar in the bottom right corner), you should be ready to run your program! Click the green arrow in the top right of the window to run, and you should see your program's output in the bottom pane.
- If you get an error saying "cannot run program", click "intro" in the top right>edit configuration>python interpreter> Python 3.7.
-
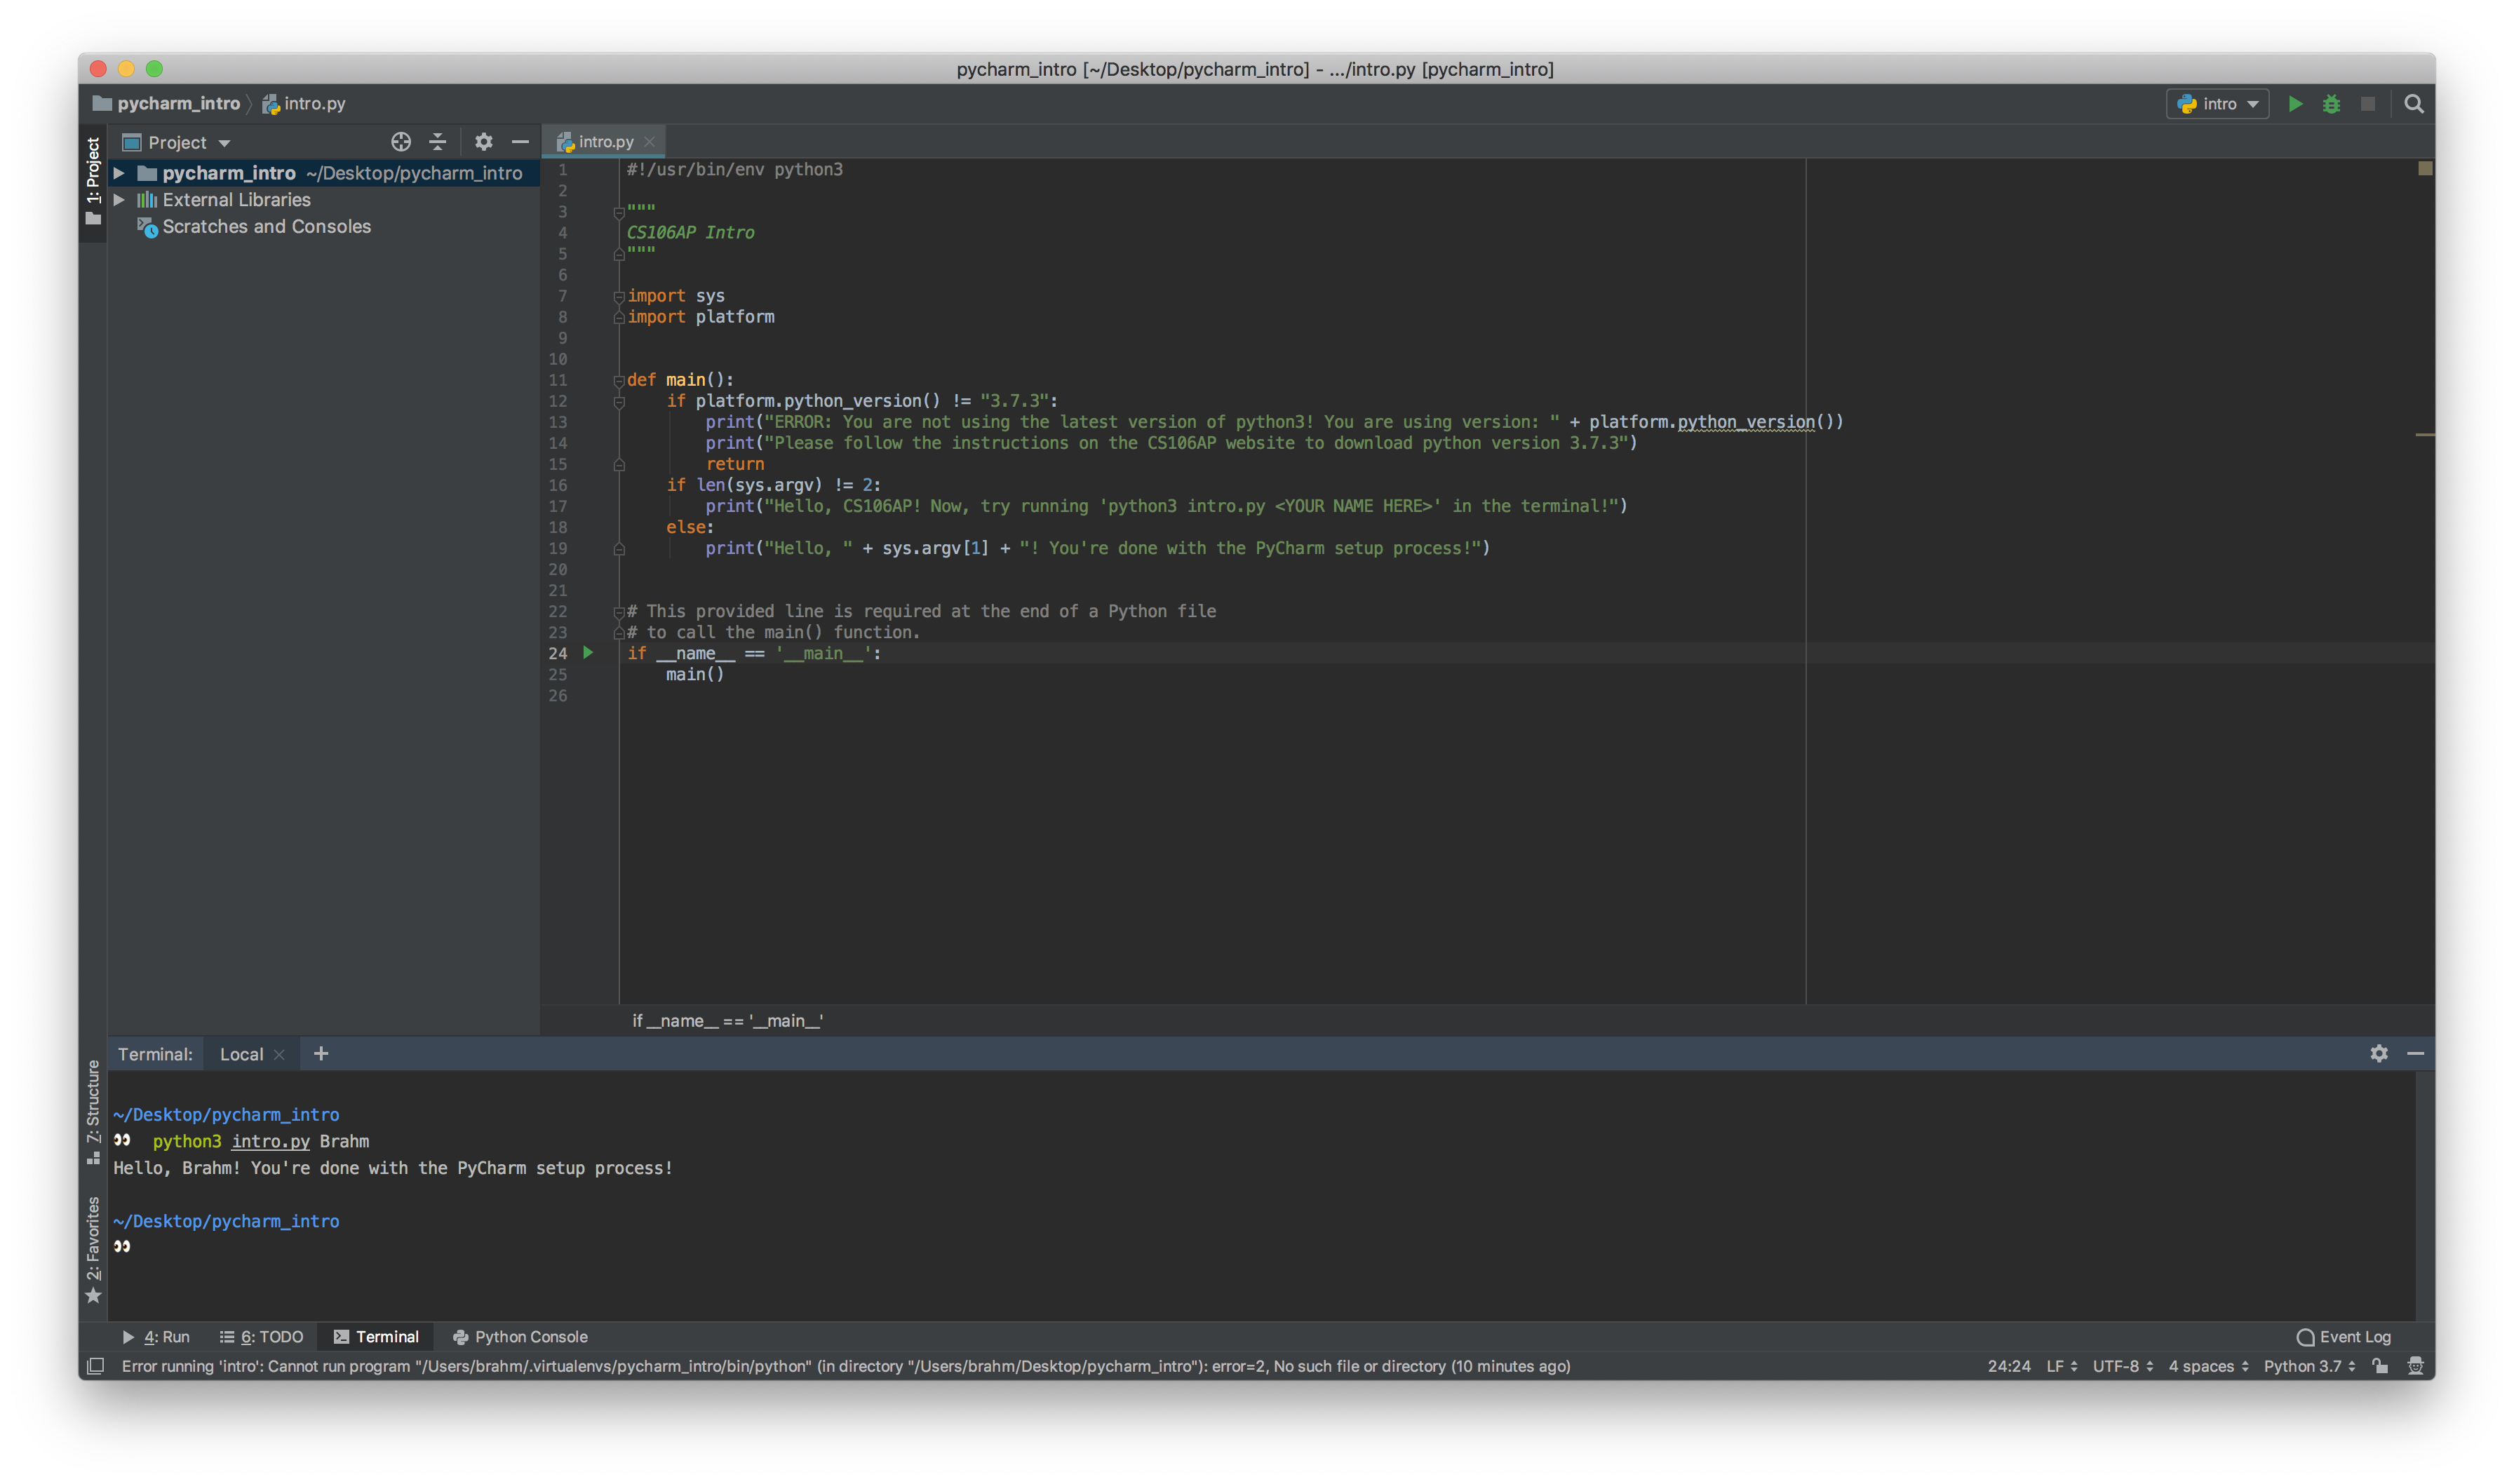
Now, click 'terminal' in the bottom of your Window to open up
PyCharm's integrated terminal. Type
python3 intro.py <YOUR NAME HERE>(or on Windows,py intro.py <YOUR NAME HERE>) and press enter to see the program's output. Congratulations! You've successfully set up PyCharm!