Building on the earlier image manipulation and logic sections, here we see how to implement a movie special effect.
Bluescreen Special Effect
"Bluescreen" video special effect
Video is just a series of still images, 20-60 per second
Have image to modify
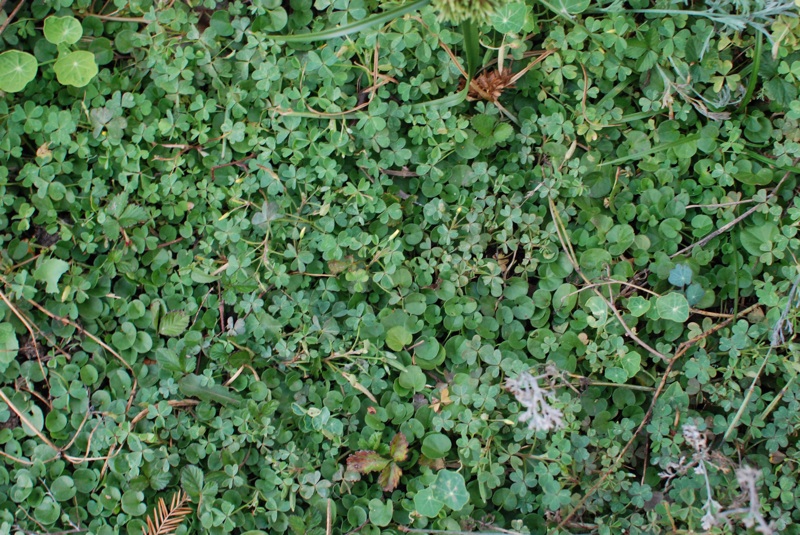
Have back background image, pull pixels from
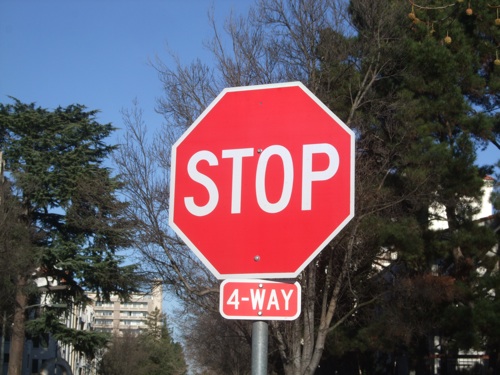
Detect colored area in an image, e.g. red in stop.jpg
For colored area, substitute in pixels from back image
Lego analogy -- same setRed() etc. we've used, arranged in a new way
Bluescreen Stop Sign Example
Change the red part of sign to look like leaves
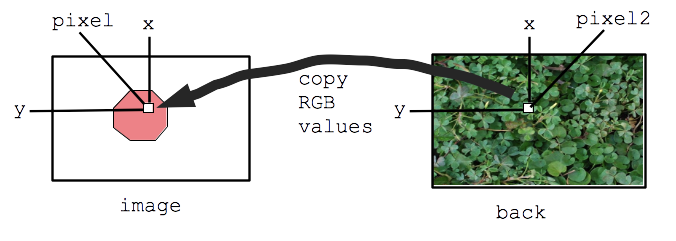
Bluescreen Algorithm
Two images: image and back
Detect, say, red pixels in image
For each red pixel:
-Consider the pixel at the same x,y in back image
-Copy that pixel from back to image
-What defines how a pixel looks? Three numbers.
-Copy the red, green, and blue values from back to iamge
Result: for red areas, substitute in areas from back image
Adjacent pixels maintained, so looks good
Bluescreen Example Code
Modify pixels in image
if-statement / avg detect red pixels
For each red pixel in image:
-Figure out x,y of pixel
-Get pixel2 from back image (at x,y)
-Copy red/green/blue from pixel2 to pixel
image-bluescreen-1
The above bluescreen example code detects the red part of the sign, and for those pixels, copies over the pixels from the back image. The bluescreen code below has 3 key differences from the earlier examples:
back = new SimpleImage("leaves.jpg"); - open a second image and store it in the variable "back" (thus far we've only opened one image at a time)
pixel2 = back.getPixel(x, y); - say we are looking at pixel x,y in the main image. Get the x,y pixel from the other image and store it in the variable "pixel2". We can get the x and y of the current pixel in the loop with the functions pixel.getX() and pixel.getY().
pixel.setRed(pixel2.getRed()); - copy the red value from pixel2 to pixel. Also do this for the other two channels. In effect, for the x,y location, this copies the pixel from back to image.
Bluescreen Stop/Leaves Experiments
Flip -- try replacing everything-but-the-red with leaves instead of the red.
Sky -- try replacing the blue sky instead of the red areas of the sign. Tune the * factor so only the sky is changed.
Shorter -- make the code a little shorter by eliminating the need for "x" and "y" variables. Put the calls to pixel.getX() and pixel.getY() right in the back.getPixel(...) call.
Solution code:
    // flip: just change < to >

    // sky: if (pixel.getBlue() > avg * 1.1) {
    // This is  great example of tuning the * factor

    // pixel2 in one line:
    // pixel2 = back.getPixel(pixel.getX(), pixel.getY());
Abby Bluescreen
In this example we have the abby.jpg image -- make it appear that the green parts of her little chair are sprouting leaves.
image-bluescreen-2
Solution code:
// Here the pixel2 = ... computation is shortened to one line
image = new SimpleImage("abby.jpg");
back = new SimpleImage("leaves.jpg");

for (pixel: image) {
  avg = (pixel.getRed() + pixel.getGreen() + pixel.getBlue())/3;
  // your code here
  if (pixel.getGreen() > avg * 1.05) {
    // 1. Get pixel2 from back image at same x,y (one line)
    pixel2 = back.getPixel(pixel.getX(), pixel.getY());

    // 2. Copy pixel2 over to pixel
    pixel.setRed(pixel2.getRed());
    pixel.setGreen(pixel2.getGreen());
    pixel.setBlue(pixel2.getBlue());
  }
}
print(image);
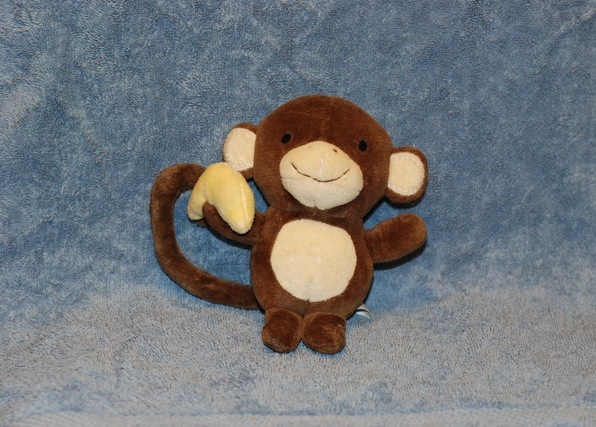
Monkey Bluescreen Like The Movies
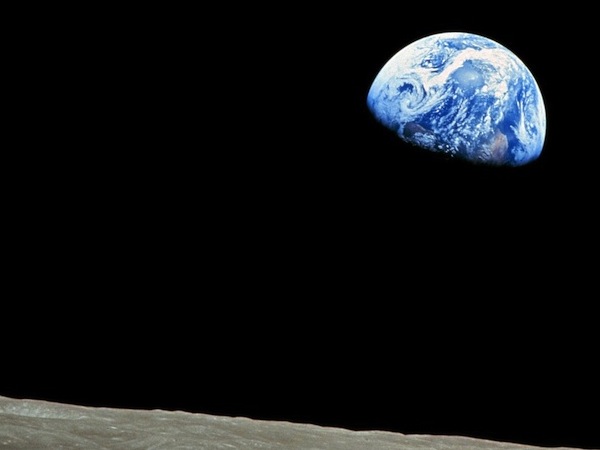
Now we'll do one like the movies -- film the movie start in front of a blue screen. Replace the blue background behind the monkey with pixels from moon.jpg.
Here is our monkey movie star:
Here is our background, the famous Apollo 8 photo of the earth shown rising
above the moon horizon.
image-bluescreen-3
Solution code:
image = new SimpleImage("monkey.jpg");
back = new SimpleImage("moon.jpg");

for (pixel: image) {
  avg = (pixel.getRed() + pixel.getGreen() + pixel.getBlue())/3;
  // your code here
  if (pixel.getBlue() > avg * 0.92) {  // detect blue
    pixel2 = back.getPixel(pixel.getX(), pixel.getY());
    pixel.setRed(pixel2.getRed());
    pixel.setGreen(pixel2.getGreen());
    pixel.setBlue(pixel2.getBlue());
  }
}

print(image);
Other Backgrounds
Other background images:
-paris.jpg
-yosemite.jpg
-stanford.jpg
Notice: if-logic only looks at image pixels
The blue or whatever in the back image is not used in the if-logic
Therefore, can swap in any back image without disturbing the logic
back.setSameSize(image);
Working with a main image and a back image, there is a problem if the back image is smaller than the main image -- the code will try to access a non-existent pixel, and we get an "x/y out of bounds" error. The following line fixes this problem:
back.setSameSize(image);
The above line resizes the back image if necessary, so it is at least as big as the main image, which is exactly what we need for blue screening, picking pixels from the back image to place into the main image. You'll see this line in the starter code for some later problems.
Blend Image Ghost
Another effect we can try is blending in a "ghost" version of the monkey into the back image. We blend the colors from the two images.
Blend a faint monkey into the back image
Blending pixels from the two images vs. replacing
Modify and print "back" instead of "image"
1. Loop over monkey image
2. if-logic to detect monkey
(this is flip, previously we detected not-monkey background)
3. Set back-pixel-red = back-pixel-red + monkey-pixel-red/5
4. Do it for the other 2 colors too
5. Print the back image
Adjust the /5 to be /10 or /15 to get the effect you want
Result is a blend of a faint monkey into the back image
image-bluescreen-4
Solution code:
image = new SimpleImage("monkey.jpg");
back = new SimpleImage("paris.jpg");
back.setSameSize(image);

for (pixel: image) {
  avg = (pixel.getRed() + pixel.getGreen() + pixel.getBlue())/3;
  // your code here
  if (pixel.getBlue() < avg * 0.9) {  // detect monkey (blue low)
    div = 5;  // divide monkey by this
    pixel2 = back.getPixel(pixel.getX(), pixel.getY());
    pixel2.setRed(pixel2.getRed() + pixel.getRed()/div);
    pixel2.setGreen(pixel2.getGreen() + pixel.getGreen()/div);
    pixel2.setBlue(pixel2.getBlue() + pixel.getBlue()/div);
  }
}
print(back);