Today: color-logic examples, bluescreen algorithm
>
Logic-Stop Examples
Color If Logic
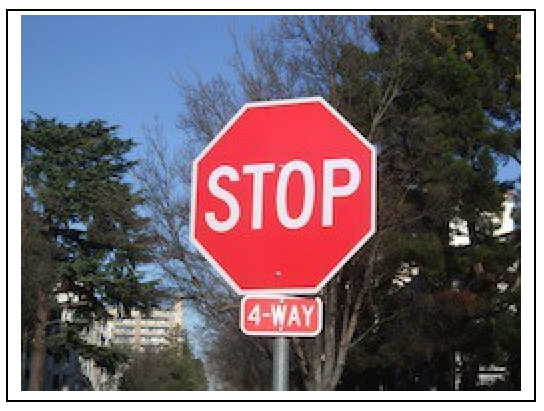
- Say we have this stop sign
- Detect areas of an image based on color, e.g. red
- Work out algorithm, Python code to detect a color area
- e.g. detect the red area of this stop sign
- Reminder for colors: rgb-explorer

Red Detect red >= 100
- Try on red_detect1 code example
- First try using red value with >
- Color detection - think about the "hurdle" in the if-test
- e.g.
if pixel.red >= 100:
- Starts with hurdle value of 100
- Adjust value to get best results
- Q: To make this more selective, make 100 bigger or smaller?
- A: bigger. Look at < - think for a second to get the direction correct
- Does not work that great:
Bright areas and red areas both have big red numbers
- redish pixel: 220, 50, 50
- white pixel: 220, 220, 220
- Best can do here is maybe hurdle of 160
Red Detect - Average

- Try on red_detect2 code example
- Improvement: compare red value to average of red/green/blue values
- "redish pixel"
the red value is above the average of this pixel
- "blueish pixel"
the blue value is above the average of this pixel
red >= average * 1.0
- Adjust the 1.0 "hurdle" factor by eye, try 1.0 1.1 1.2 .. find a good value
- The average technique works great to select the red stop sign pixels
- Experiment: for detected pixels, reduce only red and green, leaving blue unchanged
result is blue stop sign
- Experiment: for detected pixels, swap red and green values
Bluescreen Algorithm
- Demo Google search: blue screen movie image
- Also known as Chroma Key (wikipedia)
- Video is just a series of still images, 20-60 per second
- This is the "front" approach, replacing colored pixels in the front image
- Have image with special color
- Have back background image
- 1. Detect colored area in an image, e.g. the blue area
- 2. Replace colored pixels with pixels from back image
- 3. The final output is the front image with the replacements done
Bluescreen Algorithm Outline
- Two images we'll call image and back
- Detect, say, red pixels in image
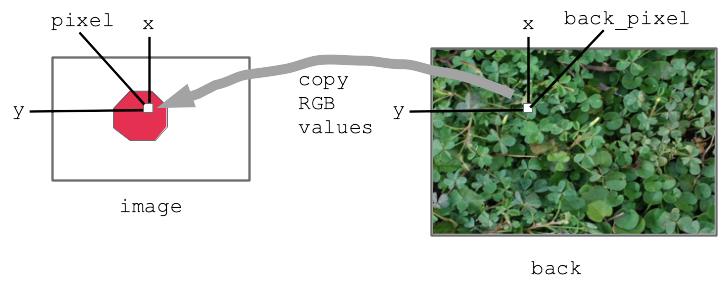
- For each red pixel (make a drawing)
Consider the pixel at the same x,y in back image
Copy that pixel from back to image
i.e. copy RGB numbers from back pixel to image pixel
- Result: for red areas, copy over areas from back image
- Adjacent pixels in back are still adjacent in new image, so it looks right
Diagram:

Bluescreen Stop Sign Example
This code is complete, look at the code then run it to see.
>
Bluescreen Stop Sign
Solution code
def stop_leaves(front_filename, back_filename):
    """Implement stop_leaves as above."""
    image = SimpleImage(front_filename)
    back = SimpleImage(back_filename)
    for y in range(image.height):
        for x in range(image.width):
            pixel = image.get_pixel(x, y)
            average = (pixel.red + pixel.green + pixel.blue) // 3
            if pixel.red >= average * 1.4:
                # the key line:
                back_pixel = back.get_pixel(x, y)
                pixel.red = back_pixel.red
                pixel.green = back_pixel.green
                pixel.blue = back_pixel.blue
    return image
Before - the red stop sign before the bluescreen algorithm:

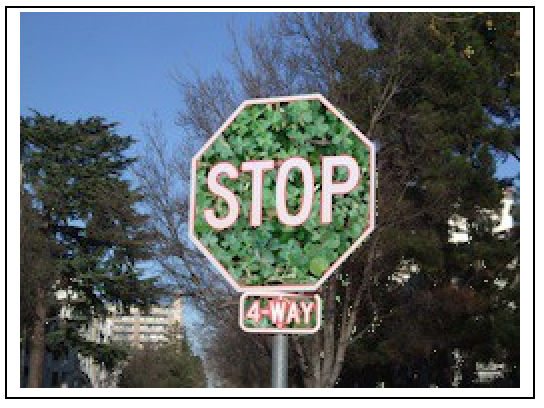
After:

Bluescreen Monkey
>
Bluescreen Monkey
A favorite old example of Nick's.
Have monkey.jpg with blue background

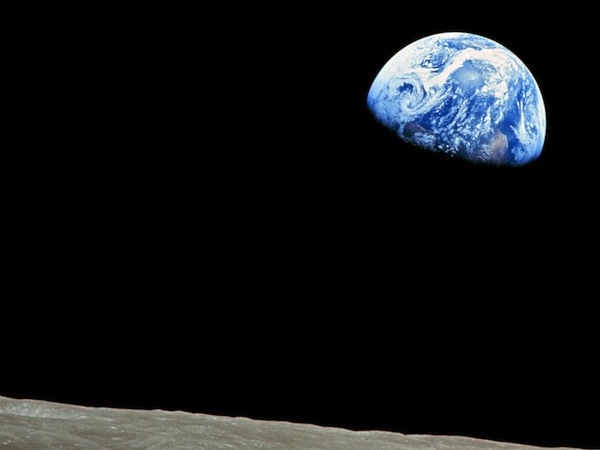
The famous Apollo 8 moon image. At one time the most famous image in the world. Taken as the capsule came around the moon, facing again the earth. Use this as the background.

The bluescreen code is the same as before basically. Adjust the hurdle factor to look good. Observe: the bluescreen algorithm depends on the colors
in the main image. BUT it does not depend on the colors of the back image - the back image can have any colors it in. Try the stanford.jpg etc. background-cases for the monkey.
The code is complete but has a 1.5 factor to start. Adjust it, so more blue gets replaced, figuring out the right hurdle value.


