CS 106B: Programming Abstractions (C++), Autumn 2015
 Stanford C++ Lib
How to Use Qt Creator
Opening a Project or Assignment
Once you've installed Qt Creator, you can download any of the assignment projects available on the assignment page. Note that to open the project, you have 2 options:
-
Open Qt Creator. Go to File->Open File or Project...

Then navigate to the project you wish to open and click on the .pro file, i.e. Life.pro. Note, if you directly open the *.h files or *.cpp files instead, this will not work, because it will not open the entire project.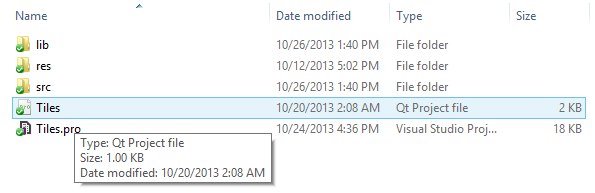
-
Navigate to the project you wish to open in your file system, then just double-click on the .pro file i.e. Life.pro. This will open Qt Creator for you with this project.
Using Qt Creator
Below is a screenshot of what Qt Creator should look like when you open a project.

Let's breakdown what buttons are where and how you actually edit and run the code. First in the picture below is the View menu. This menu allows you to change how qt creator will look, which can help you in different tasks. You'll mainly use the Edit view and the Debug view. Projects will open in Edit view.

The files inside of this project will be displayed in the project files window which can be seen below. Note, if you can't see this window, hold down the Alt key and press 0 (zero, the number key) on Windows or the Meta key and press 0 on Mac. The code files for the project can be found in the Headers → src folder and the Sources → src folder. The files in the lib/StanfordCPPLib folders are the code files for the Stanford Library which includes classes like Vector, Grid, and Map. Feel free to open up these files and take a look. Just make sure not to change them since your assignments will be graded with a clean copy of those files.

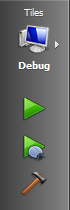
But how do you run your programs? First, you'll need to build the project by clicking the Build button which is marked by the hammer icon in the picture below. If the project builds, then you can run the project by clicking the play button which is the plain green triangle button shown in the picture below. If you want to debug your project, you should click the debug button which is the green triangle with a bug on it shown in the picture below. Note, your project must be built in debug mode in order to debug your program. You can change the build mode by clicking the computer icon shown in the picture below and selecting the debug option. Most projects by default are built in debug mode.
The last thing to mention is where to view compiler errors, issues, and application output. At the bottom of your screen, you'll see the Issues, Application Output, and Compiler Output options. You can open these windows to see the corresponding information. Sometimes the explanations in the Issues window is not that helpful. In these cases, you should look at the Compile Output or Application Output to see if that gives you more helpful information.

How to Debug
If you have having trouble finding bugs in your program or just want to learn how to debug with Qt Creator's Debugging Tools, here's a handout for you.