I am an interdisciplinary mechanical engineer who uses mechanics, thermodynamics, heat transfer, materials, and physics fundamentals in design and analysis processes.
Micro/nanofabrication
I am proficient in various fabrication and characterization tools in the semiconductor industry, such as lithography, etching, thin film deposition, microscopy and spectroscopy techniques.
Product Design
I have extensive experience in product design using CAD/FEA simulations, rapid prototyping, and traditional and computer controlled manufacturing techniques.
Teamwork
I value collaboration and communication as keys to effective and positive teamwork.
Portfolio
Selection of my past projects.
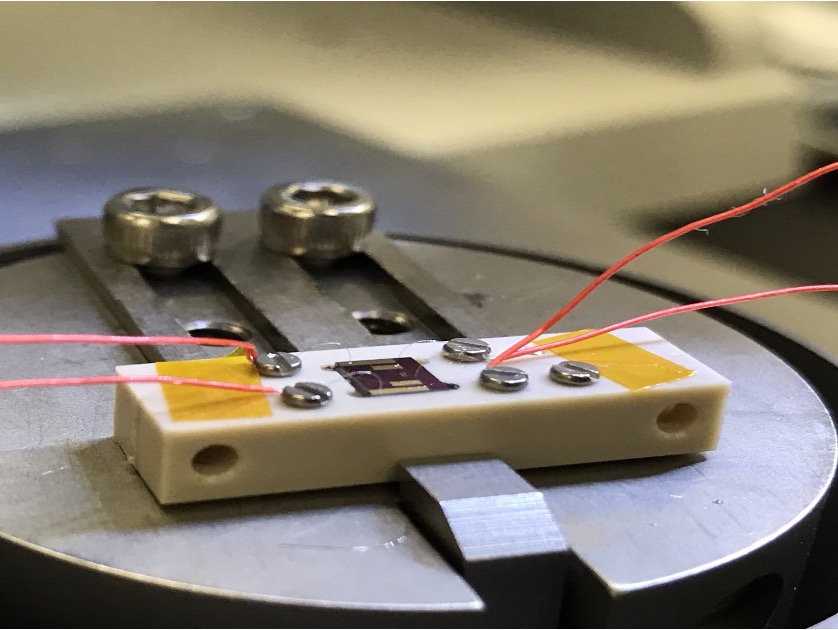
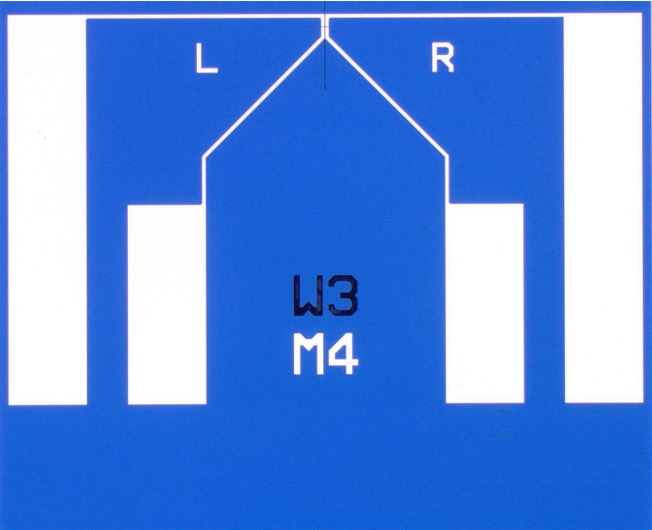
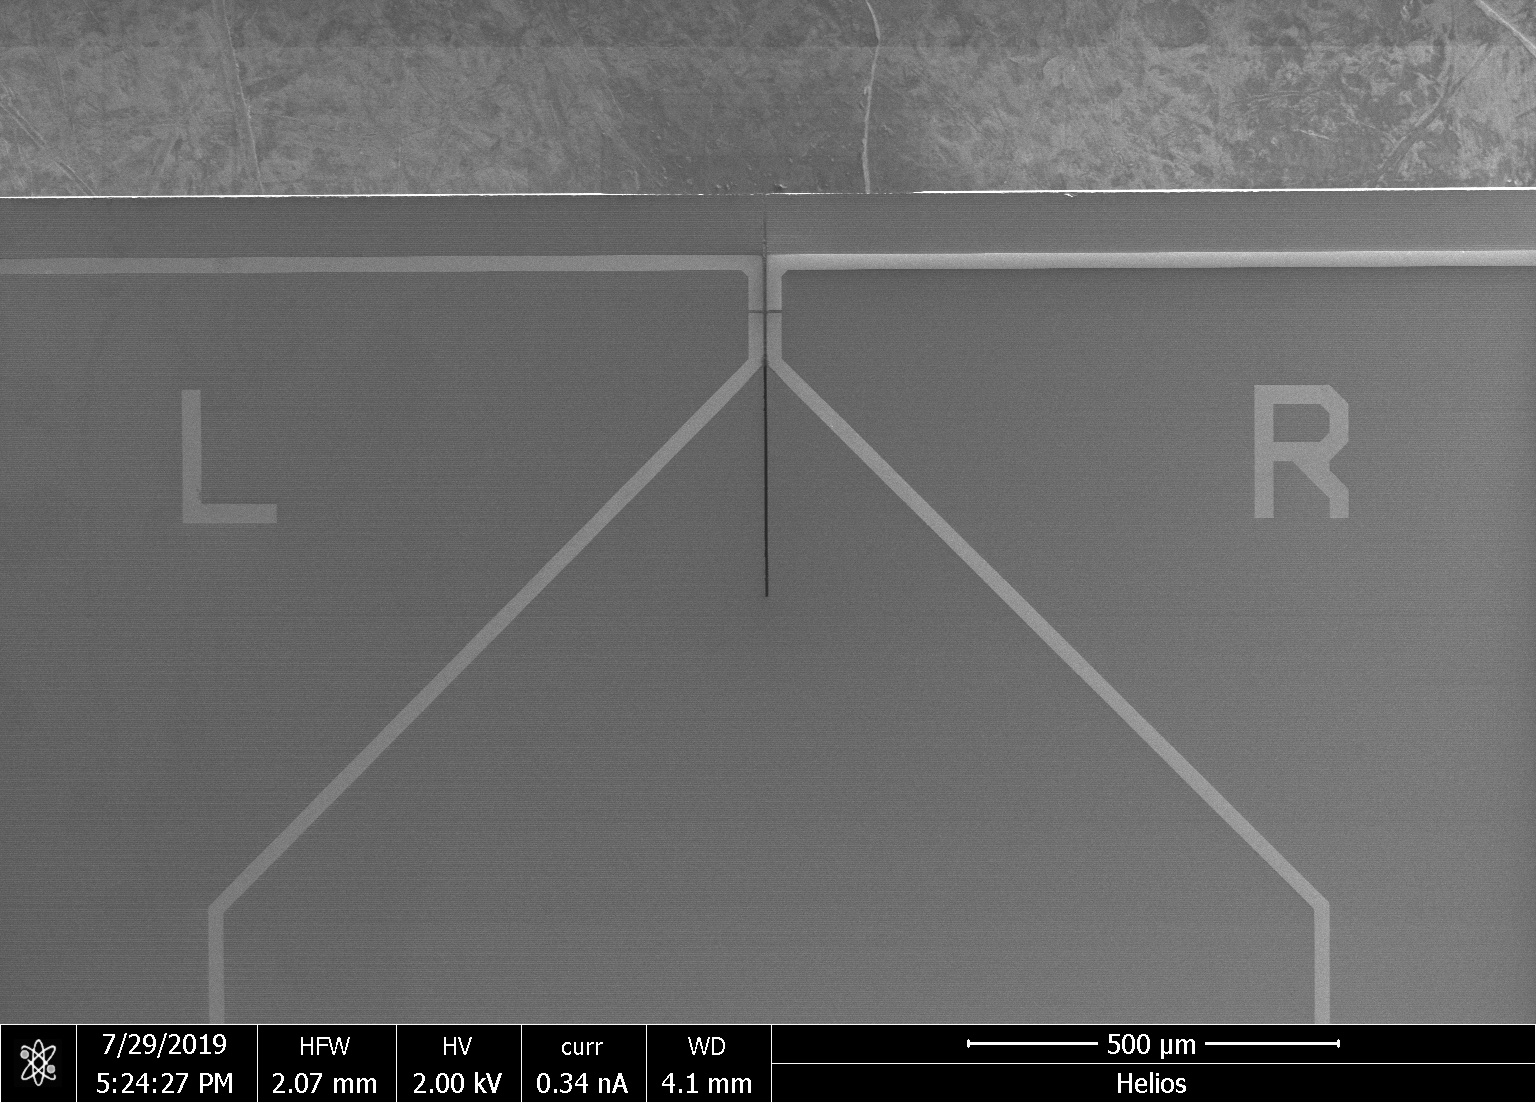
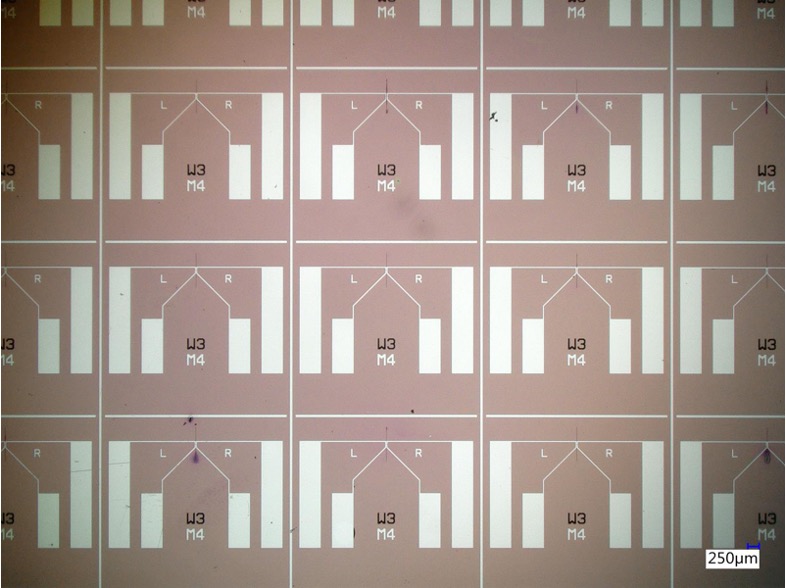
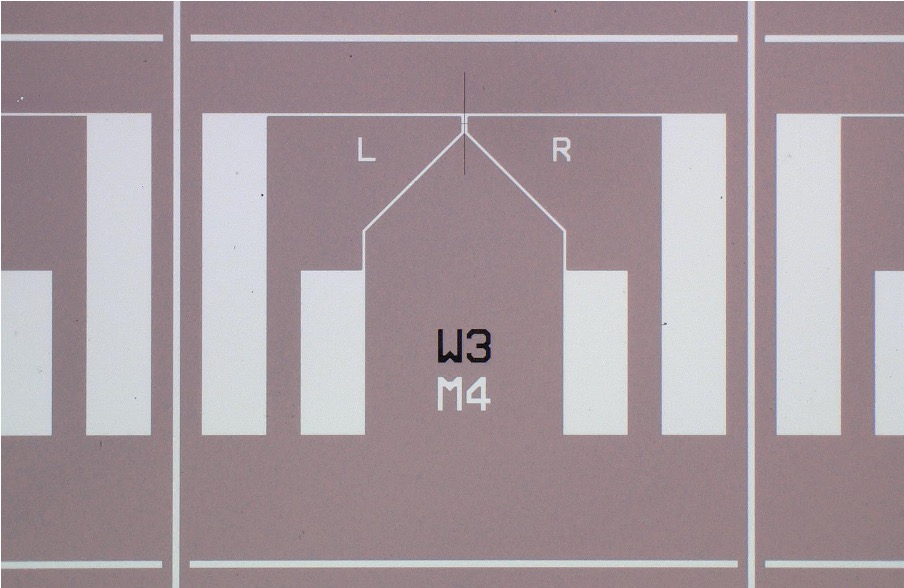
ORNL in-situ STEM Biasing Chip
Microfabrication
SLAC in-situ X-ray Biasing Chip
Microfabrication
Dry Etching Experiments
Microfabrication
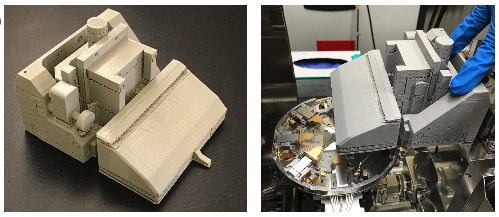
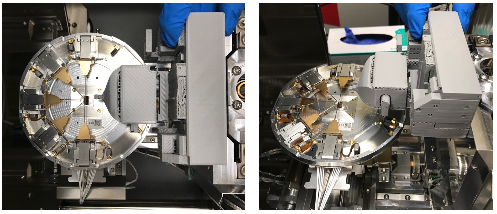
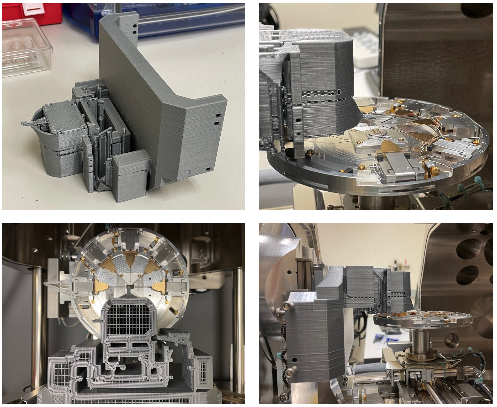
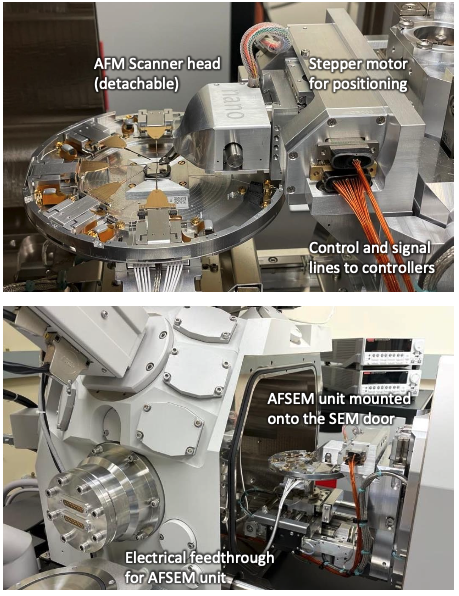
Quantum Design AFSEM™ with SEM and Nanoprobestation
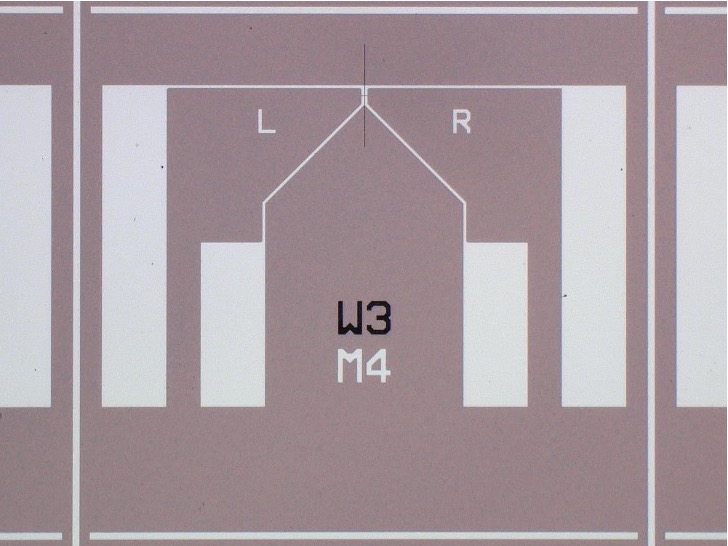
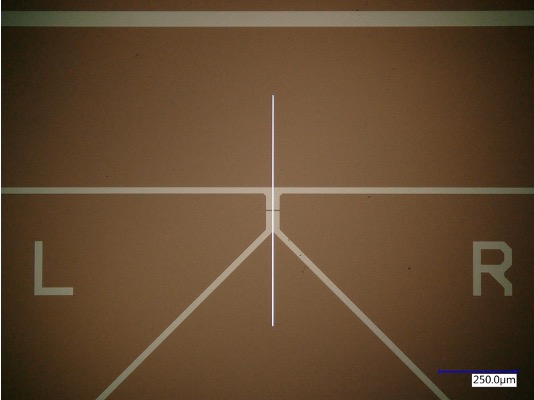
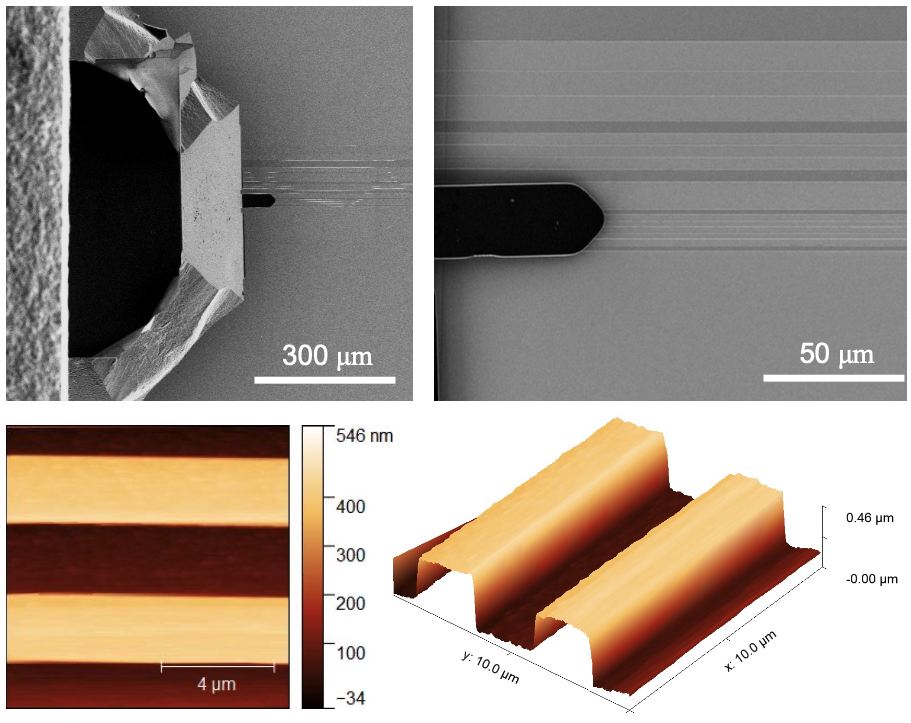
I fabricated a customized STEM biasing chip based on the original design of fusion e-chip from Protochip due to our specific need in trench width to mount the sample. The micro/nanofabrication process involved tens of steps which I employed photolithography, plasma dry etching, deep silicon etching with Bosch process, evaporation, metal liftoff, wafer dicing, wafer bonding, and wet etching.
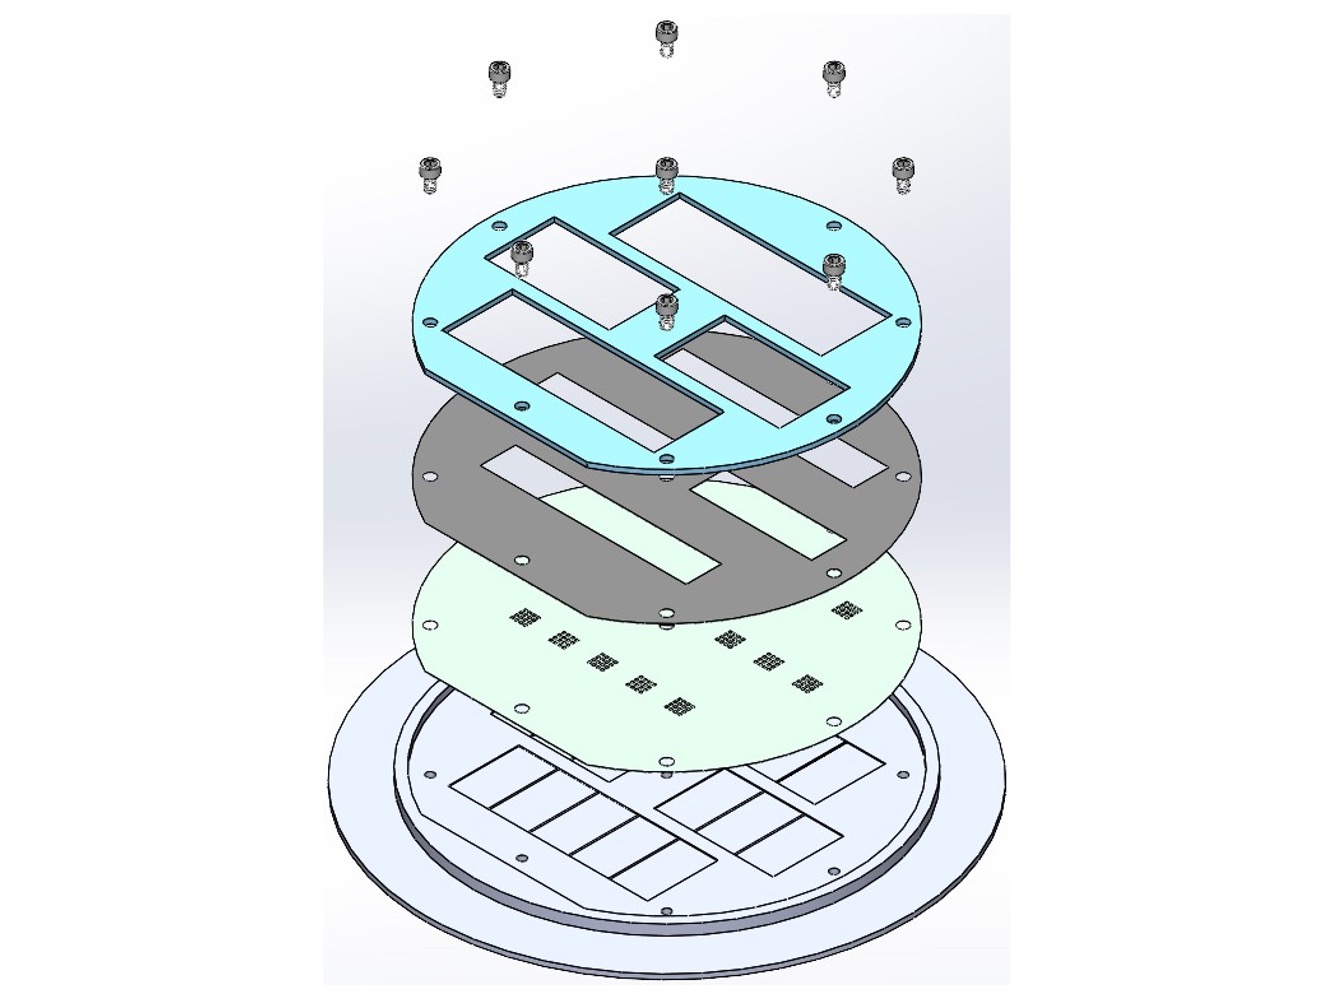
SLAC in-situ X-ray Biasing Chip
Microfabrication
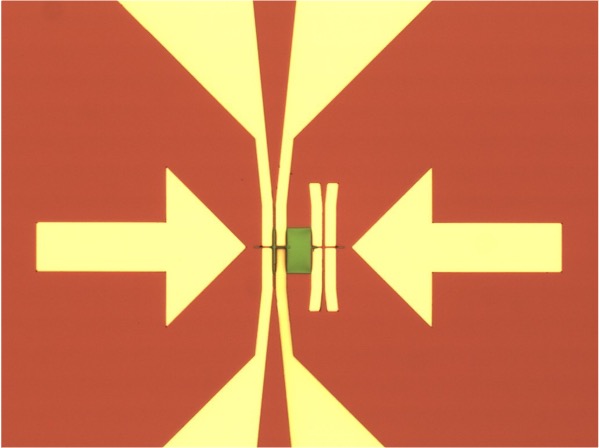
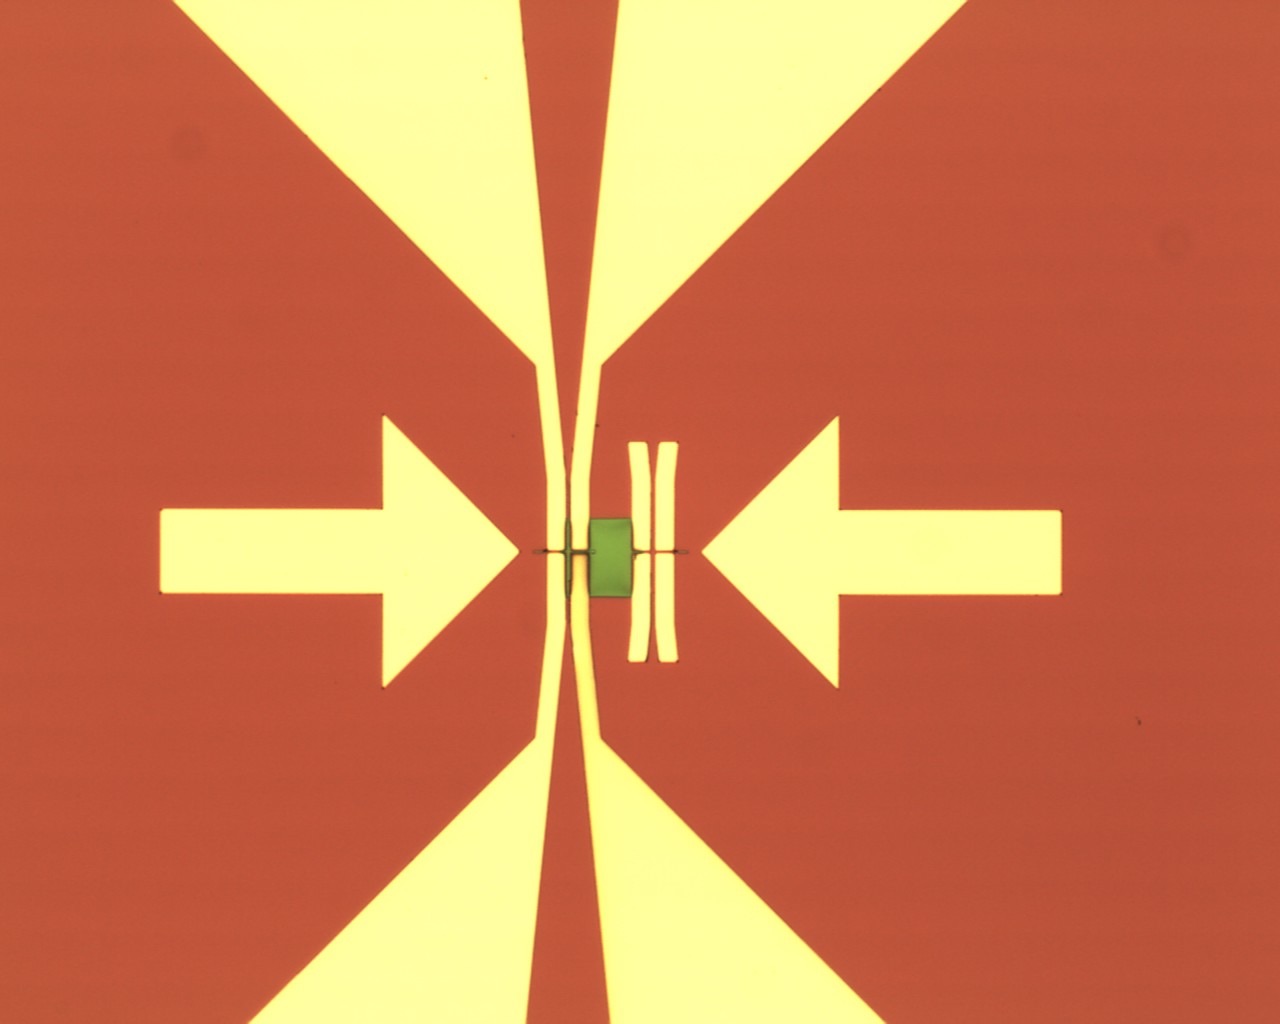
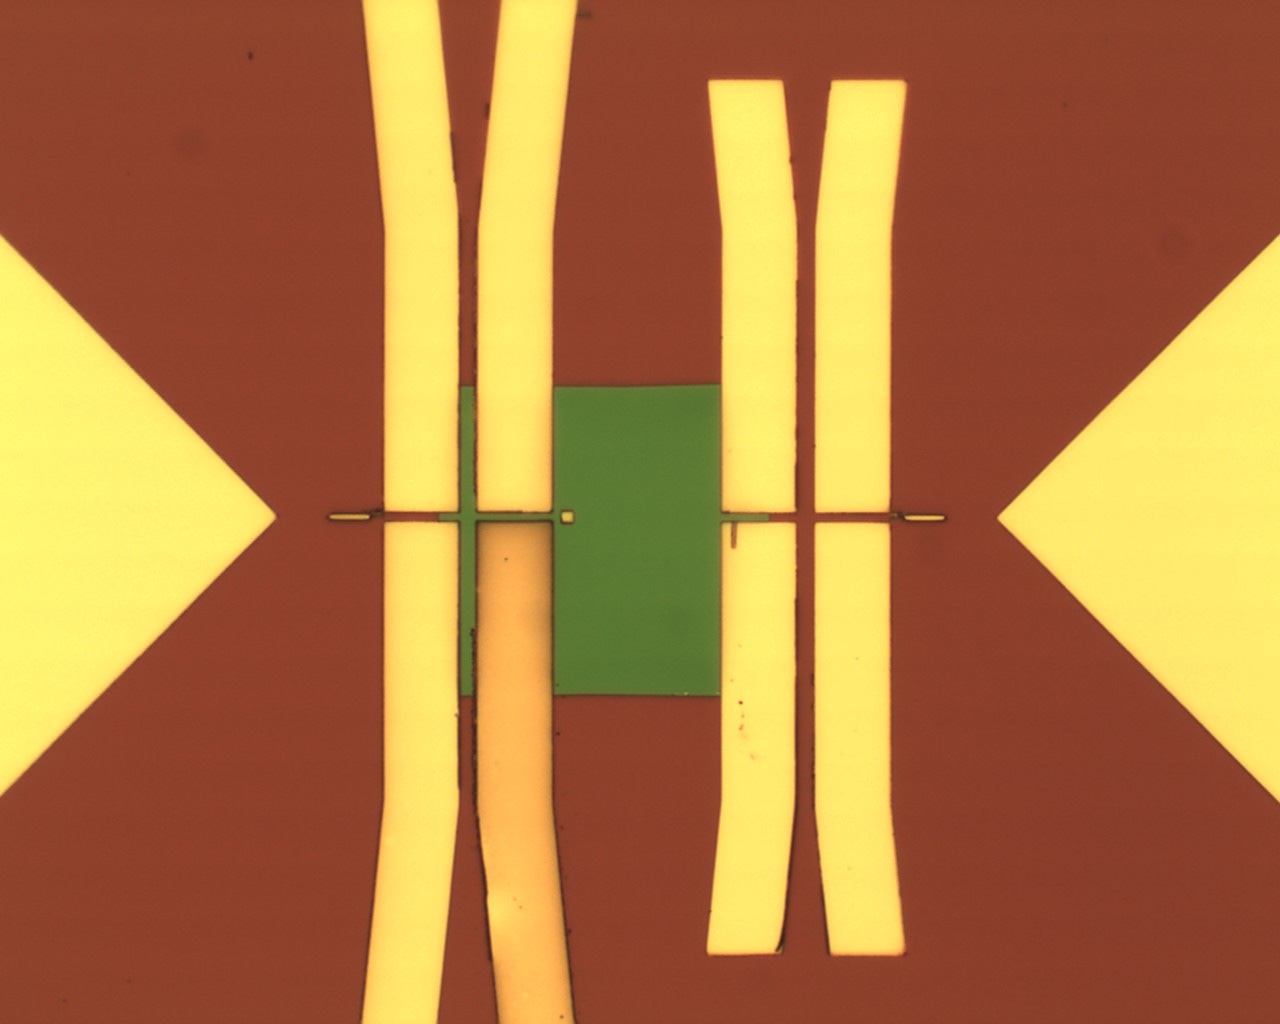
Here, I fabricated a sample holder for X-ray related experiment at Stanford Linear Accelerator Center (SLAC). The sample has metal lines as electrodes on the front side sitting on a SiNx window. The backside of the wafer/chip has been etched open with KOH wet etchant to allow X-ray to pass through SiNx window from the front side to the back side. The main challenges of the fabrication were the alignment of the front and back side patterns, and the wet etching process which inherently had some uncertainties. Special thanks to Eric Han and Woosung Park who taught me my first lesson in micro fabrication.
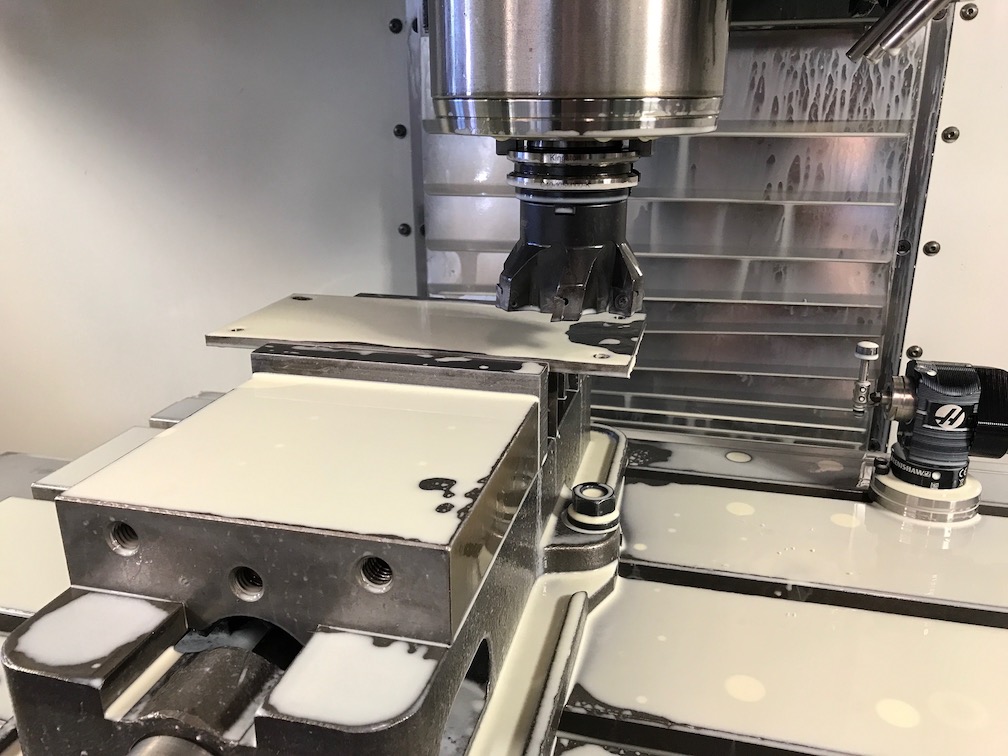
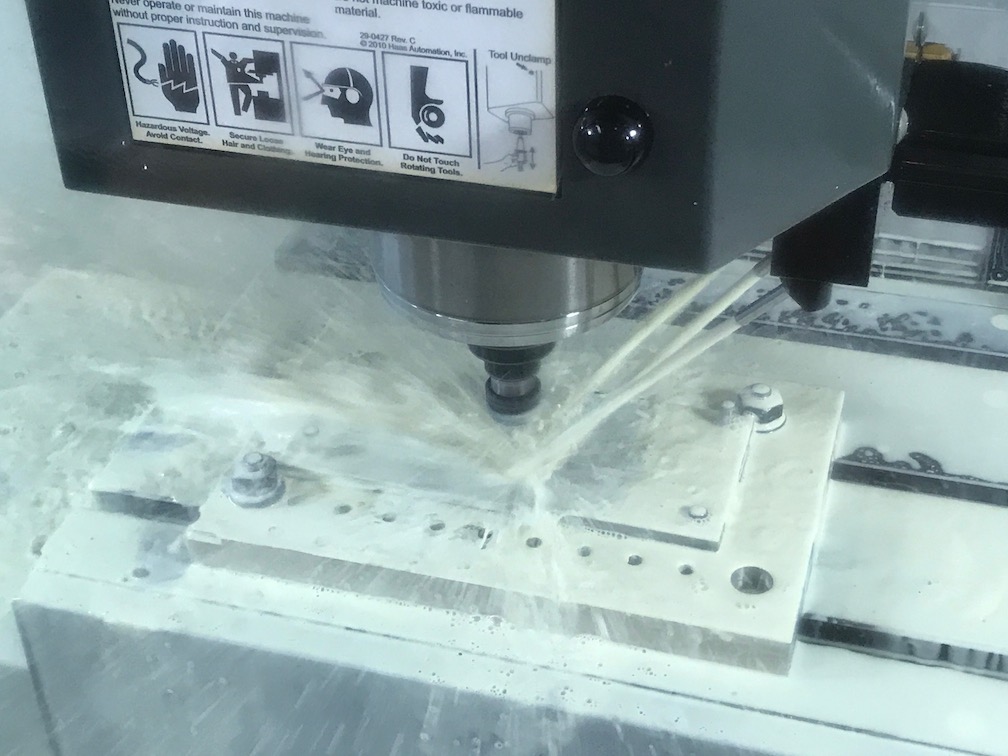
Dry Etching Experiments
Microfabrication
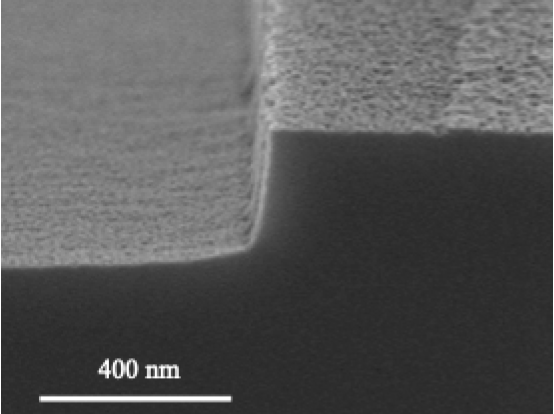
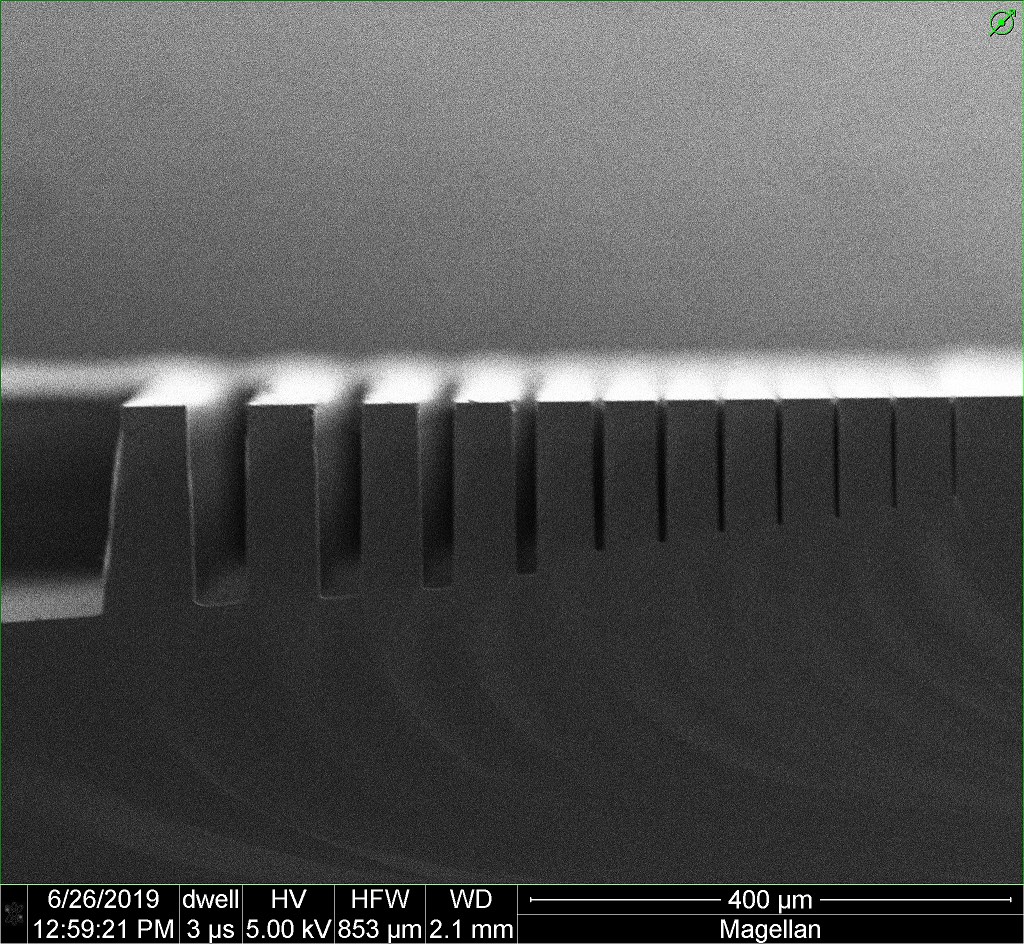
I have worked on some dry etching design of experiment projects to study the effect of each process parameter has on the etch characteristics. In the first figure, my teammate (Kate Lee and Matthew Gutwald) and I explored how etching gas ratio, pressure, ICP and RF power affect the etch rate, sidewall angle, etch floor roughness of InSb using Oxford III-IV plasma etcher at Stanford Nanofabrication Facility (SNF). More details can be found at https://snfexfab.stanford.edu/guide/projects/dry-etching-of-insb-using-ox-35-etcher. In the other two figures, I explored the effect of aspect-ratio-dependent-etching in the deep silicon etcher with Bosch process (PT-DSE) at SNF.
Quantum Design AFSEM™ with SEM and Nanoprobestation
Instrumentation Integration Design
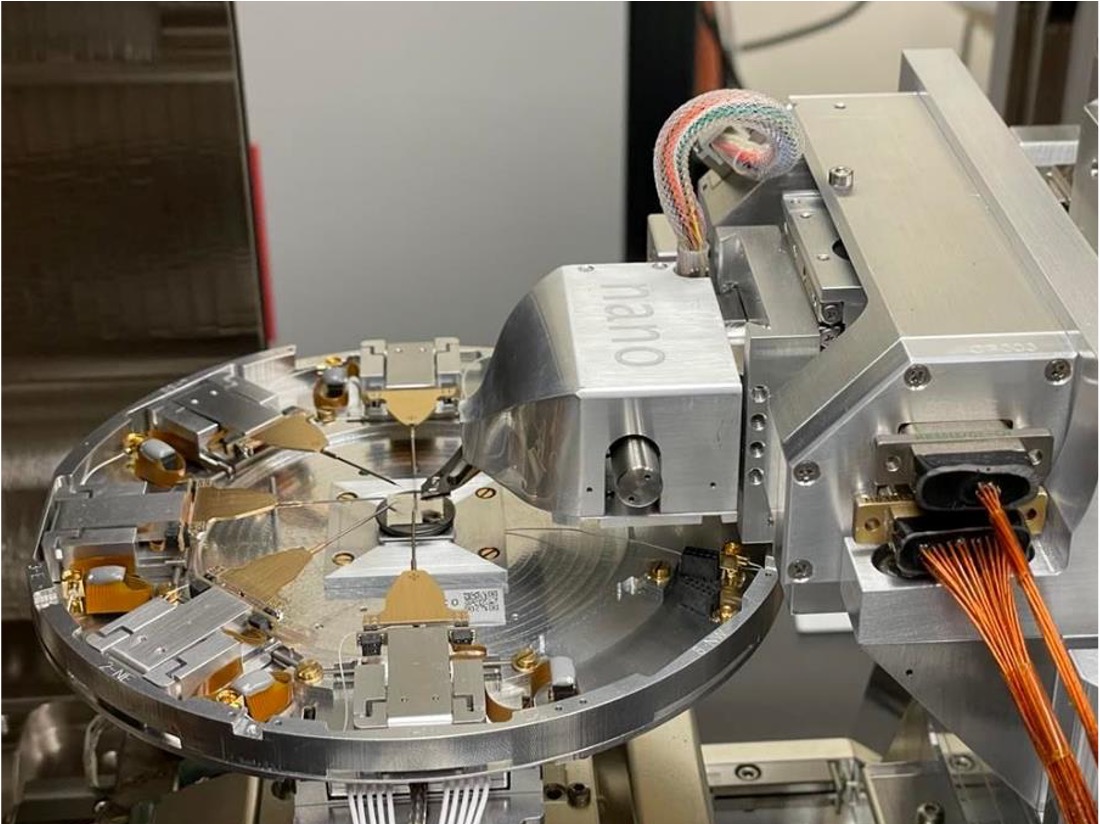
I worked with engineers in Quantum Design, Germany and San Diego in this project to design and integrate the product from Quantum Design - AFSEM unit (Atomic force microscope with self-sensing cantilever) into the SEM with Kleindiek nanoprobe station™. We went through multiple design iterations and prototypes with FDM 3D print tests. The final assembly yielded a great result in robustness and ease of use. The last figure here show that the AFM characterization technique from this instrument gave a satisfactory result in topography scan. Special thanks to Sean Bernstel for helping me during the design process.
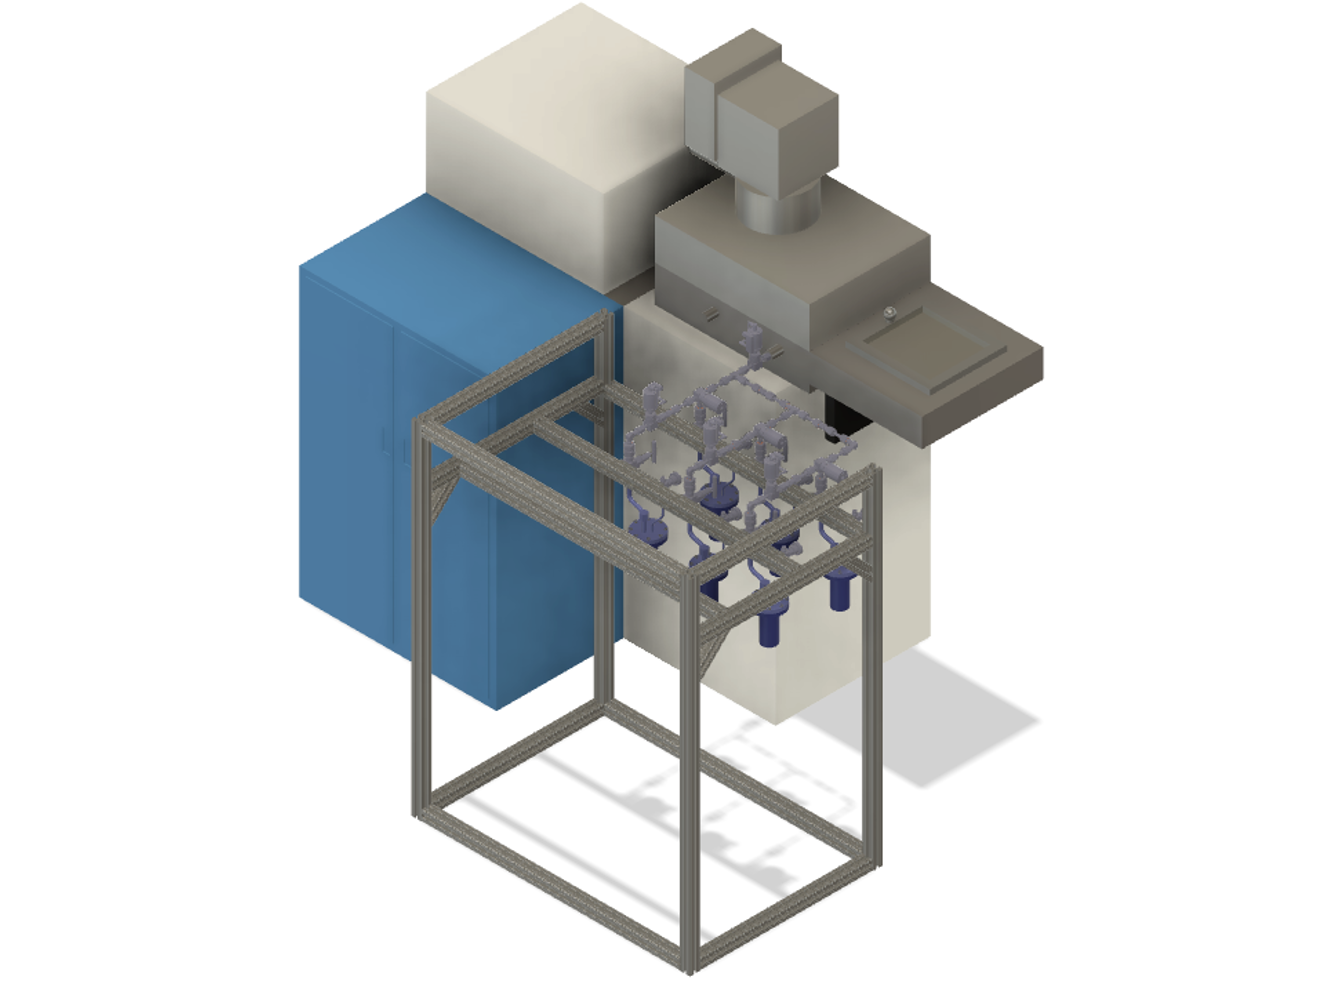
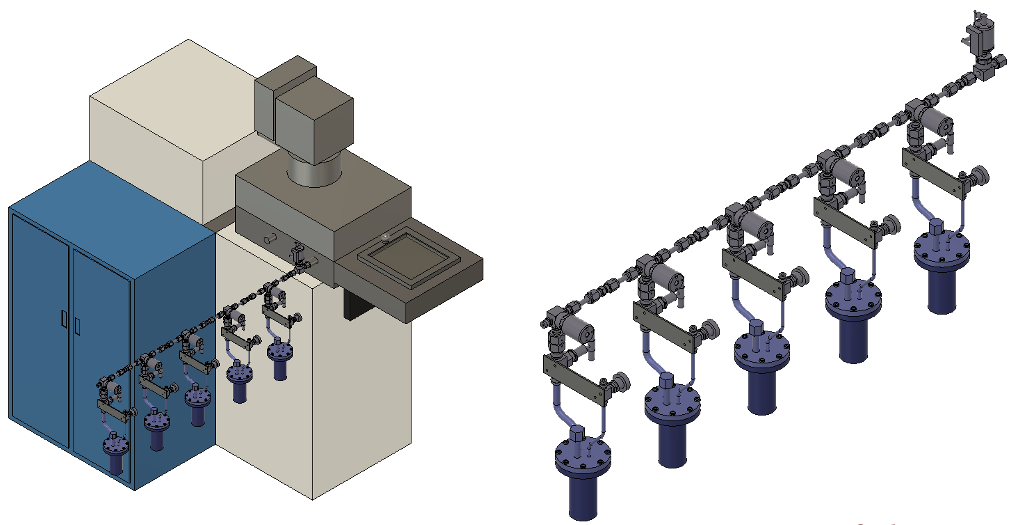
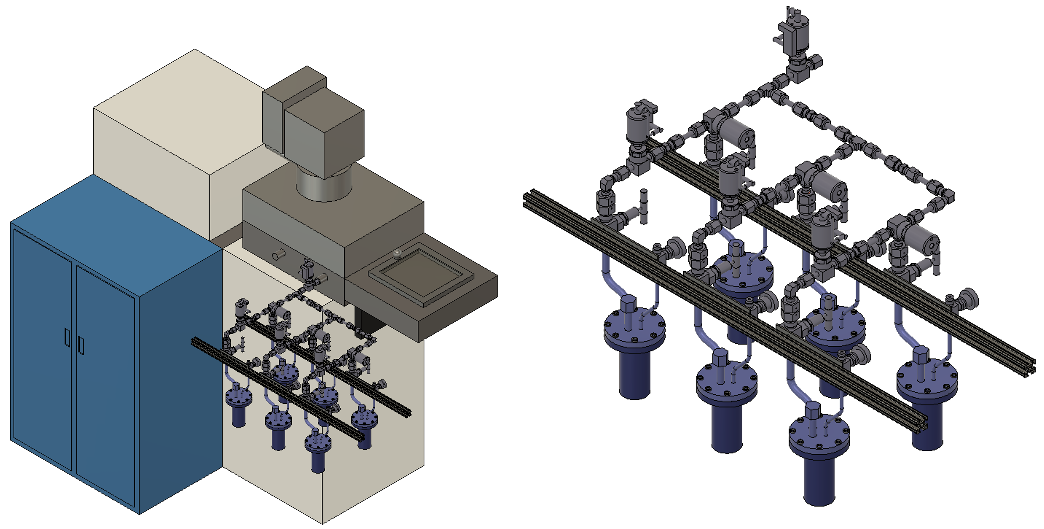
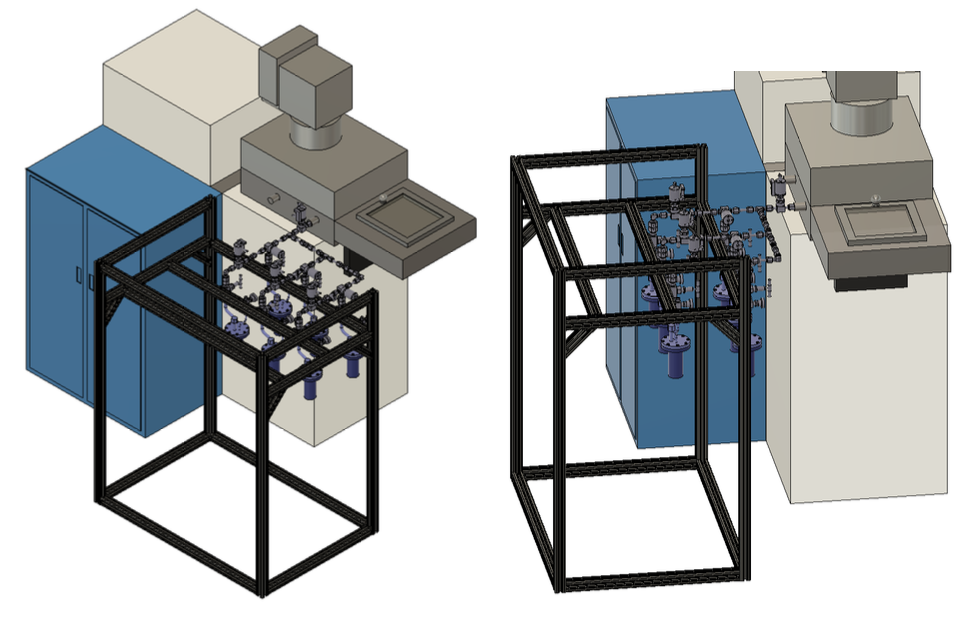
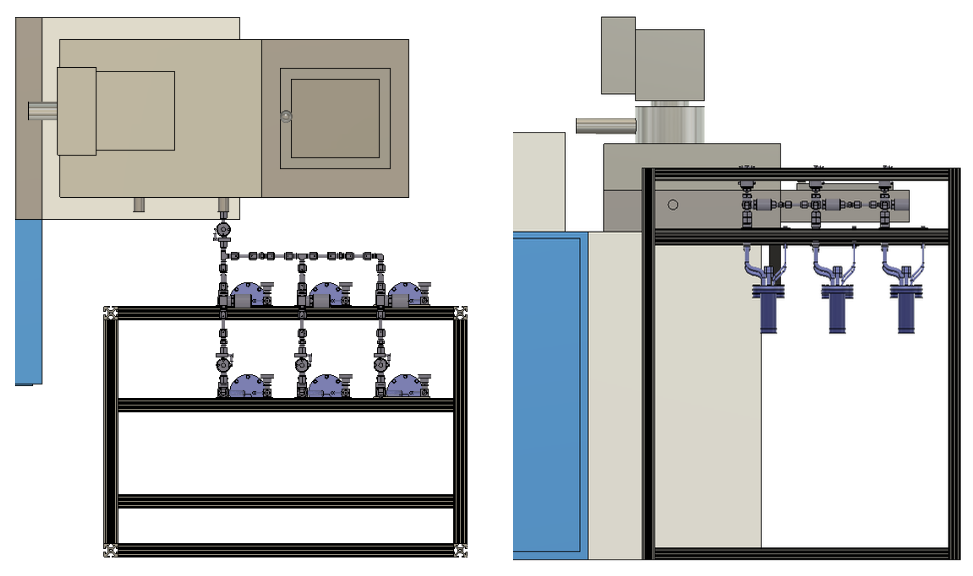
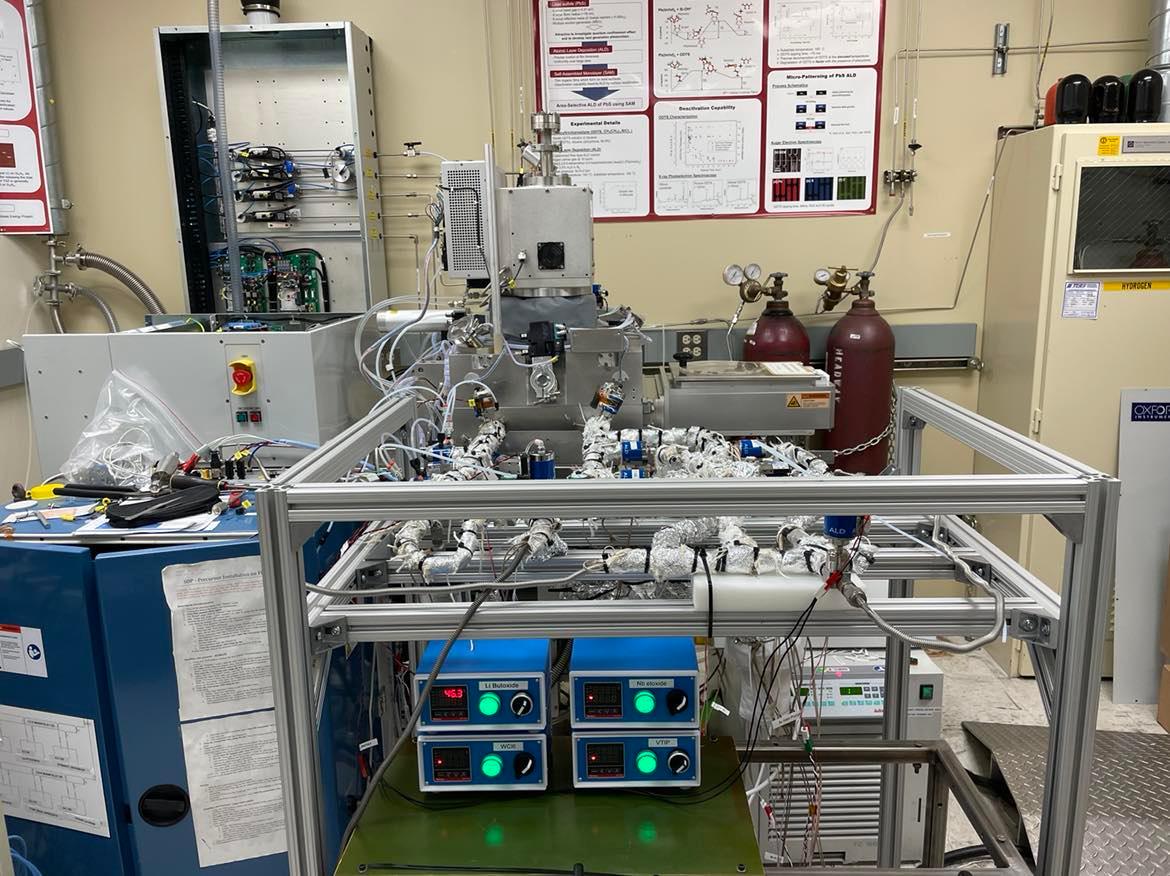
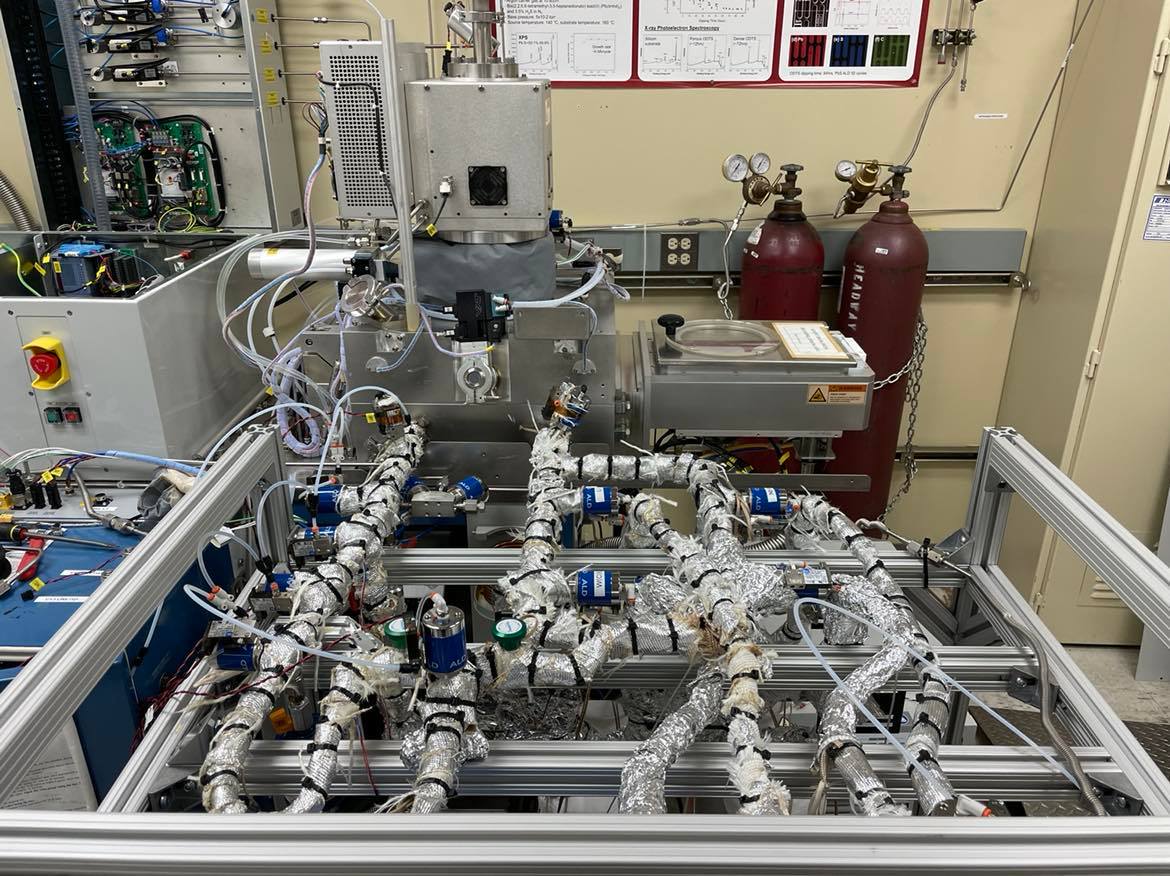
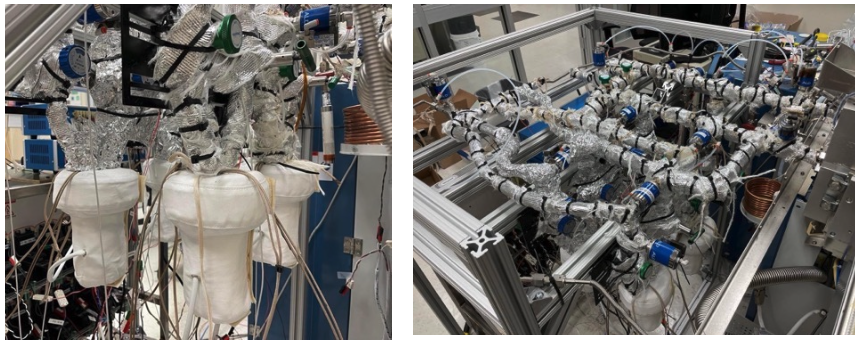
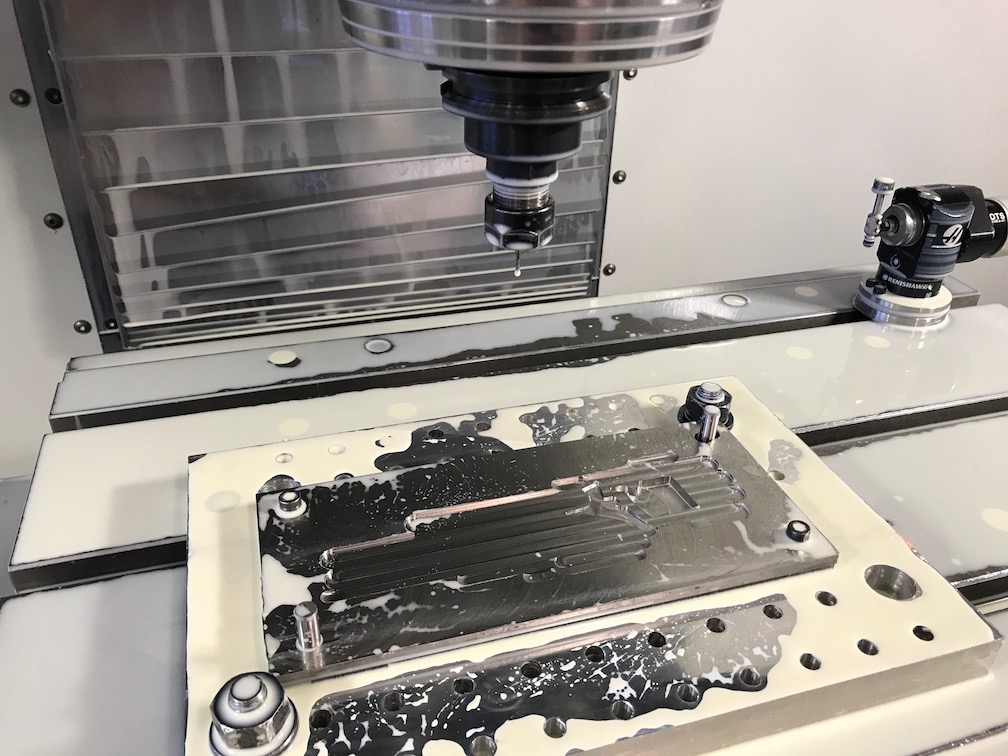
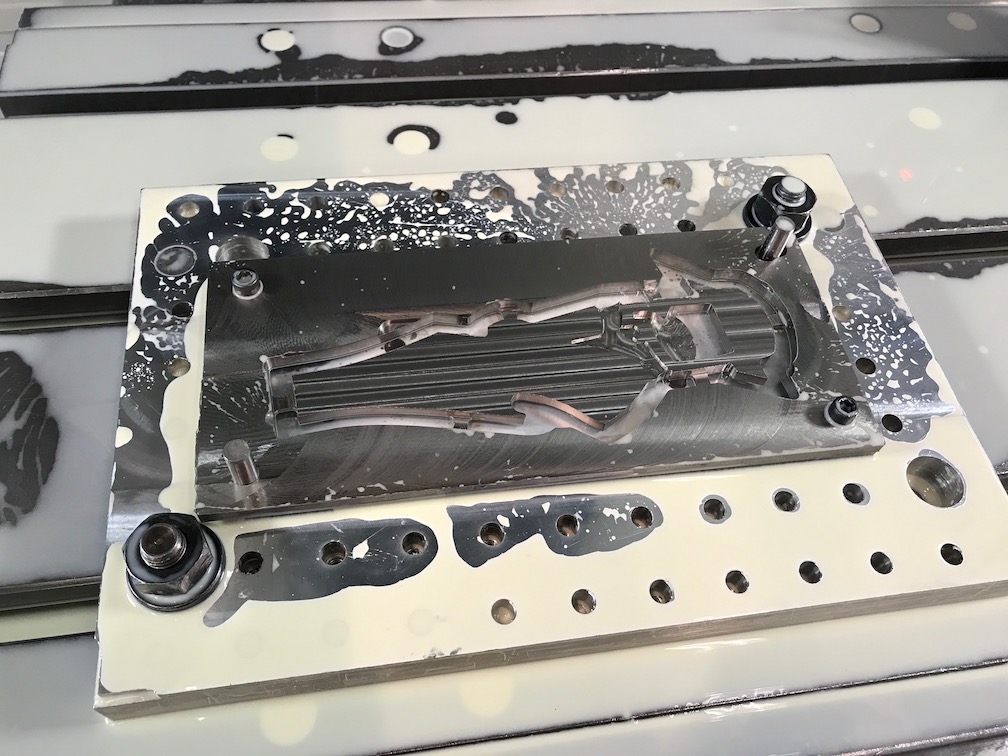
Precursor Delivery System
Instrumentation Integration Design
The goal of this design project is to retrofit/upgrade precursor delivery lines of the existing plasma-enhanced-atomic-layer-deposition (PEALD) tool, FlexAl model from Oxford Instruments, to accommodate bubbler units. The bubbler units will help increase the precursor pressure, hence increase the ALD film deposition yield and reproducibility. We explored multiple designs in consideration of 1) support rigidity, 2) pressure drop in precursor lines, 3) temperature uniformity in precursor lines, and 4) ease of installation and uninstallation. We went with the third design shown in the third figure. The last two figures show the actual setup at Nanoscale Prototyping Lab at Stanford University. Special thanks to Eric Han, Yunha Jung, and Gwon Deok Han in this.
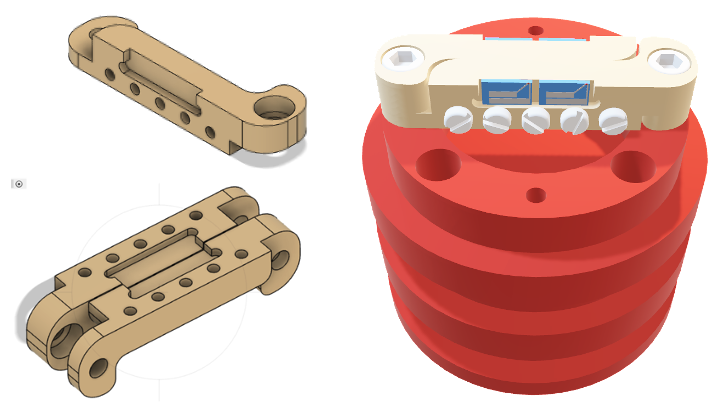
ARPES Sample Holder
Sample Holder Design
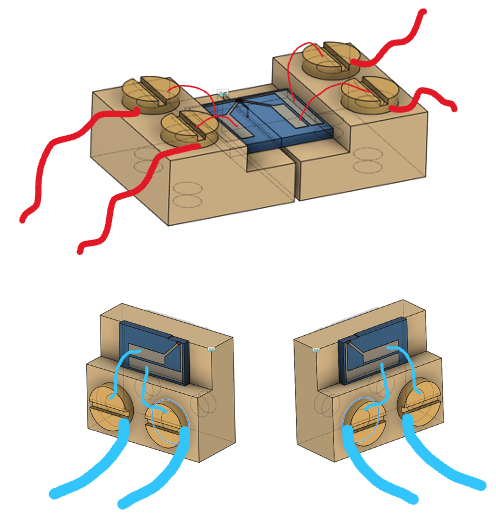
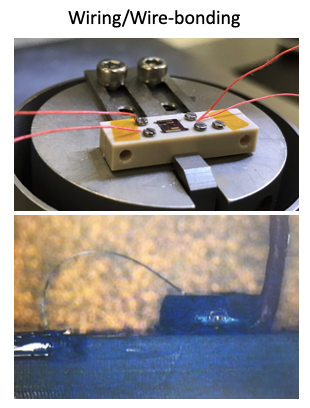
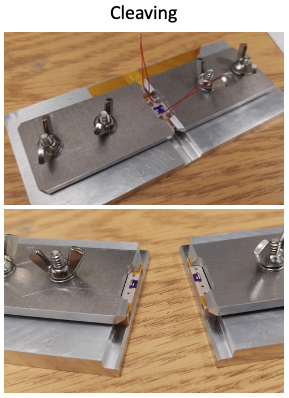
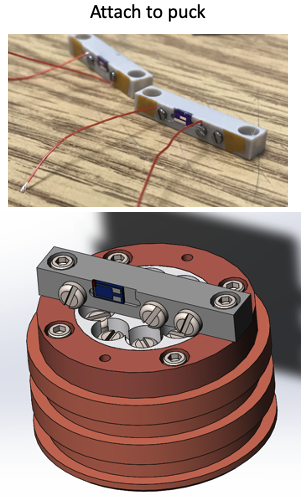
In this project, I collaborated with Markus Lid from Norwegian University of Science and Technology (NTNU). The goal was to design a sample holder for angle-resolved photoemission spectroscopy (ARPES) experiment at Lawrence Berkeley National Laboratory (LBNL). We explored multiple designs and tested the prototypes with 3D printed models as well as PEEK machined parts. The final design we arrived at allowed us to 1) attach the sample onto the holder, 2) wire bond necessary electrical connections from sample to the screws, 3) attach external wires for future connection with ARPES puck, and 4) cleave the sample in half.
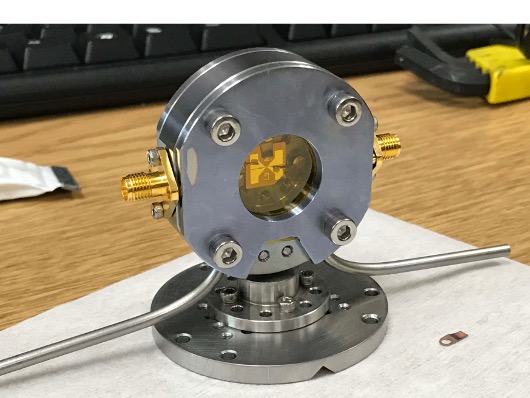
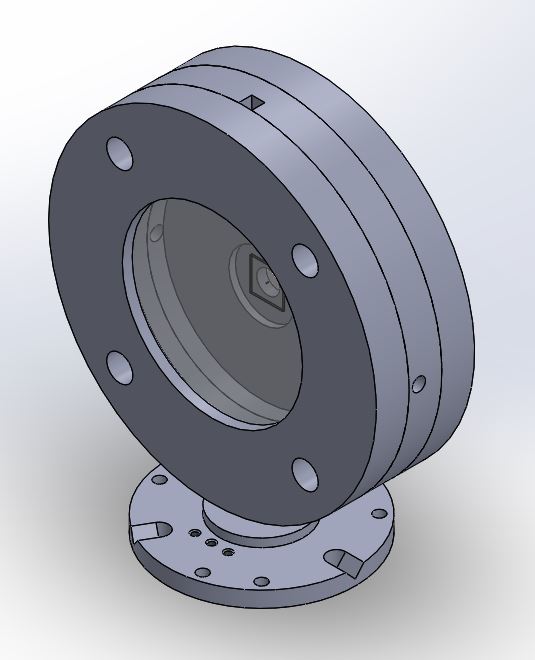
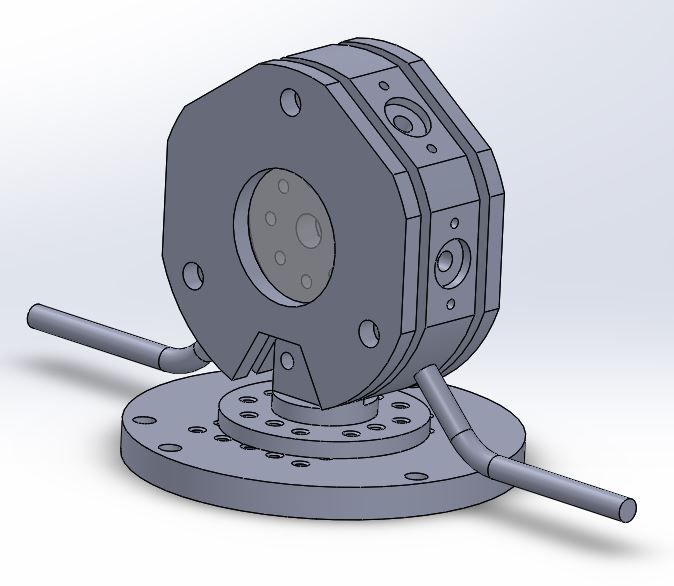
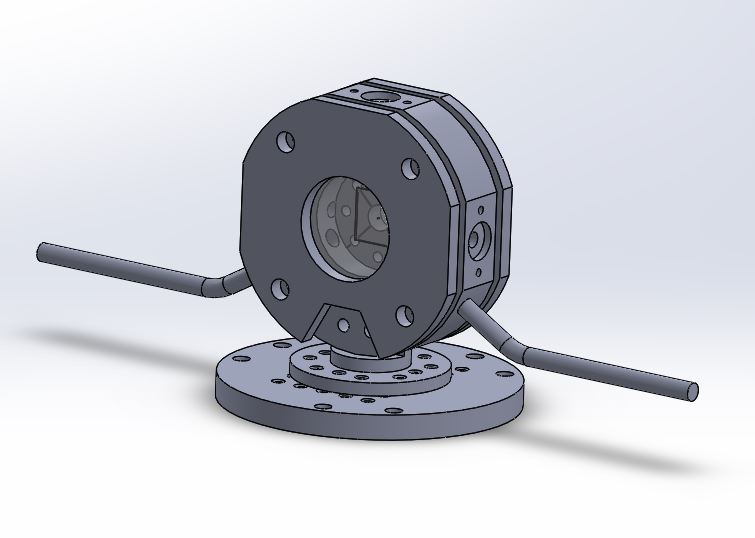
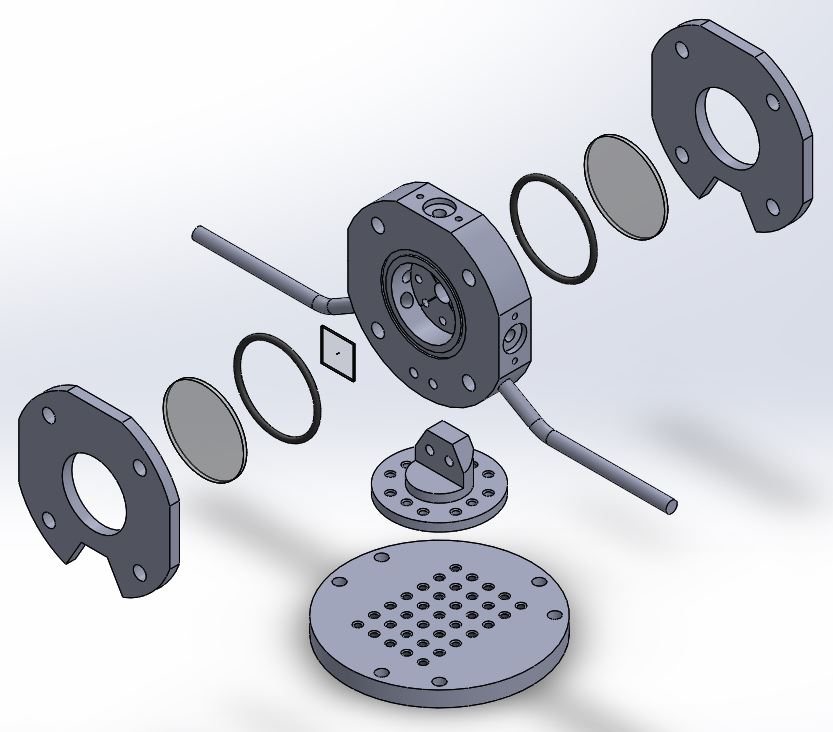
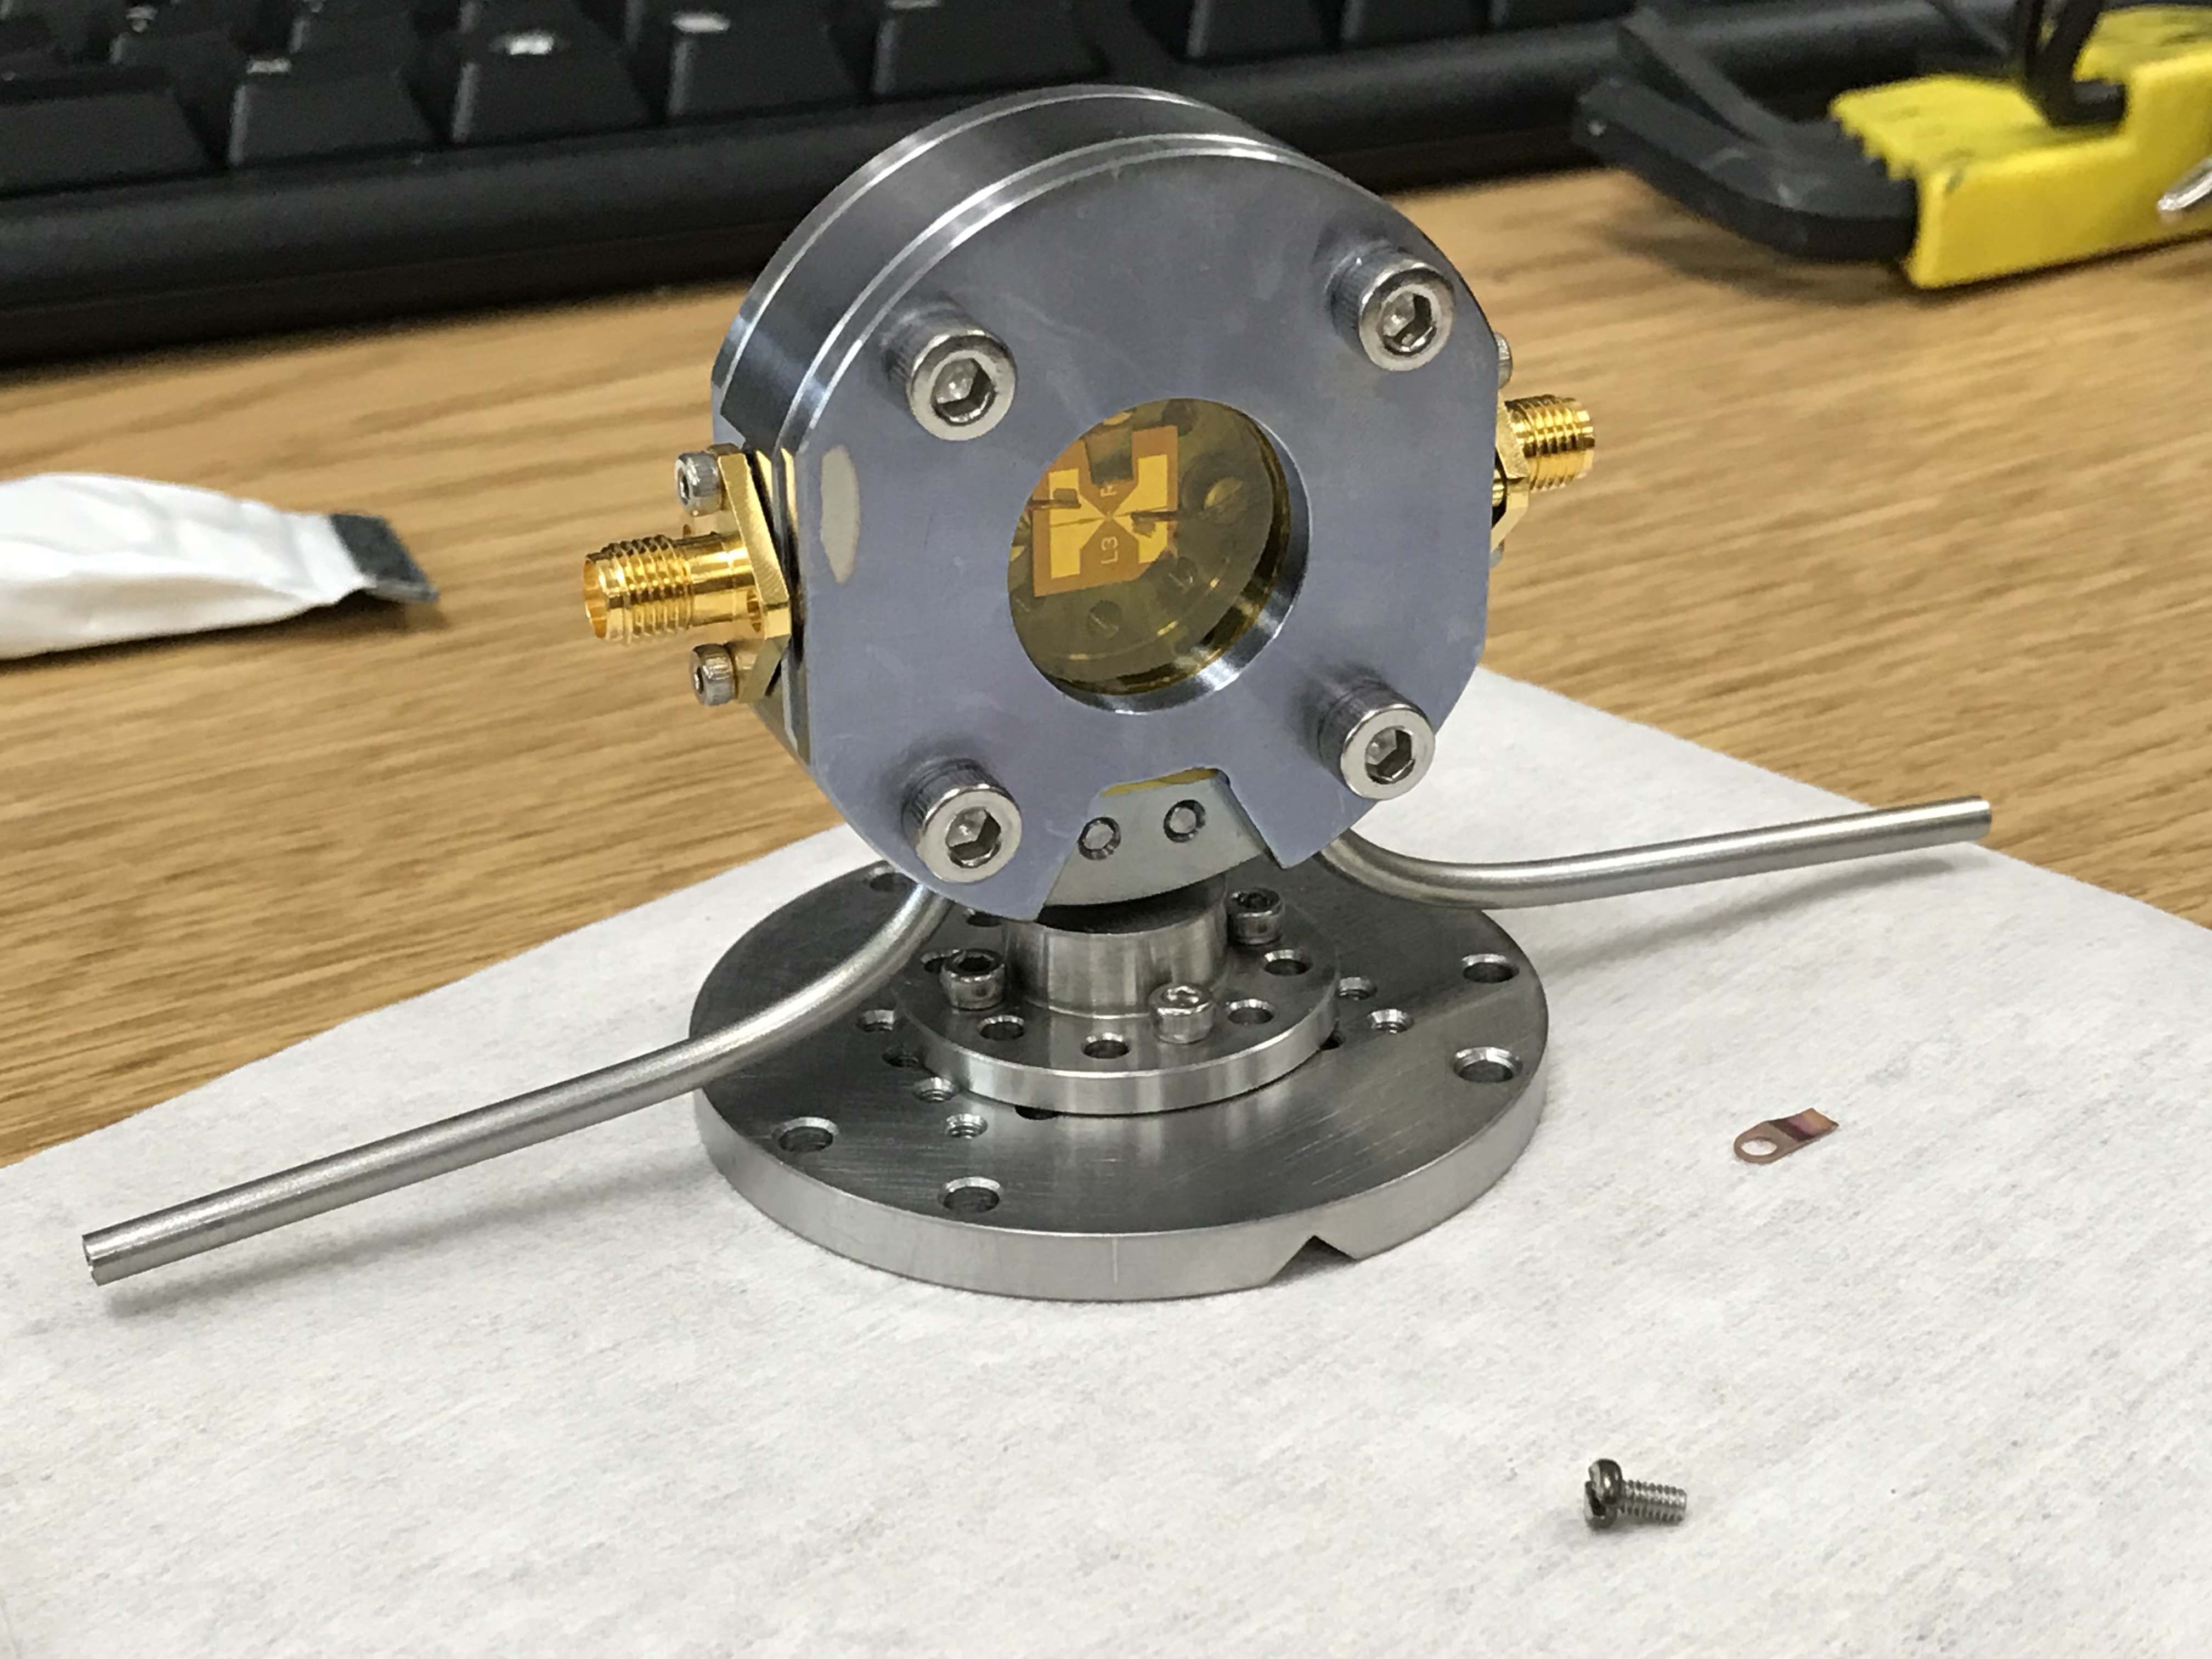
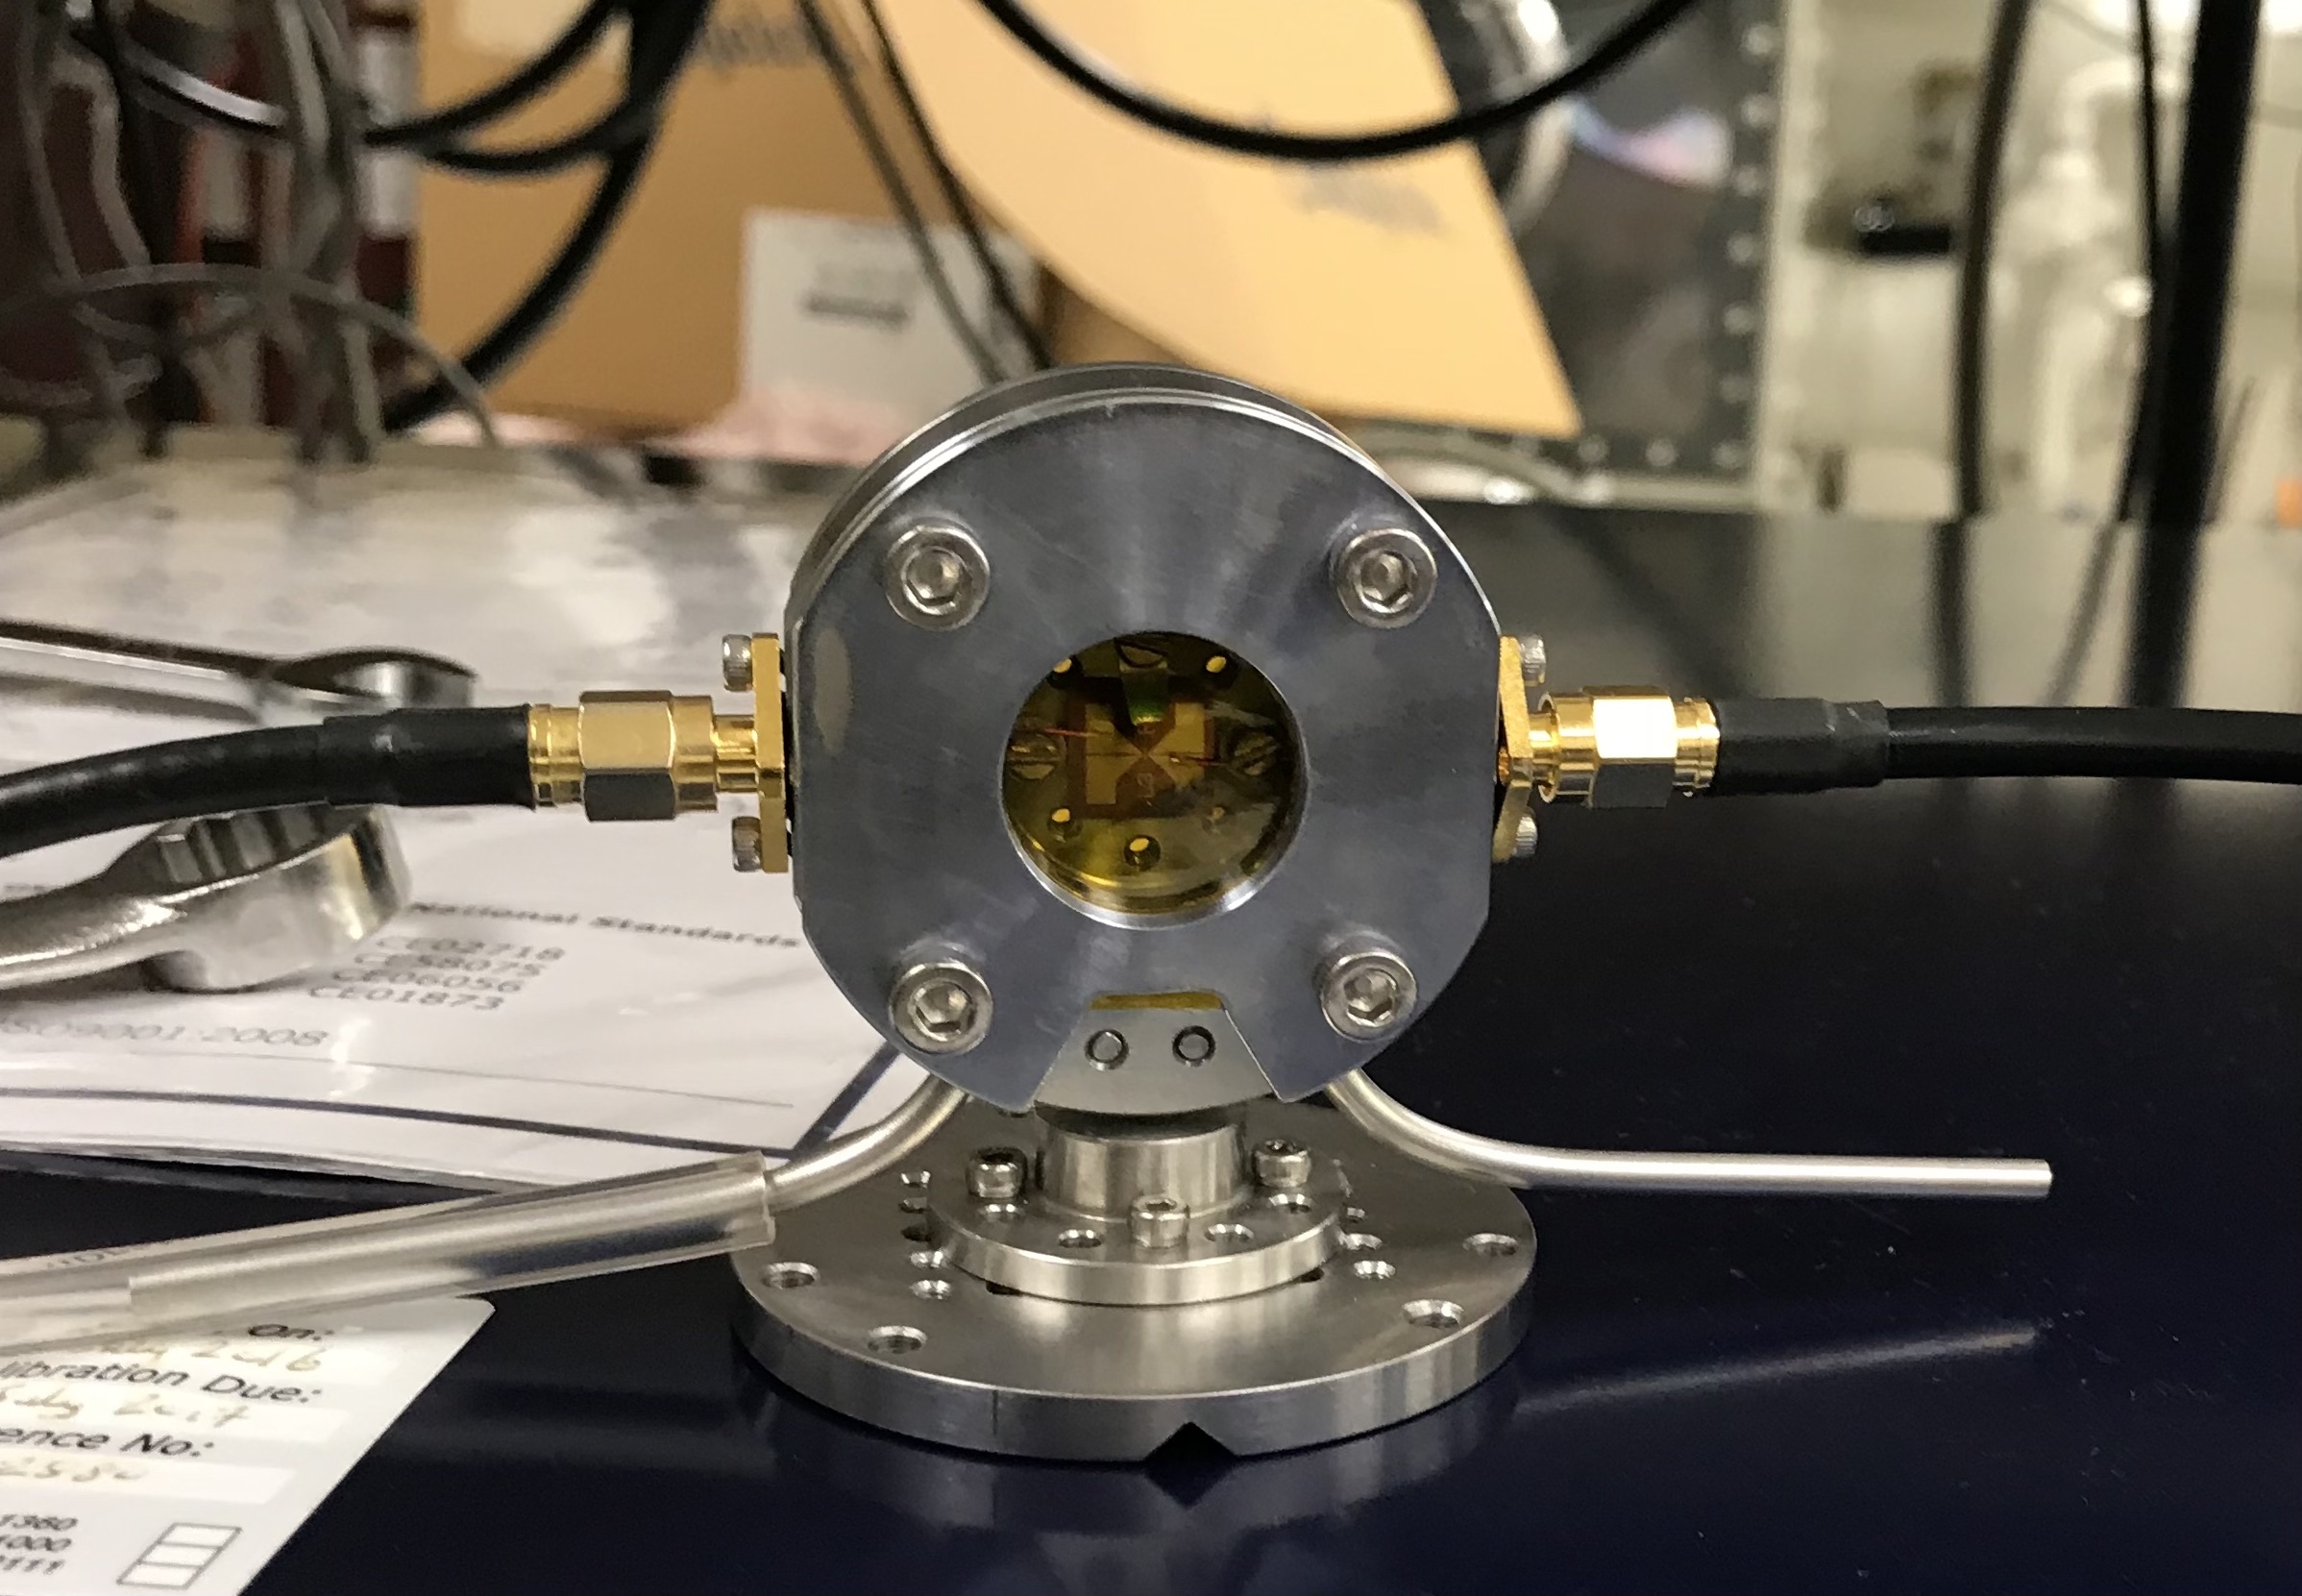
SLAC in-situ Biasing Sample Chamber Design
Sample Holder Design
Here, I designed the sample holder for SLAC in-situ biasing X-ray experiment. Several iterations were explored and the best one was selected (figure 4 and 5). The design challenges of this chamber were 1) a method to electrically contact to the sample metal pad inside the chamber, and 2) a method to fill the chamber with Ar gas to prevent sample oxidation during measurement. Figure 6 and 7 show the manufactured chamber and the chamber with sample during test run. Special thanks to Kiho Bae for feedback throughout design process and for having parts manufactured.
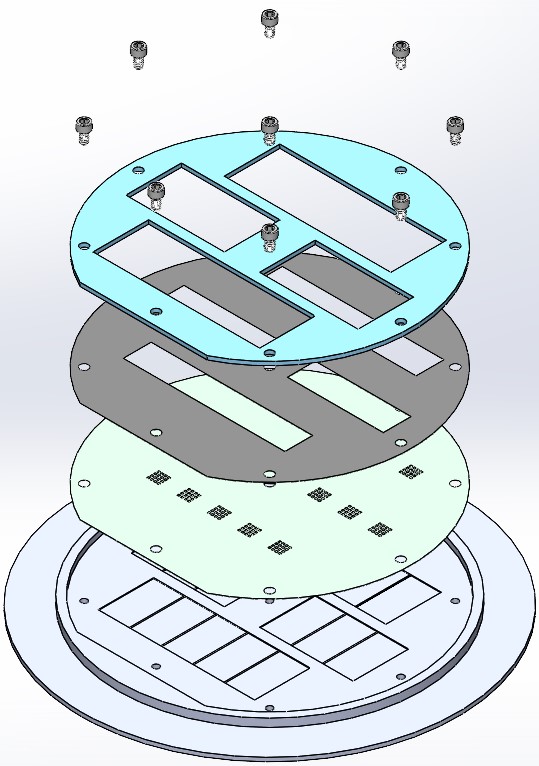
KJL Sputter Holder Design
I designed a substrate mask to be used on the KJL sputter 6” wafer holder. This allows us to pattern multiple top electrodes with size of 700x700 um2 in one 1x1.5 cm2 sample.
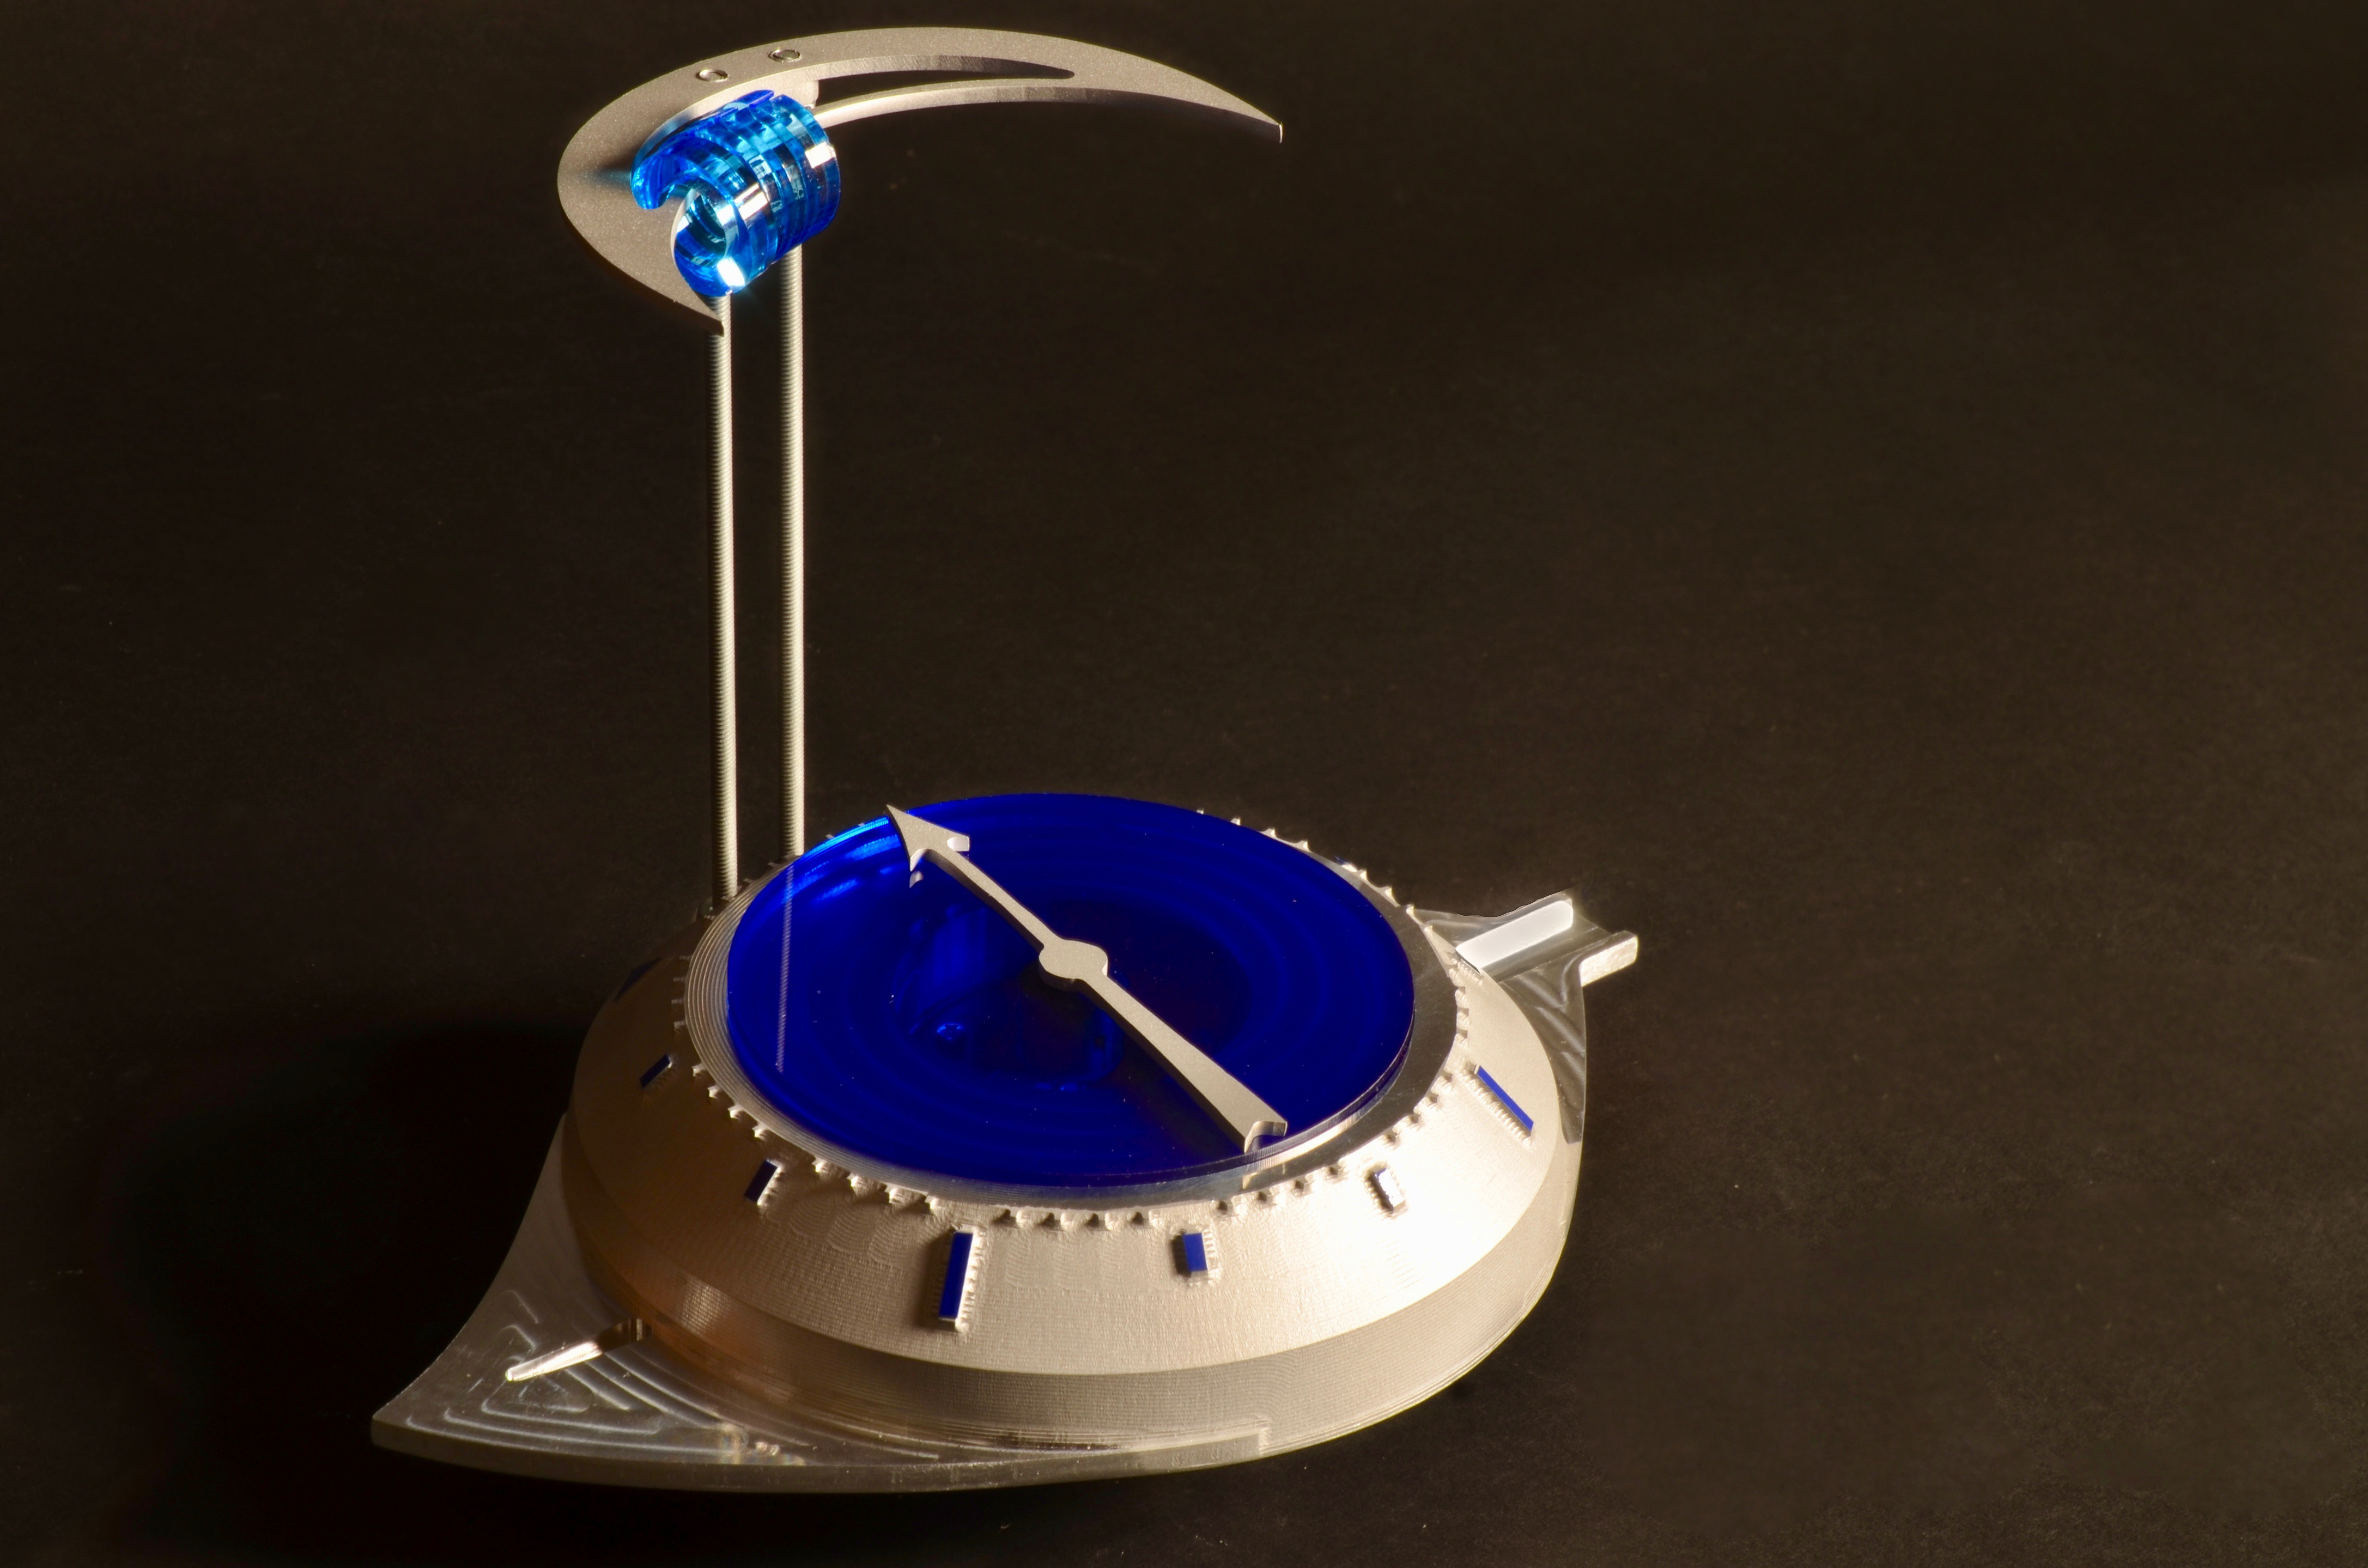
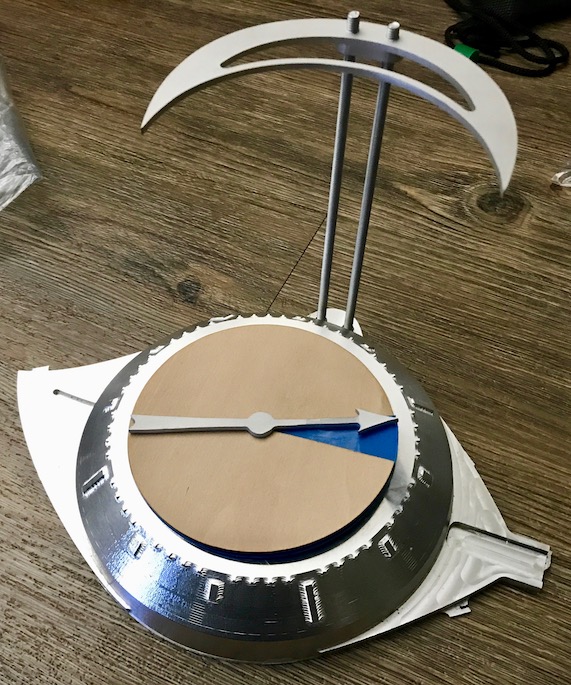
Leaf Timer
An elaborated and nature-inspired pomodoro timer
Ideas about the timer clock came from early ‘Pomodoro’ idea of tracking work and break time. In the early sketches, I was wrestling with the idea of incorporating both clock and timer together in one housing. The time tracking method such as sand (as in hour-glass), pendulum, and bamboo see-saw are also explored. Finally, I realized that the kitchen timer can be used with simplest adaptation, hence allowing a more variety in the design.
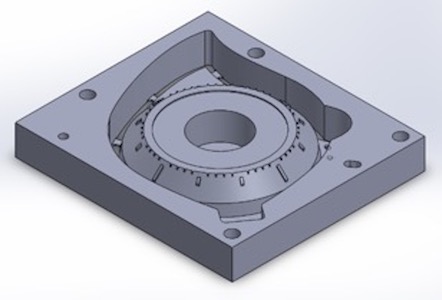
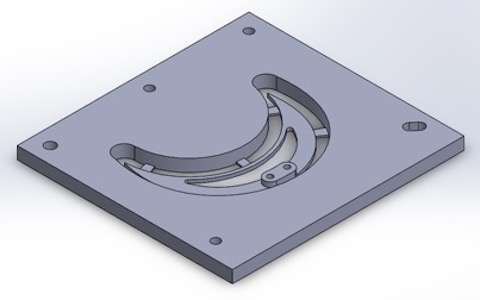
The first component is the Base. Its shape has been redesigned multiple times with the leaf shape to be my favorite. The curves of the leaf help decrease the stressfulness of the ‘time remaining’. I designed this product to have least straight lines as possible.
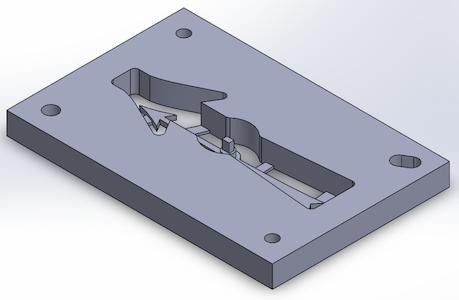
The second component is the timer hand. From several design choices, the arrow shape is chosen because of its elegance and simplicity. Challenge for this part is that it needs to have a rectangular part that will go into the ‘connector’ and therefore machining on a very thin aluminum block is not possible. Once assembled, the user will rotate this timer hand to set the time.
The third component is the upper plate. This component is a complement of this product to help users track number of work they have completed. The counter is the four circular rings hanging on the thin part of the upper plate. Whenever the users count four work period, 10 - 15 minute break is suggested.
Testing of the time-remaining visualization on the machined part.
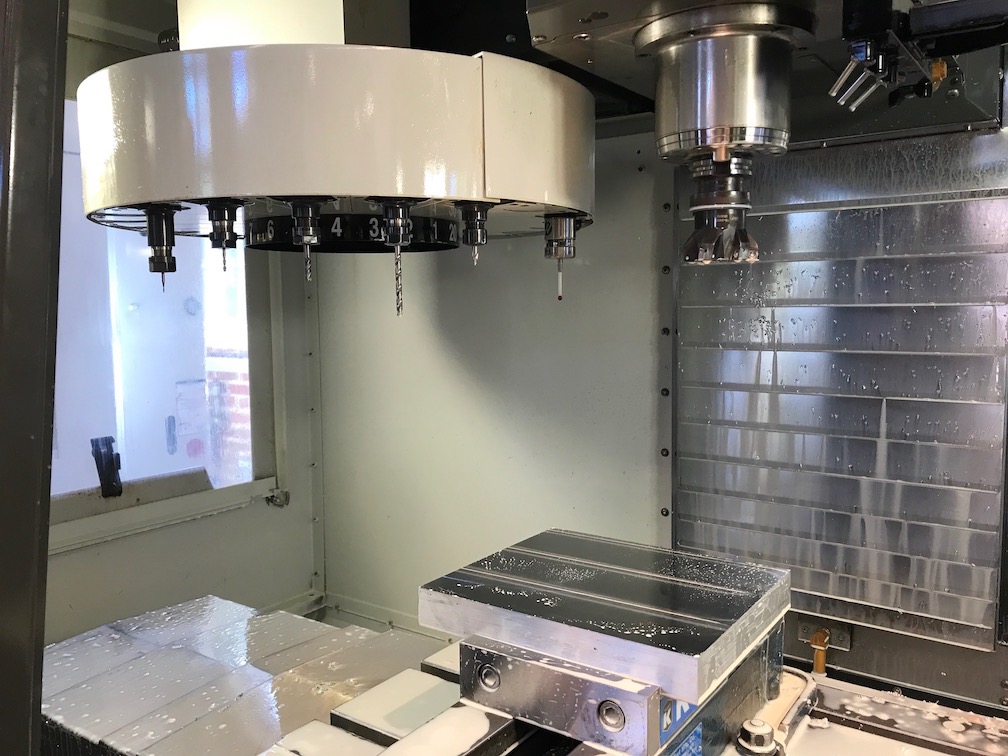
The tools in the tool holder. Tools (not all are shown here) used in this machining are 3” Shell mill for Aluminum, 1/4” center drill, Drill F (0.257”), Flat end mill 1/4” 2 FL, Flat end mill 1/8” 2 FL, Flat end mill 1/16” 2 FL, Drill no. 25 (0.1495”), 8-32 Thread former, Ball end mill 1/4” 2 FL, and Ball end mill 1/8” 2 FL.
Cutting in process.
Parts after the finishing pass and its leftover material.
CAD/CAM: Solidworks, HSMWorks
Date: Spring 2017
Class: ME 318
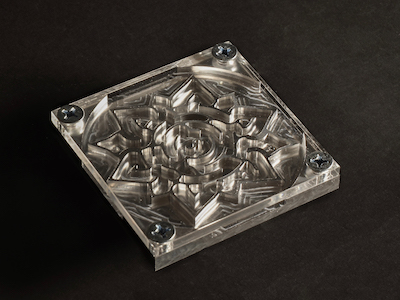
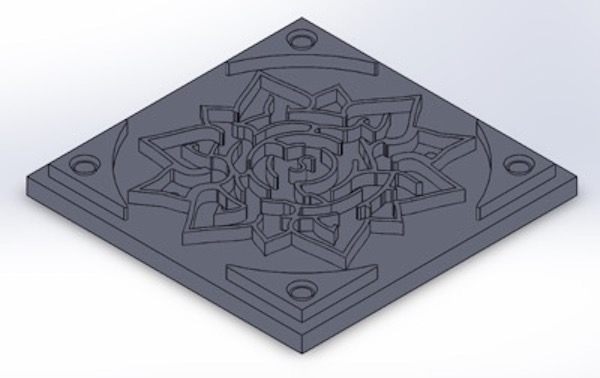
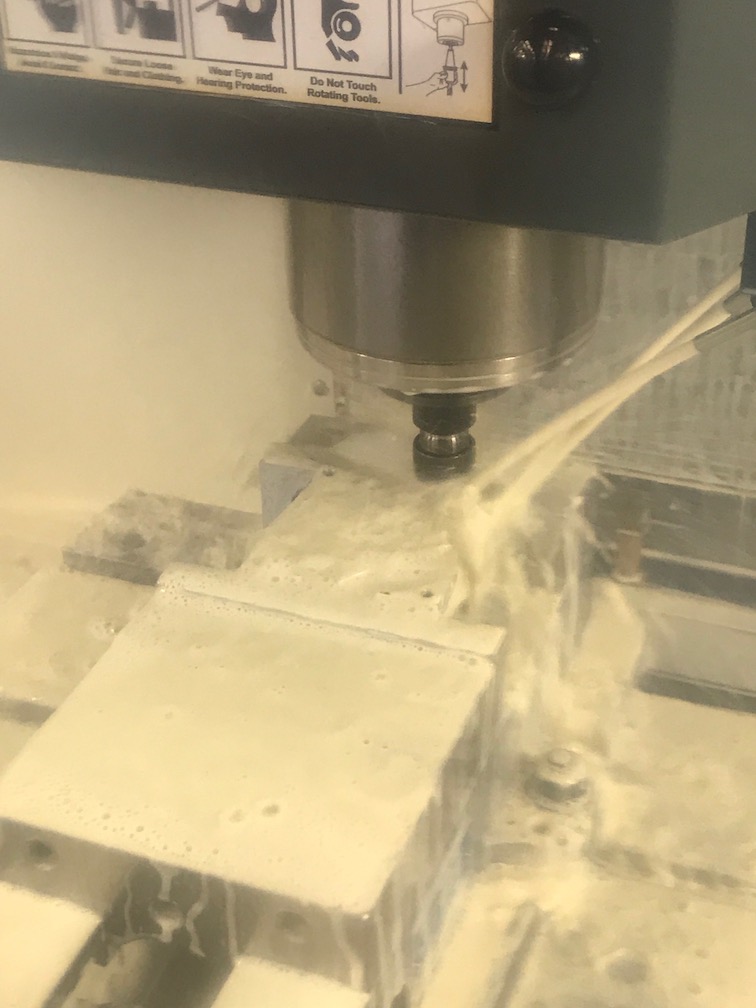
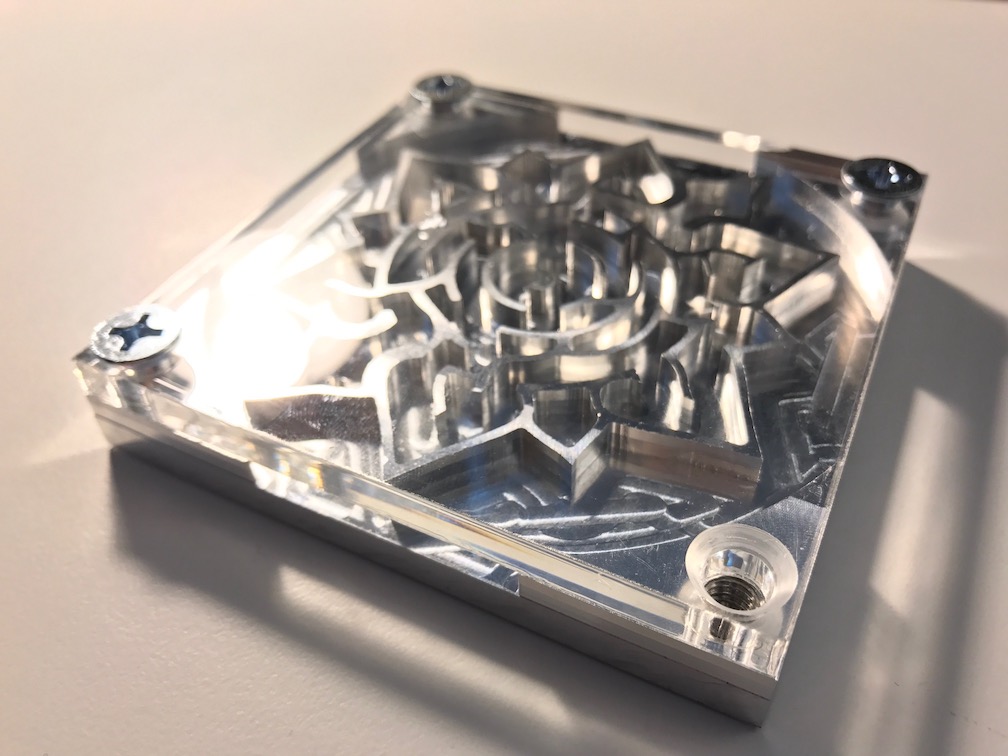
Lotus Maze
A maze inspired by lotus and Thai style pattern.
The lotus and Thai style pattern is intended to implicitly incorporate the beauty into the confusion caused by the maze. I created this design by using series of circles, arcs, and spline lines. The challenges are making sure that the ball can pass through every groove in the maze.
CAD of the maze.
Cutting in process. Tools used here are 1/4” center drill, Drill F (0.257”), 1/4"-20 Thread former, Flat end mill 1/8” 2 FL, and Flat end mill 1/16” 2 FL.
Finished cut part.
Finished part with acrylic plate and bolts.
CAD/CAM: Solidworks, HSMWorks
Date: Spring 2017
Class: ME 318
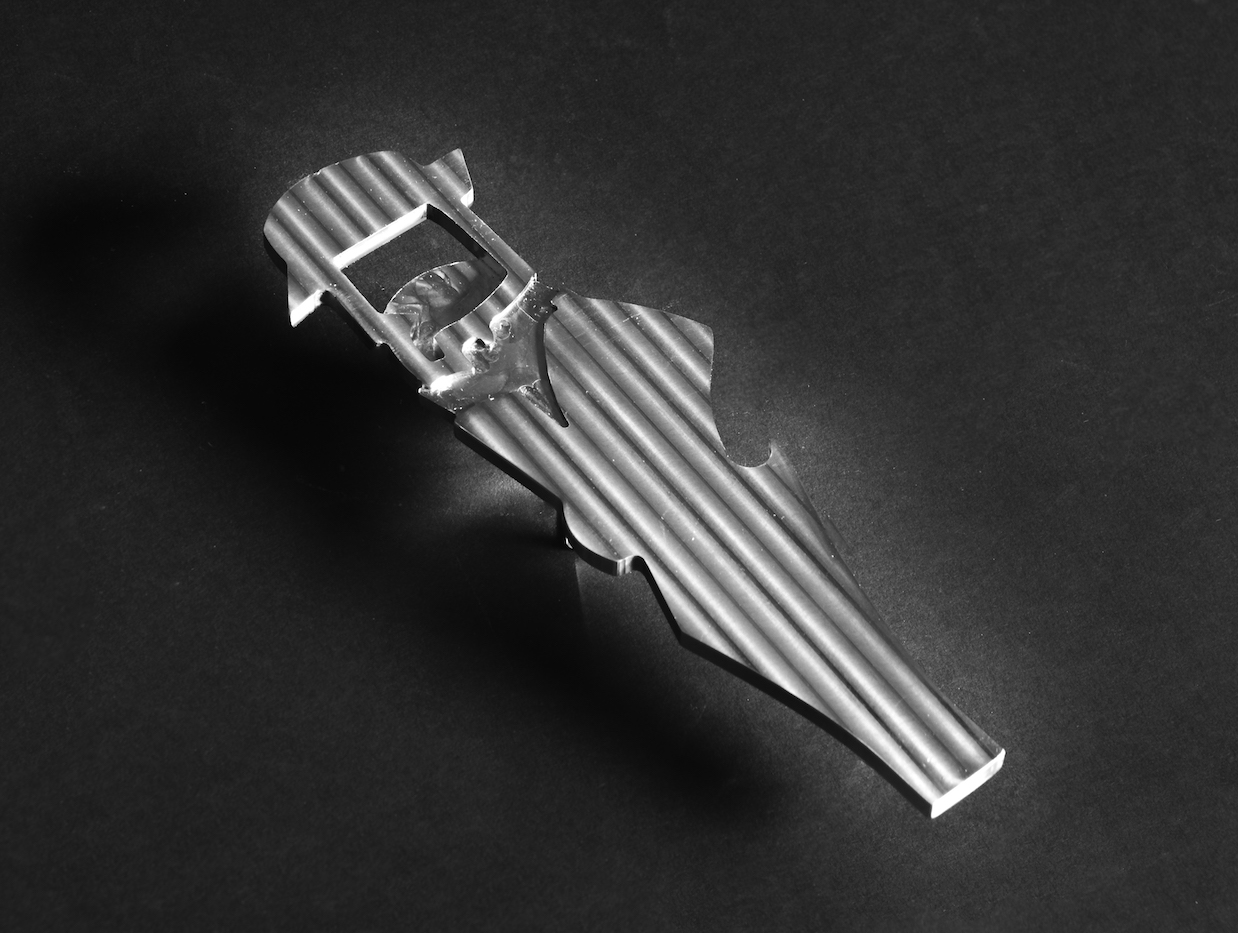
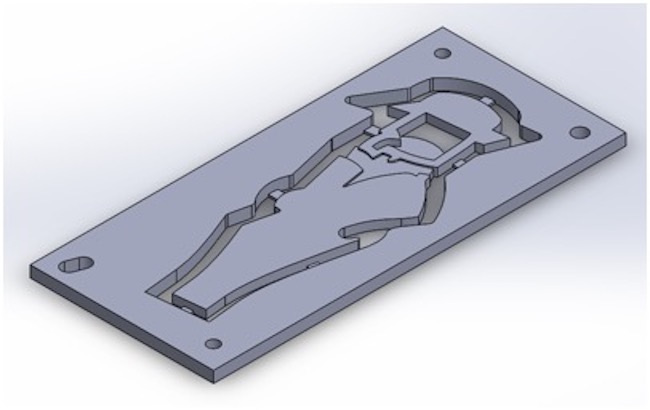
Thinking Man
A Shakespeare inspired bottle opener.
The design of ‘Thinking man’ is inspired by Shakespeare quote that say ‘Our doubts are traitors and make us lose the good we oft might win by fearing to attempt.’ In this design, I created my part to have different heights. It also took me sometime to figure out where to place tabs, its size, and details about the pin holes and bolt holes.
CAD of the bottle opener
Facing operation using shell mill.
Cutting in process.
Cutting the first pass down to a desired thickness.
Finished part.
CAD/CAM: Solidworks, HSMWorks
Date: Spring 2017
Class: ME 318
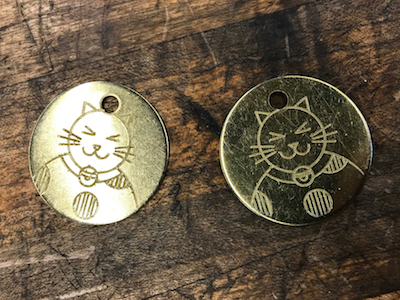
Lucky Cat
A lucky cat medallion.
I designed this (almost recursive) pattern from my cat collar bell. All engraved lines are from hand-written g-code.
CAD/CAM: Solidworks, HSMWorks
Date: Spring 2017
Class: ME 318
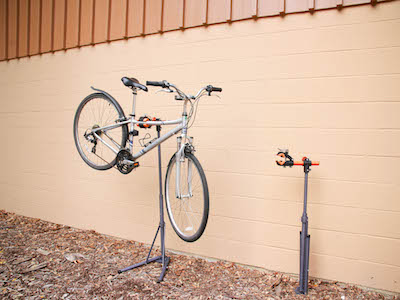
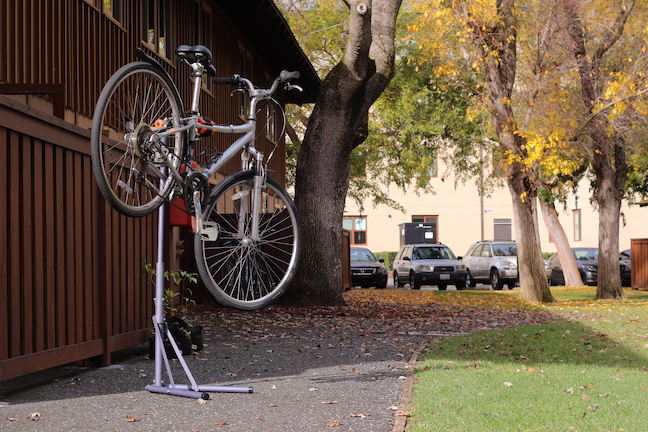
Portable Bike Stand
A lightweight foldable portable bike stand.
Design Goal: To create a bike repair stand which can be brought to any places to facilitate bike fixing.
Core Processes: Turning and Milling.
Materials: Aluminum and Delrin (Plastic).
Challenges: Adapting design to optimize product's strength and ensure that every part fits together were pretty challenging.
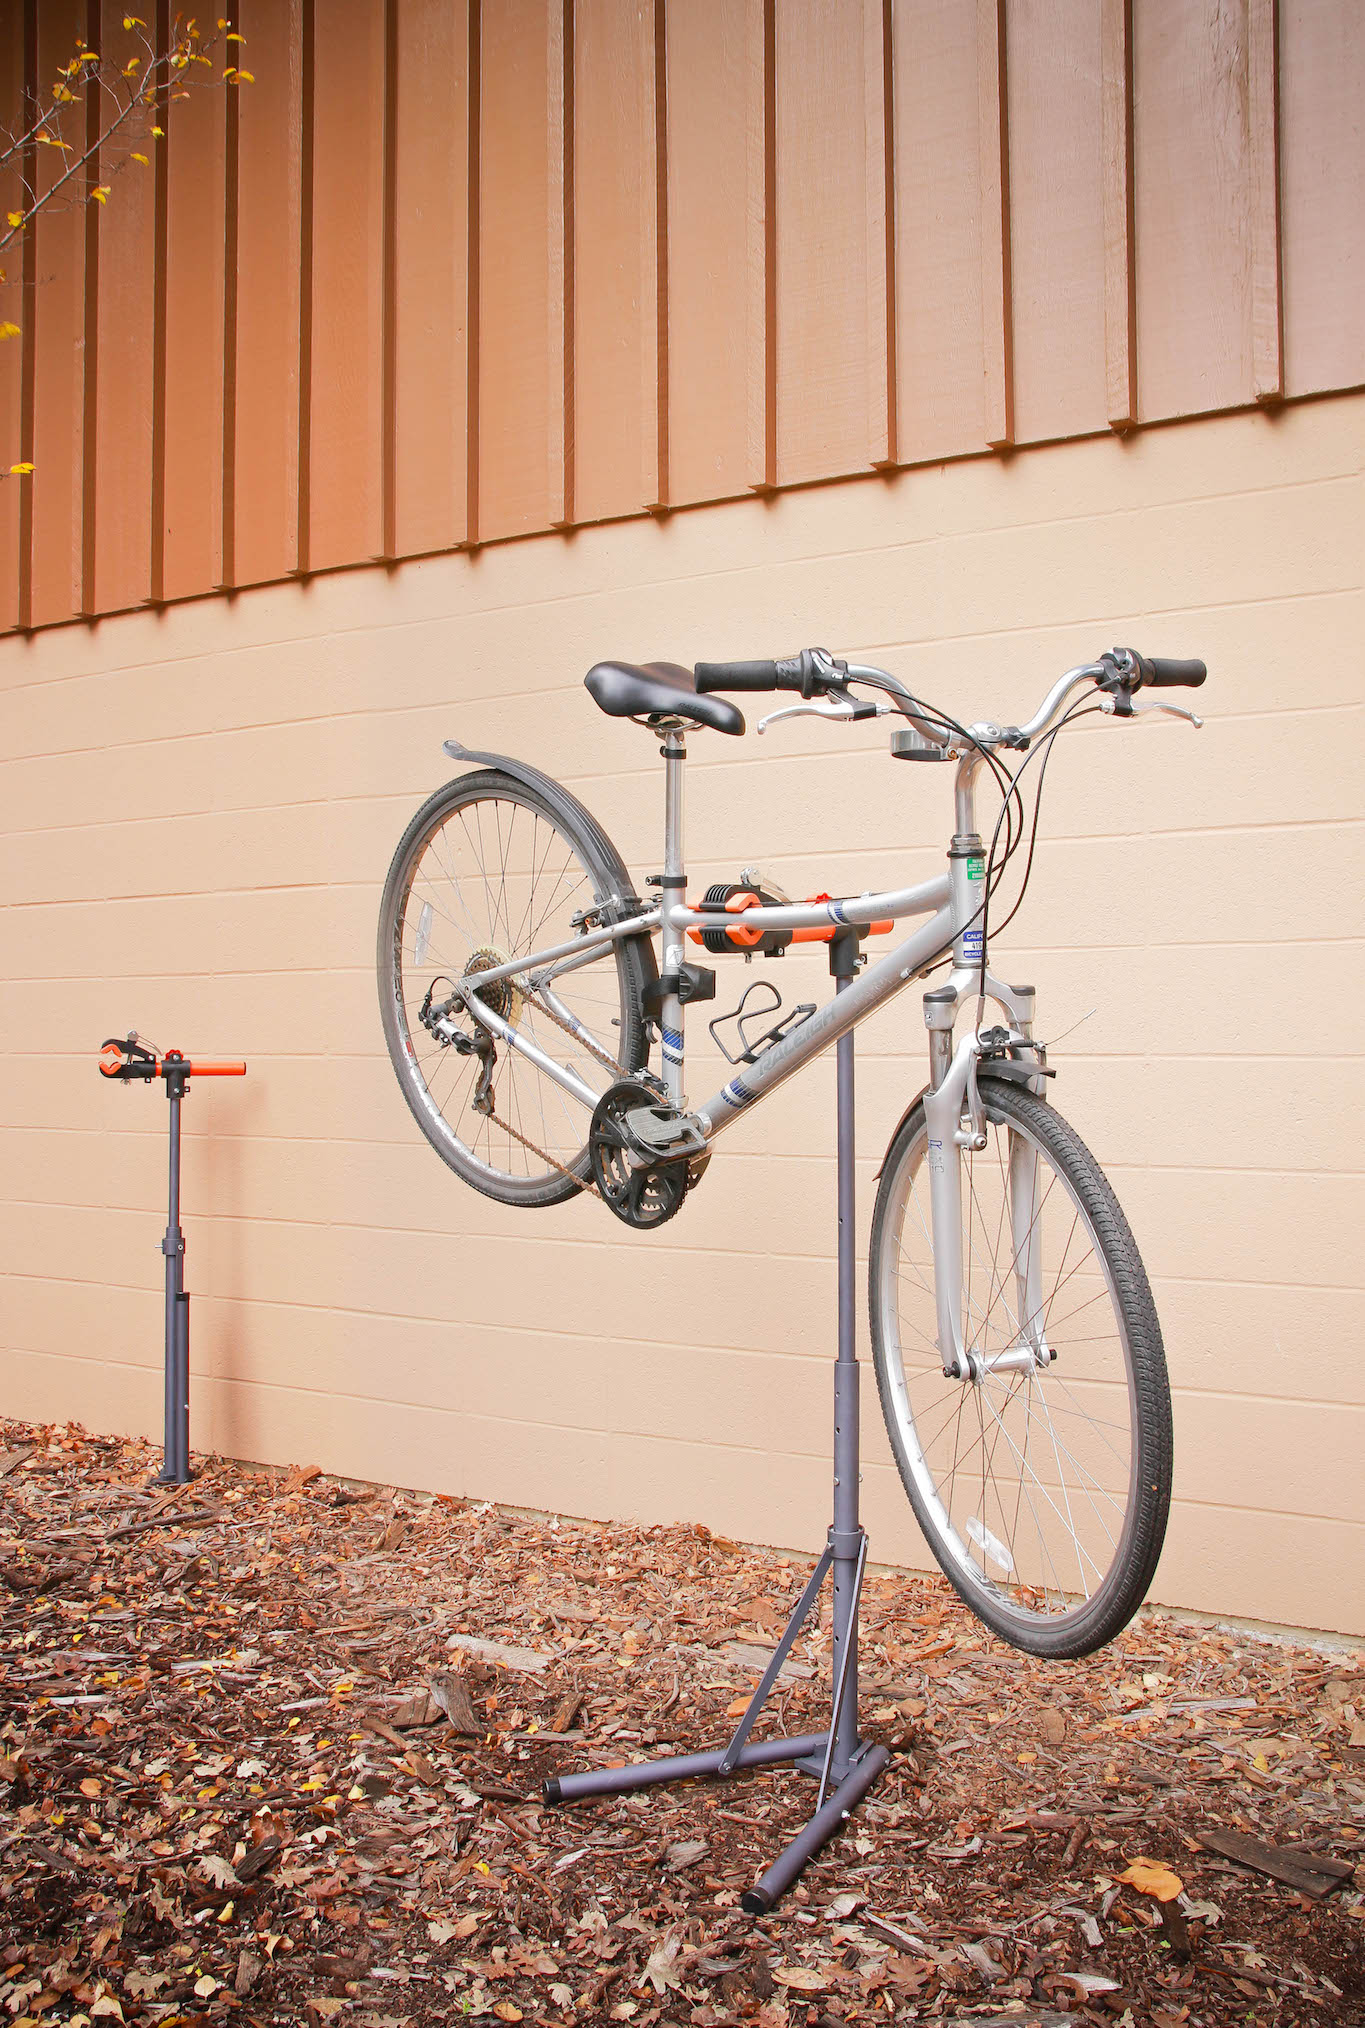
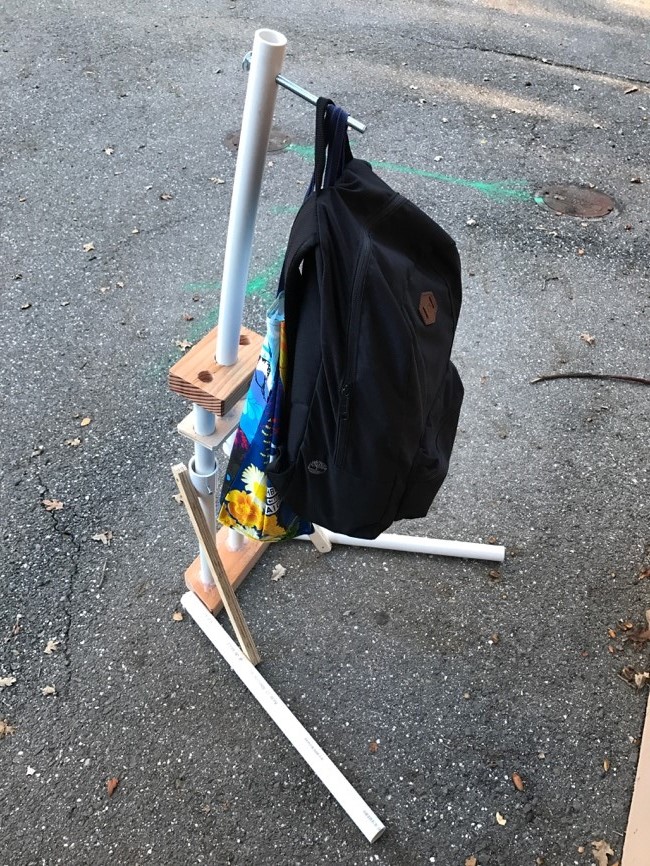
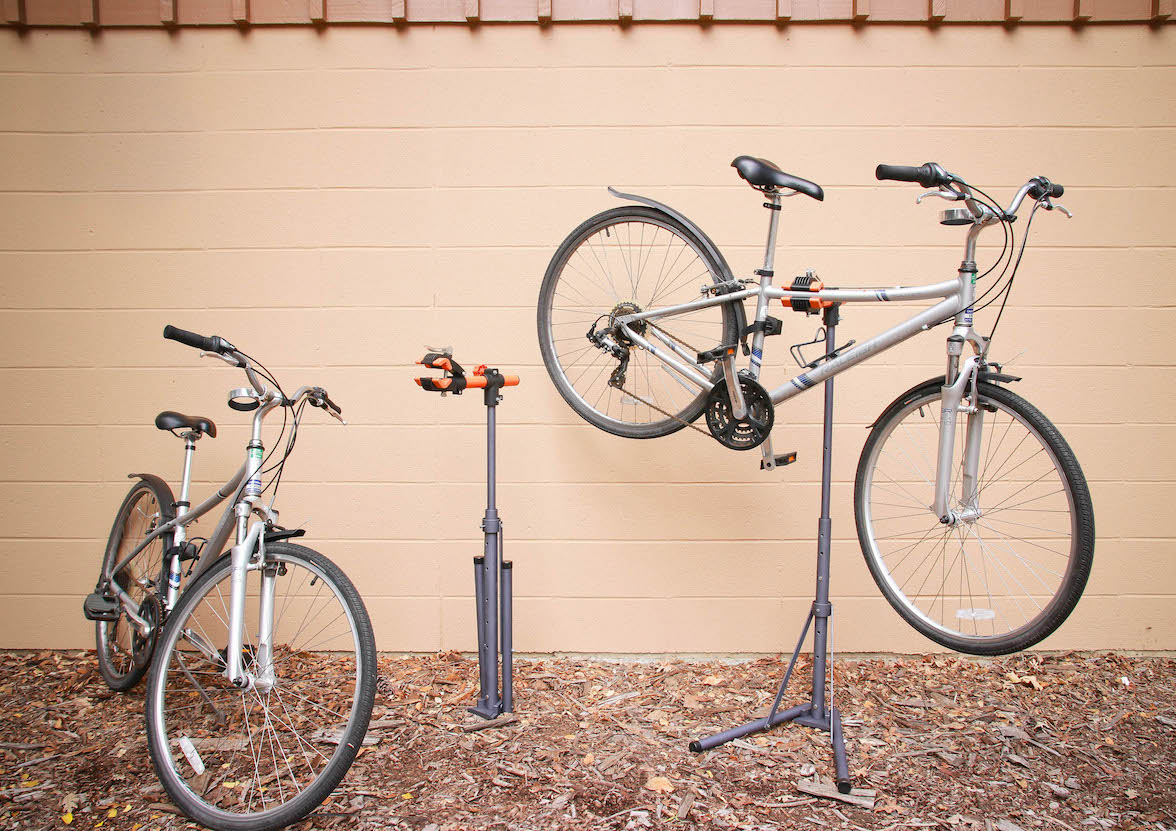
One of the early prototypes to test the concept of foldable bike stand. I did not end up using the two column design because of the strength of the structure.
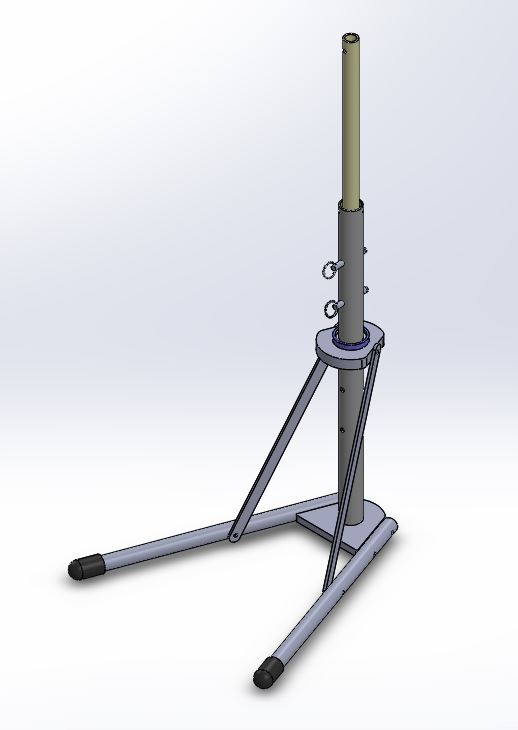
Most recent CAD design of the bike stand. With the CAD assembly, the folding mechanism is checked in Solidworks.
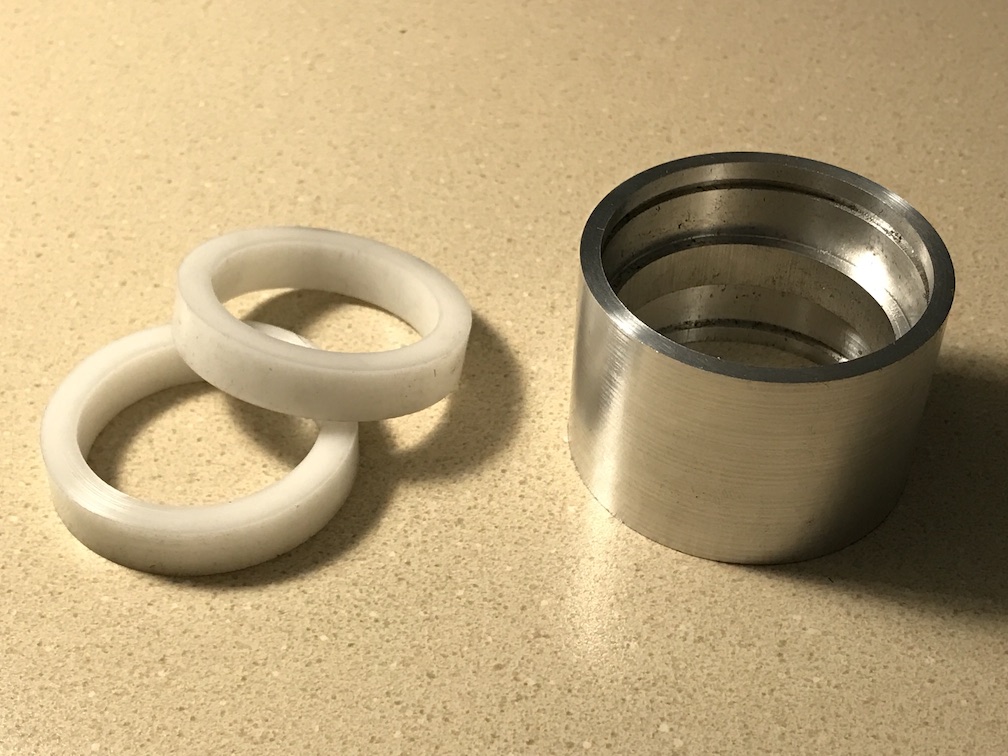
Bushing and the Delrin (plastic rings) are keys to smooth translational motion in the folding mechanism. They are machined by turning.
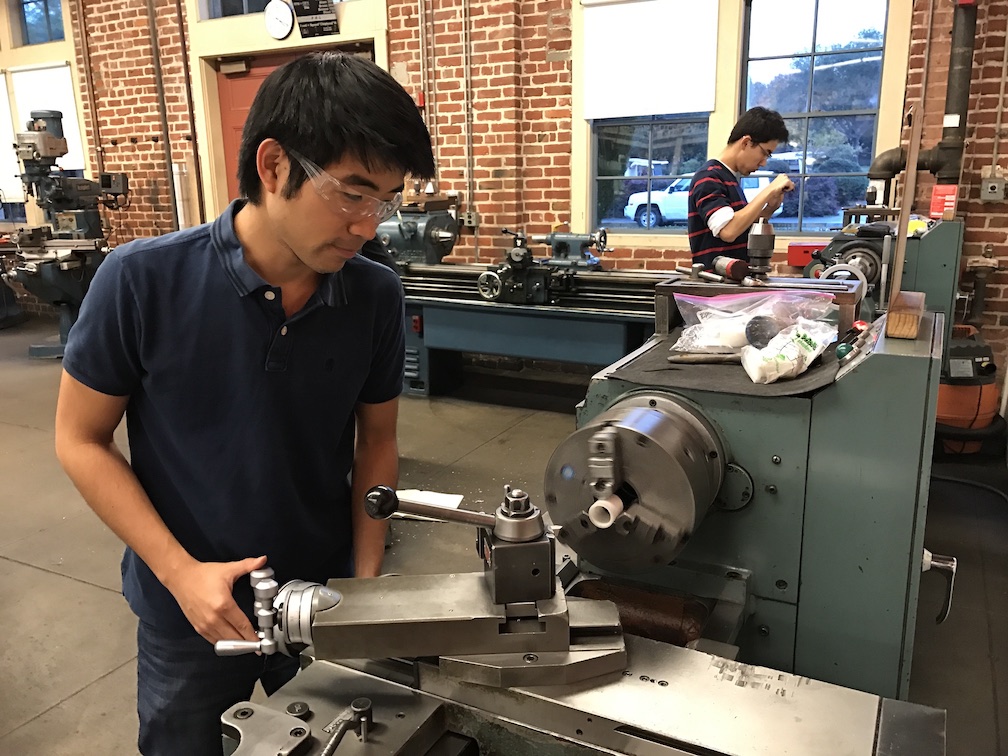
Me doing the turning operation cutting the bushing down to the desried dimension.
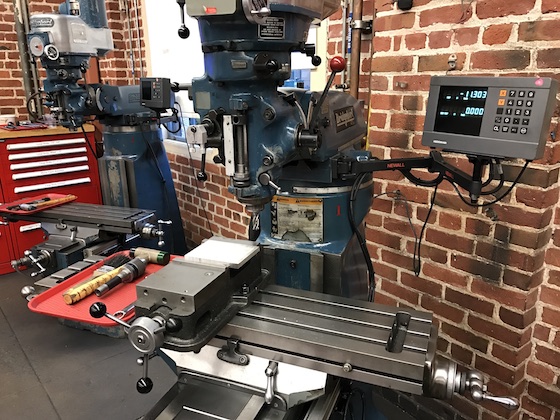
Milling station with stock set up.
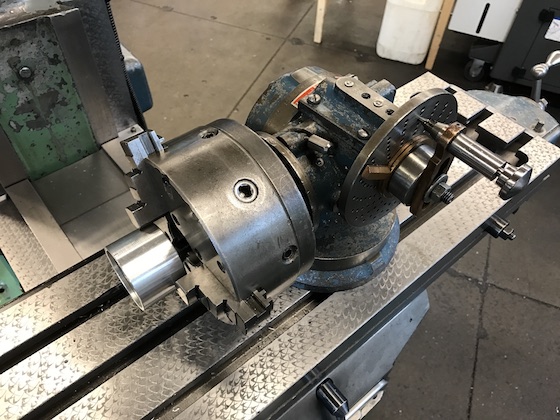
Using dividing head to drill holes at exact angles.
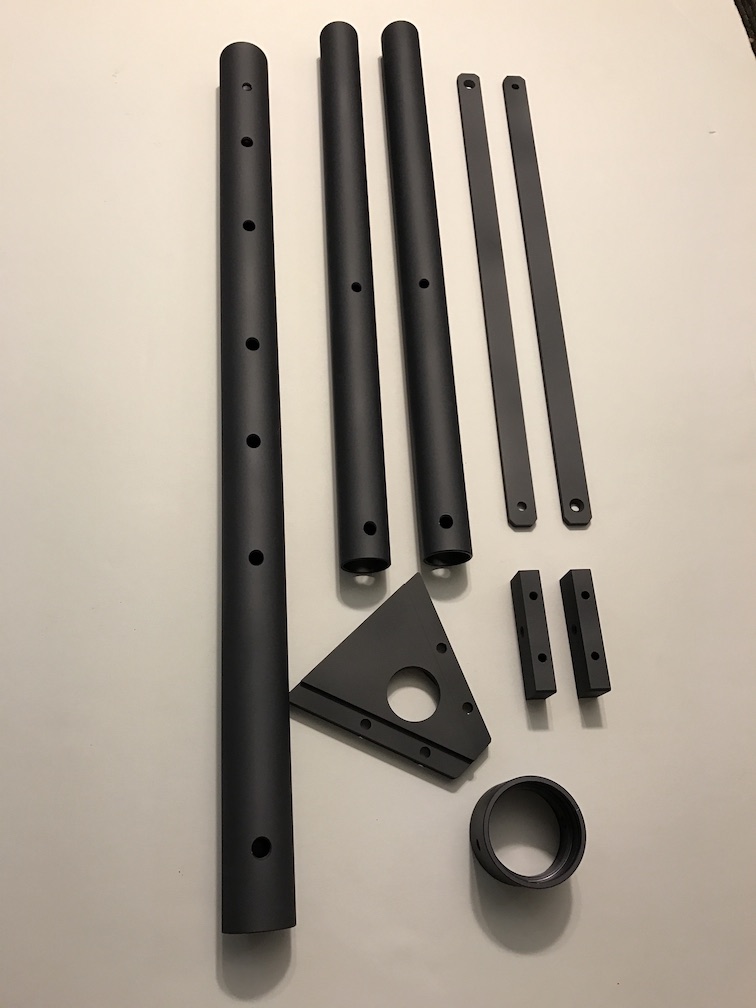
Parts after anodized in dark gray color.
Finished product.
Finished product.
CAD/CAM: Solidworks
Date: Fall 2016
Class: ME 203
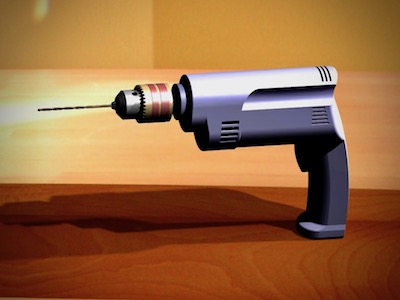
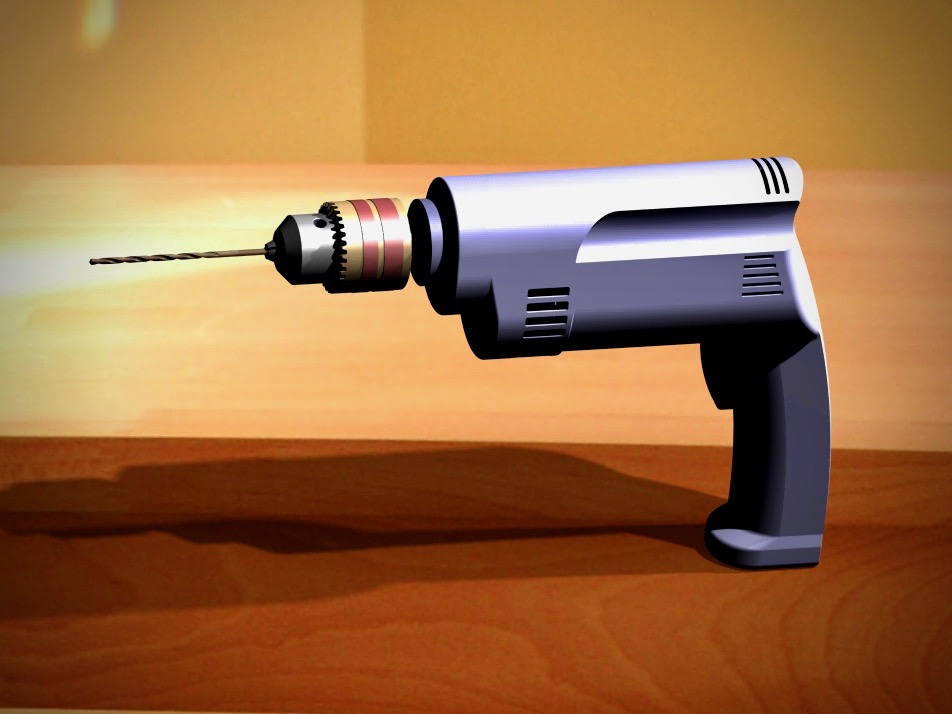
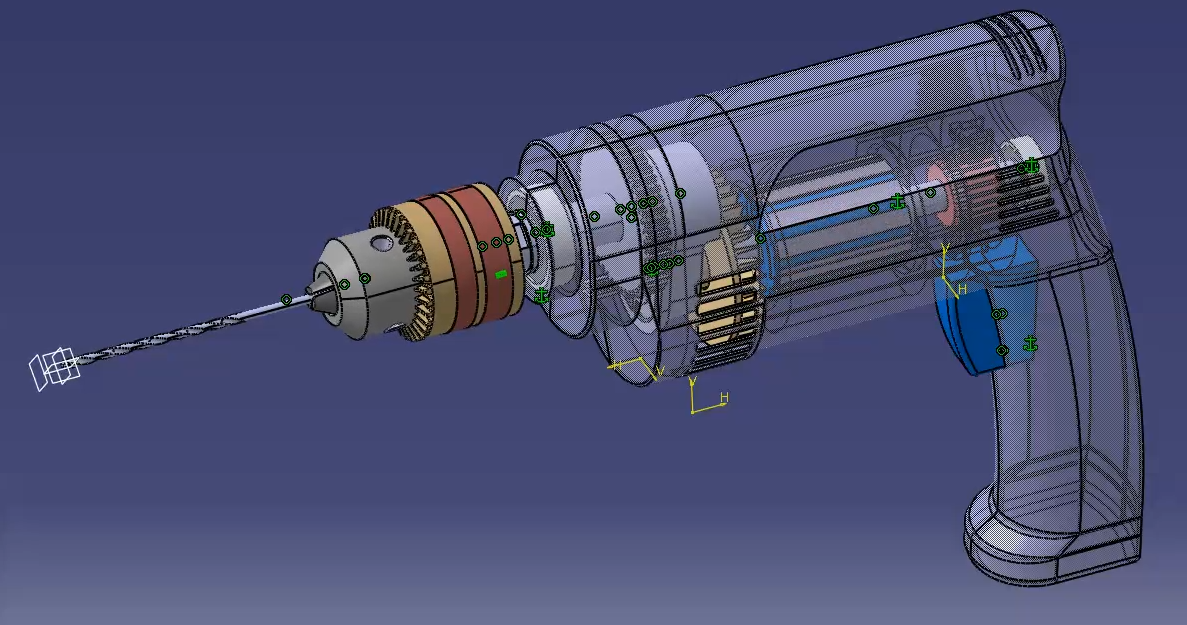
Hand Drill
Electric hand drill surface modeling.
Reverse engineering of hand drill internal parts and external surfaces. Using generative shape design in CATIA V5 to create surface modeling.