Assignment 0
Overview
Welcome to Assignment 0, our setup assignment! This assignment will not be graded, but it will be necessary for completion of Assignments 1, 2 and 3. You will be going through the steps to get access to several necessary components.
General
- Sign up for our Gradescope. The entry code is 9EZKBK. You will be submitting all homework assignments as well as project updates to Gradescope.
- Sign up for our Piazza if you have not already! This will be an essential form of communication in the course.
- Fill out the brief class check-in describing what you want to learn most in the class.
Data Access Setup
- Create a Kaggle account. Kaggle is a website with a large number of open-sourced datasets and challenges published; this will allow you to access data needed in future assignments.
- Create a PhysioNetWorks account for access to MIMIC-III clinical data.
- Follow the instructions here to complete the required training course. When you finish the training course, download your full completion report (with a list of modules, dates, and scores) in PDF form, which you will submit as part of this assignment. Please see our Piazza note for details on filling out the application.
- Continuing with the instructions, request access to MIMIC-III by submitting an application for credentialed access with your full completion report.
- Upon creating a PhysioNetWorks account, please fill out this form with your PhysioNetWorks information so we can grant you access to MIMIC-III.
Google Cloud Setup
If you are new to Google Cloud Platform (GCP), please follow these instructions. We will use GCP to run GPUs on VM instances. This setup includes creating a free trial with your personal Gmail account, upgrading to a paid account (in order to use GPUs), claiming a GCP coupon code for BIODS 220 students which will cover all GCP costs needed for the course, requesting an increase in GPU quota and setting up your deep learning VM instance.
- Set up a Google Cloud account with your personal Gmail account (note: you must use your personal Gmail because stanford.edu emails do not have GCP project privileges). It will ask you to enter billing information; however, for the assignments we will provide you with GCP credits to cover compute expenses.
- Upgrade your Google Cloud Free Tier account in order to use GPUs following these instructions.
- Claim your GCP coupon code for BIODS 220 students through the link posted on our Piazza.
- Before you can request a VM instance with GPUs, you will need to request a quota increase. (Note: as of recently, it may take up to 48 hours after creating your account on GCP to have the ability to request GPU quota.)
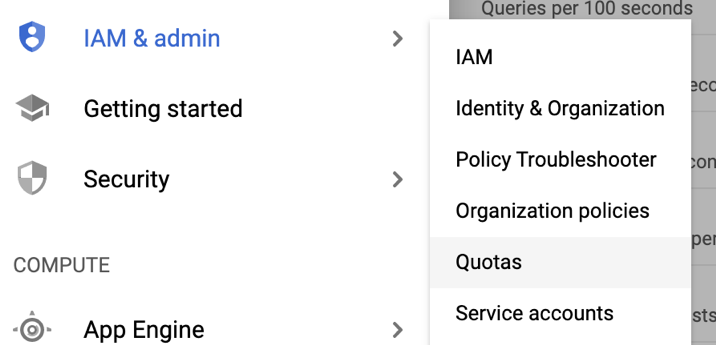
- Navigate to the quotas page for your current GCP project:
- Change the Metric filter to GPUs (all regions) and edit the quota to request for your limit to be increased to 1. After requesting, wait for a follow-up email confirming approval before continuing to next steps. This could take between a few minutes to a day, so please do this as soon as possible to to ensure there are no issues.

Note: if you do not see this interface, it may be due to changes on the platform from this week. A workaround is to attempt to launch a Deep Learning VM and clicking on quotas page to bring you to the correct page to edit quotas.
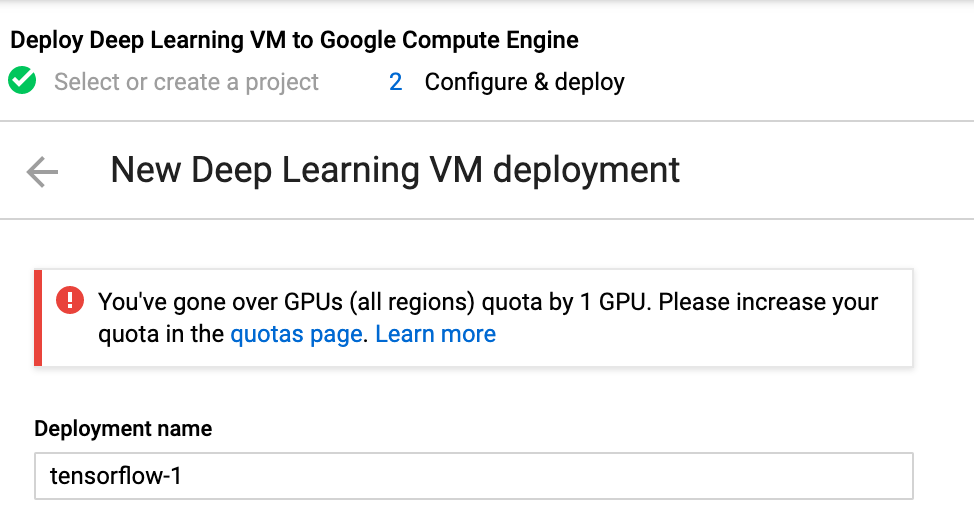
- Once you have approval for requesting GPUs, launch the Deep Learning VM.
- Fill in the Deployment name field with your preferred VM name or keep it as the default.
- For now, keep the default hardware settings (e.g. for the GPUs setting, the Number of GPUs should be at 1 and the GPU type should be NVIDIA Tesla K80). This can be changed later if assignments require more CPUs/memory or faster accelerators.
- Ensure that the Framework is TensorFlow Enterprise 2.1 (CUDA 10.1).
- Select the checkbox for Install NVIDIA GPU driver automatically on first startup.
- Select the checkbox for Check the box Enable access to JupyterLab via URL instead of SSH.
- Click Deploy at the bottom of the page. Wait for it to finish deploying (should take only a few minutes).
- Lastly, STOP the VM instance, since you will not be using it for the rest of this assignment.
- Configure Networking
- Click into the stopped VM instance, and click EDIT.
- Select the checkboxes for Allow HTTP traffic and Allow HTTPS traffic.
- Click Save at the bottom of the page.
- Go to VPC network > Firewall, and click CREATE FIREWALL RULE.
- Give any name, e.g. "biods220".
- In the Targets field, select All instances in the network.
- In the Source IP ranges field, enter "0.0.0.0/0".
- In the Protocols and ports field, select Specified protocols and ports, select the tcp checkbox and enter "7000-9000".
- Click Create at the bottom of the page.
- Become familiar with using your VM instance
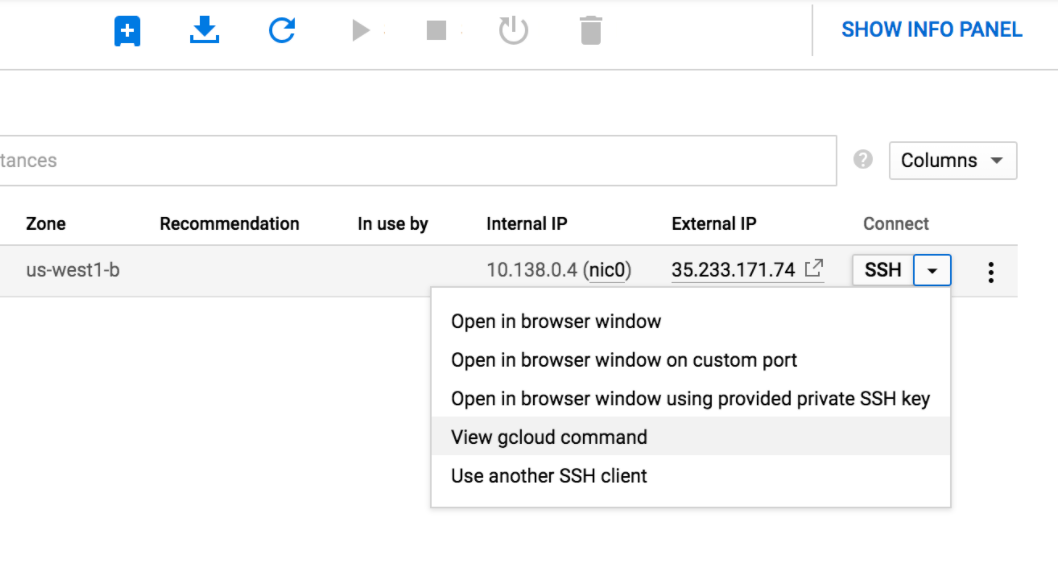
- On your local device, install the Google Cloud SDK that is appropriate for your own local device platform. The following are useful commands often used with the GCloud SDK.
- The Secure Shell (SSH) command provides a secure encrypted connection between two hosts and is used for cloud machine access. Once you have started your VM instance, you can SSH into it by pasting and executing the given gcloud command in your local terminal:
- Here is another helpful gcloud command that allows you to transfer a file from your local to your VM instance:
gcloud compute scp <FILEPATH> USERNAME@YOUR_VM_NAME:~
- Become familiar with tmux (Terminal Multiplexer). This will prevent training sessions from getting disrupted, and you can virtually have multiple terminal windows open, all doing completely separate tasks.
- Start a new session with the default name (an integer):
tmux - Detach from a session:
ctrl - b - d - Start a new session with a user-specified name:
tmux new -s [name] - Attach to an existing session:
tmux a -t [name] - Switch to a session:
tmux switch -t [name] - List sessions:
tmux ls - Kill a session:
ctrl - b - x - Split a pane horizontally:
ctrl - b - " - Split a pane vertically:
ctrl - b - % - Move to pane:
ctrl - b - [arrow_key]
- Start a new session with the default name (an integer):
IMPORTANT: Ensure that the instance is stopped so you are not charged! To do this, go to Compute Engine > VM instances, select the checkbox next to your VM instance and click STOP at the top. It will stop after a few minutes.
