CS 106A: Programming Methodology (Java), Summer 2016
Installing Java and Eclipse
last updated 2016/03/29
Short Instructions: (see below for more details)
| 1. Install Java JDK 8 | 2. Install Eclipse |
|---|---|
|
Download the installer and then run it to install Java. |
Download and unzip the archive, then run Eclipse. |
After completing these steps, jump down to the Running Eclipse section.
If you are having problems with your Eclipse, check here: Common Eclipse errors and issues / troubleshooting
Detailed Instructions:
In CS 106A, we'll be using the popular Eclipse editor to build our programs. Stanford has built a customized version of Eclipse that includes special Stanford features to tailor it specifically for CS 106A. Please follow these instructions exactly and do not skip steps! If you run into any trouble installing Eclipse, email the instructors, whose contact info is on the Staff page.
-
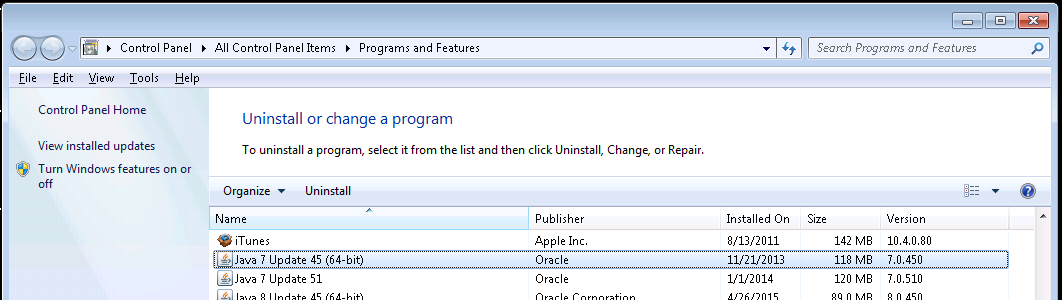
(Windows-only) Uninstall old Java from your system, if present
Many Windows systems have an old/incompatible version of Java on them that was installed alongside some other software on your computer, such as iTunes. Before installing Java for CS 106A, we strongly recommend that you remove any older copies of Java that may be installed on your system. To do so:
- Start Menu → Control Panel → Programs and Features
-
Remove/uninstall any occurrences of Java/J2SE Runtime Environment, Java SDK, or Java Update.
-
Download and install Java SE Development Kit ("JDK") v1.8
-
 Java JDK installer for Windows
(64-bit)
Java JDK installer for Windows
(64-bit)
-
 Java JDK installer for Mac OS X
-
Java JDK installer for Linux
(64-bit)
-
 other operating systems
-
Install JDK. After clicking the appropriate link above, a prompt may appear to ask you whether you want to run or save the file. Click Run to begin the download and installation process. If a subsequent security warning dialog box appears, click Run (or Yes) to continue with the installation.
The Java JDK installation program should begin. Do a Typical installation, and follow the rest of the instructions given in order to complete your installation. You can just click Next or Finish at each screen that pops up.
-
-
Download Stanford Eclipse.
Before you begin to write your first program, you will need to obtain a copy of Eclipse from the CS 106A course website. We use a customized version of Eclipse, so you must download it from our link and not from the default eclipse.org.
-
 Download Eclipse for Windows
(64-bit)
Download Eclipse for Windows
(64-bit)
-
Download Eclipse for Mac OS X
-
Download Eclipse for Linux
(64-bit)
-
other operating systems
Save the file to somewhere on your hard drive. This may take a while as the file being downloaded is rather large.
-
-
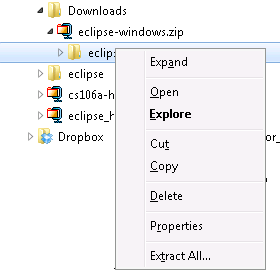
Un-ZIP / extract the contents of the Eclipse ZIP file.
On Mac, double-click the downloaded ZIP file to open and extract it. On Windows, right-click it and select Extract All....
You can extract Eclipse to anywhere you like. On Mac, the common place to put Eclipse is in the Applications folder. On Windows systems, a typical place is C:\Program Files.
-
Create a shortcut for launching Eclipse. (optional)
After extracting Eclipse, you can then create a shortcut for easy access to the program.
Use your operating system's file browser/finder to navigate to the directory where you extracted the Eclipse files, such as Applications / Eclipse (Mac) or C:\Program Files\eclipse (Windows).
Windows: Locate the eclipse.exe (Windows) file. Right-click-drag it to your desktop and then select the option Create Shortcut Here.
Mac: Open the Eclipse folder (the one you just dragged into the Applications folder), and drag the square Eclipse icon to your dock.
-
Run Eclipse.
Open Eclipse by double-clicking on the eclipse or eclipse.exe icon from the shortcut you created in the previous step.Mac: If you see an error that says Eclipse "can't be opened because it is from an unidentified developer," right-click on the Eclipse icon and select Open instead. You will be able to open Eclipse without right-clicking from now on.
After completing these steps, your Eclipse should be installed! Now jump down to the Running Eclipse section of this page.
Running Eclipse
At this point you should have Eclipse installed and working on your computer. When you run eclipse for the first time, you may get a screen that looks like this:
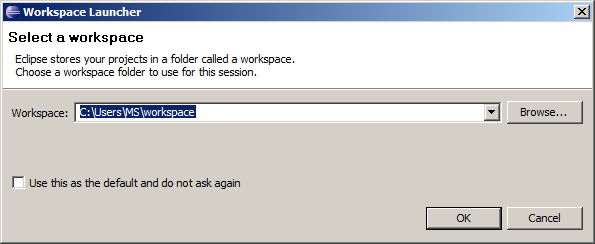
A workspace is just a directory in which Eclipse will place your projects. In 106A you won't have to make any new projects from scratch. We will always give you skeleton projects for your assignments, so you don't need to worry about where the workspace is, so the suggested location is fine. Check the "Use his as the default and do not ask again" checkbox, and then click OK. Once you do, Eclipse will start running and then bring up a screen that looks like this (it may look slightly different on the Mac):
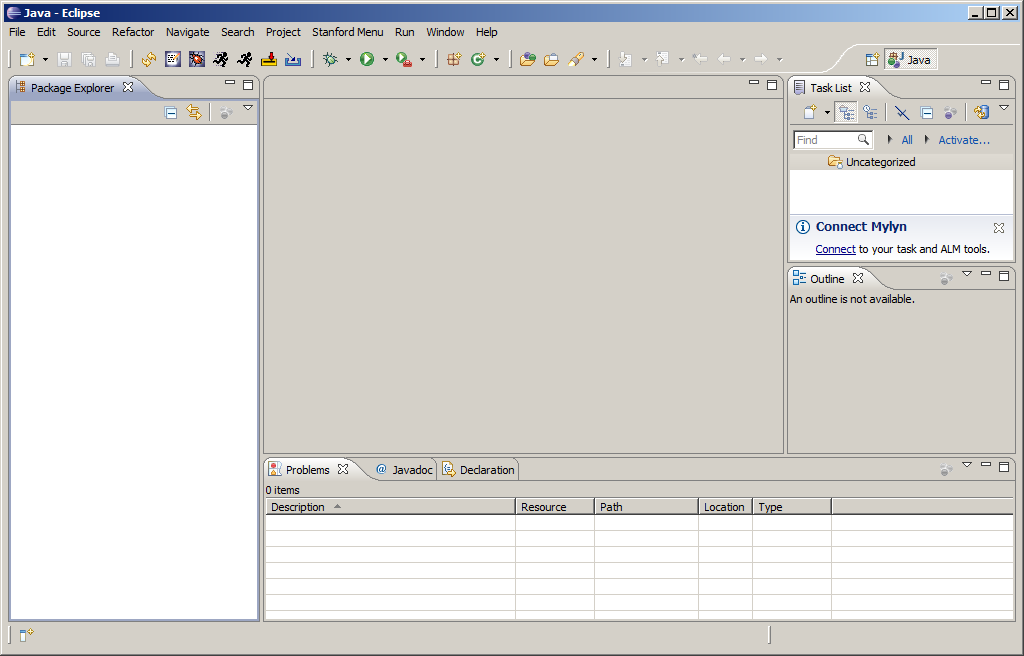
The layout of the screen, which the Eclipse designers decided to call a perspective, corresponds to the Stanford Editor perspective, which is where you will want to start editing your programs. Because Eclipse is a professional tool, it contains many advanced features that can be confusing to new programmers in an introductory course. The purpose of the Stanford Editor perspective is to hide many of these features that you don't need. If you ever find yourself in a perspective that seems confusing, click on Stanford Menu in the menu bar and then select Editor. You can also click on the Editor button from the main toolbar, which looks like this:
![]()
Once you have Eclipse loaded, your next step will usually be to create a new project in your workspace by importing a skeletal framework that we provide called a starter project. Using starter projects makes your life much easier by allowing you to ignore the many details involved in creating a project from scratch. Every assignment will include a starter project for each problem, and your first task will be to download the starter project from the class website and then importing it into your workspace. The details for doing so are described in the handout "Using Karel with Eclipse".
Manual Installation:
If you run another unsupported operating system or have been instructed to do so by a section leader, here is a direct link to downloading the Stanford Eclipse plugin. We do not recommend installing in this way unless you have been explicitly told to do so.